by Frank Dixon | Dec 4, 2023 | Blog
Your roof is your home’s first line of defense against the elements, but sometimes, it needs a little help to stay in top shape. Whether it’s a sudden storm, a fallen tree limb, or unexpected leaks, knowing how to handle an emergency roof repairs can save you time, money, and potential damage to your home.
In this guide, we’ll walk you through the essential steps of emergency roof repair, so you can safeguard your home and keep your peace of mind.
What’s inside this blog:
- 4 quick fixes for immediate repair
- 3 steps for contacting your insurance company
- 5 tips for preventative roof maintenance
Keep ready to become a pro at emergency roof repair!
Safety First! ☔
Before we dive into the nitty-gritty of roof repairs, remember that safety should be your number one priority. Here are some crucial safety tips:
- Stay Grounded: Avoid climbing onto the roof if it’s not safe or if you lack the necessary equipment.
- Use Proper Equipment: If you have to get on the roof, use a sturdy ladder and wear appropriate safety gear, such as a helmet and harness.
- Beware of Electrical Hazards: Be cautious of power lines that may have been affected by the wind.
4 Quick Fixes for Immediate Relief 🔧
In emergency situations, it’s essential to take immediate action to prevent further damage. Here are some quick fixes you can do:
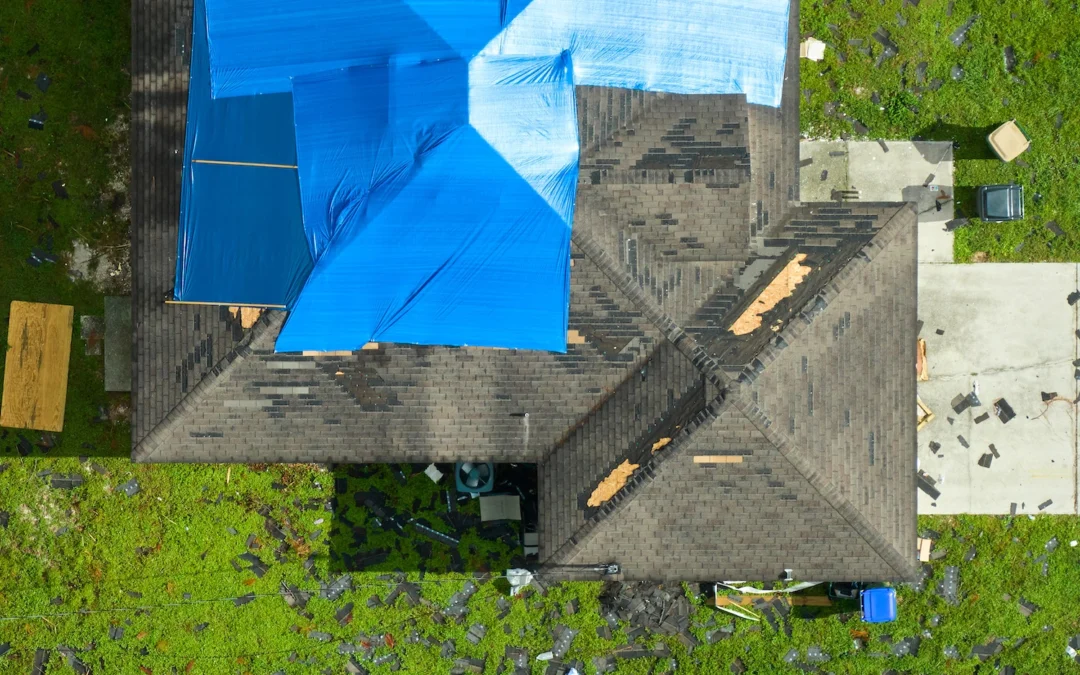
1. Tarping
Cover the damaged area with a tarp or heavy-duty plastic sheeting to prevent water from entering your home. Secure it in place using nails or weights.
2. Sealing Leaks
For smaller leaks, use roofing cement or silicone caulking to seal the area temporarily. Apply it generously over the affected spot.
3. Removing Debris
Safely remove any debris or objects that may have fallen onto your roof. Be cautious and use a broom or rake with a long handle.
4. Temporary Patch
If you have access to matching shingles or roofing material, create a temporary patch to cover holes or missing pieces. Nail or screw it securely in place.
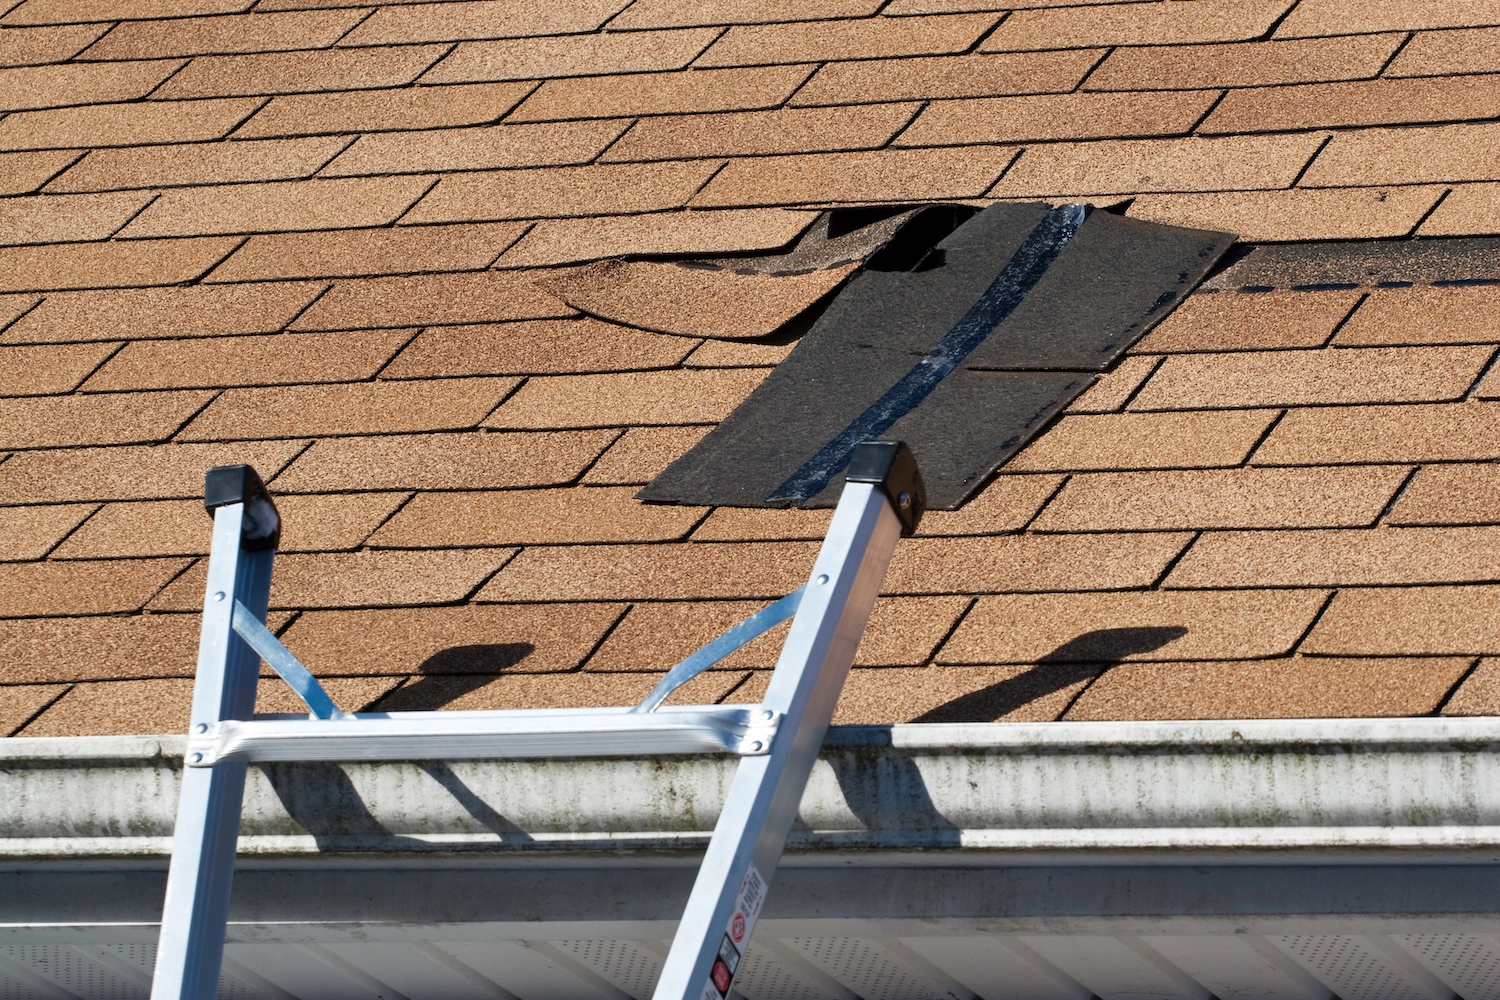
Assessing the Damage 🔍
Once you’ve taken these initial steps, it’s time to assess the damage and decide whether you need professional assistance. First, check your home’s interior for signs of water damage, such as ceiling stains, dampness, or dripping. Follow the water trail to locate the source of the leak. Then, carefully inspect your roof from the ground or use binoculars to identify visible damage, such as missing or damaged shingles, bent flashing, or displaced roofing material.
Lastly, ensure there are no loose power lines, tree limbs, or other hazards on or near your roof before attempting any repairs.
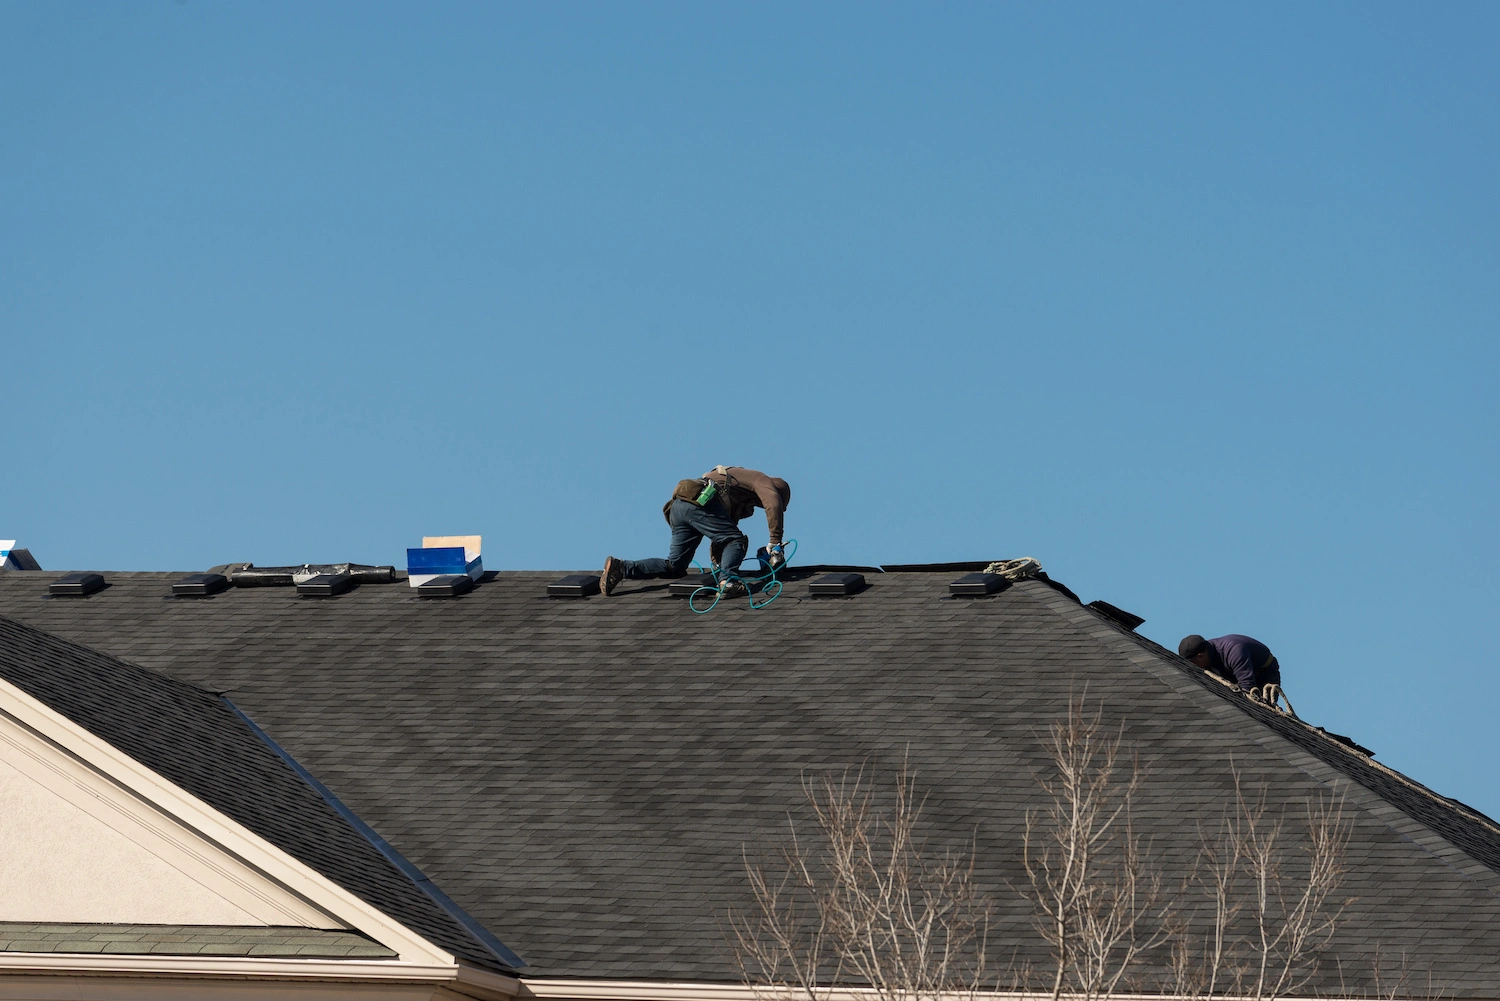
When to Call a Professional 👷♂️
While some minor repairs can be handled by homeowners, there are situations where it’s best to call a professional roofing contractor:
- Extensive Damage: If the damage is extensive, such as a large section of your roof missing or significant structural issues, it’s best to leave it to the experts.
- Electrical Hazards: If you suspect damage to electrical wiring or components on your roof, it’s crucial to hire a professional with the expertise to handle it safely.
- Steep or High Roofs: Roofs with steep angles or those that are particularly high can be dangerous to navigate without proper equipment and training.
- Time Constraints: If you’re unable to address the issue promptly, it’s best to have a professional roofing contractor perform emergency repairs to prevent further damage.
Documenting the Damage 📸
Before you begin any repairs or contact your insurance company, it’s crucial to document the damage thoroughly. First, capture clear images and videos of the damage from multiple angles, both inside and outside your home. You’ll also need to document the date and time of the incident to provide accurate information to your insurance company.
Finally, make sure you collect any evidence of the cause of the damage, such as weather reports, fallen branches, or any other relevant information.
3 Steps for Contacting Your Insurance Company 📞
Once you’ve documented the damage and taken temporary measures to prevent further issues, it’s time to contact your insurance company. Here’s what you need to do:
1. Review Your Policy
Familiarize yourself with your homeowner’s insurance policy to understand what’s covered and what isn’t.
2. File a Claim
Contact your insurance company and file a claim as soon as possible. Provide them with the documentation you’ve collected.
3. Schedule an Inspection
The insurance company will likely send an adjuster to assess the damage and determine the coverage.
Temporary vs. Permanent Repairs 🛠️
In some cases, emergency repairs are temporary measures to stop immediate damage, while permanent repairs are necessary to restore your roof’s integrity. Here’s how to approach each:
Temporary Repairs
- Tarping: If you’ve used a tarp to cover a damaged area, consider it a temporary solution. It will buy you time until permanent repairs can be made.
- Sealing Leaks: Sealant or caulking can temporarily stop leaks but may not be a long-term fix.
- Temporary Patch: Shingle patches or makeshift fixes can provide immediate relief but should be replaced with proper repairs.
Permanent Repairs
- Professional Help: For significant damage or structural issues, consult a professional roofing contractor for permanent repairs.
- Matching Materials: Use matching roofing materials to ensure a seamless and long-lasting fix.
- Follow Codes: Make sure any permanent repairs comply with local building codes and regulations.
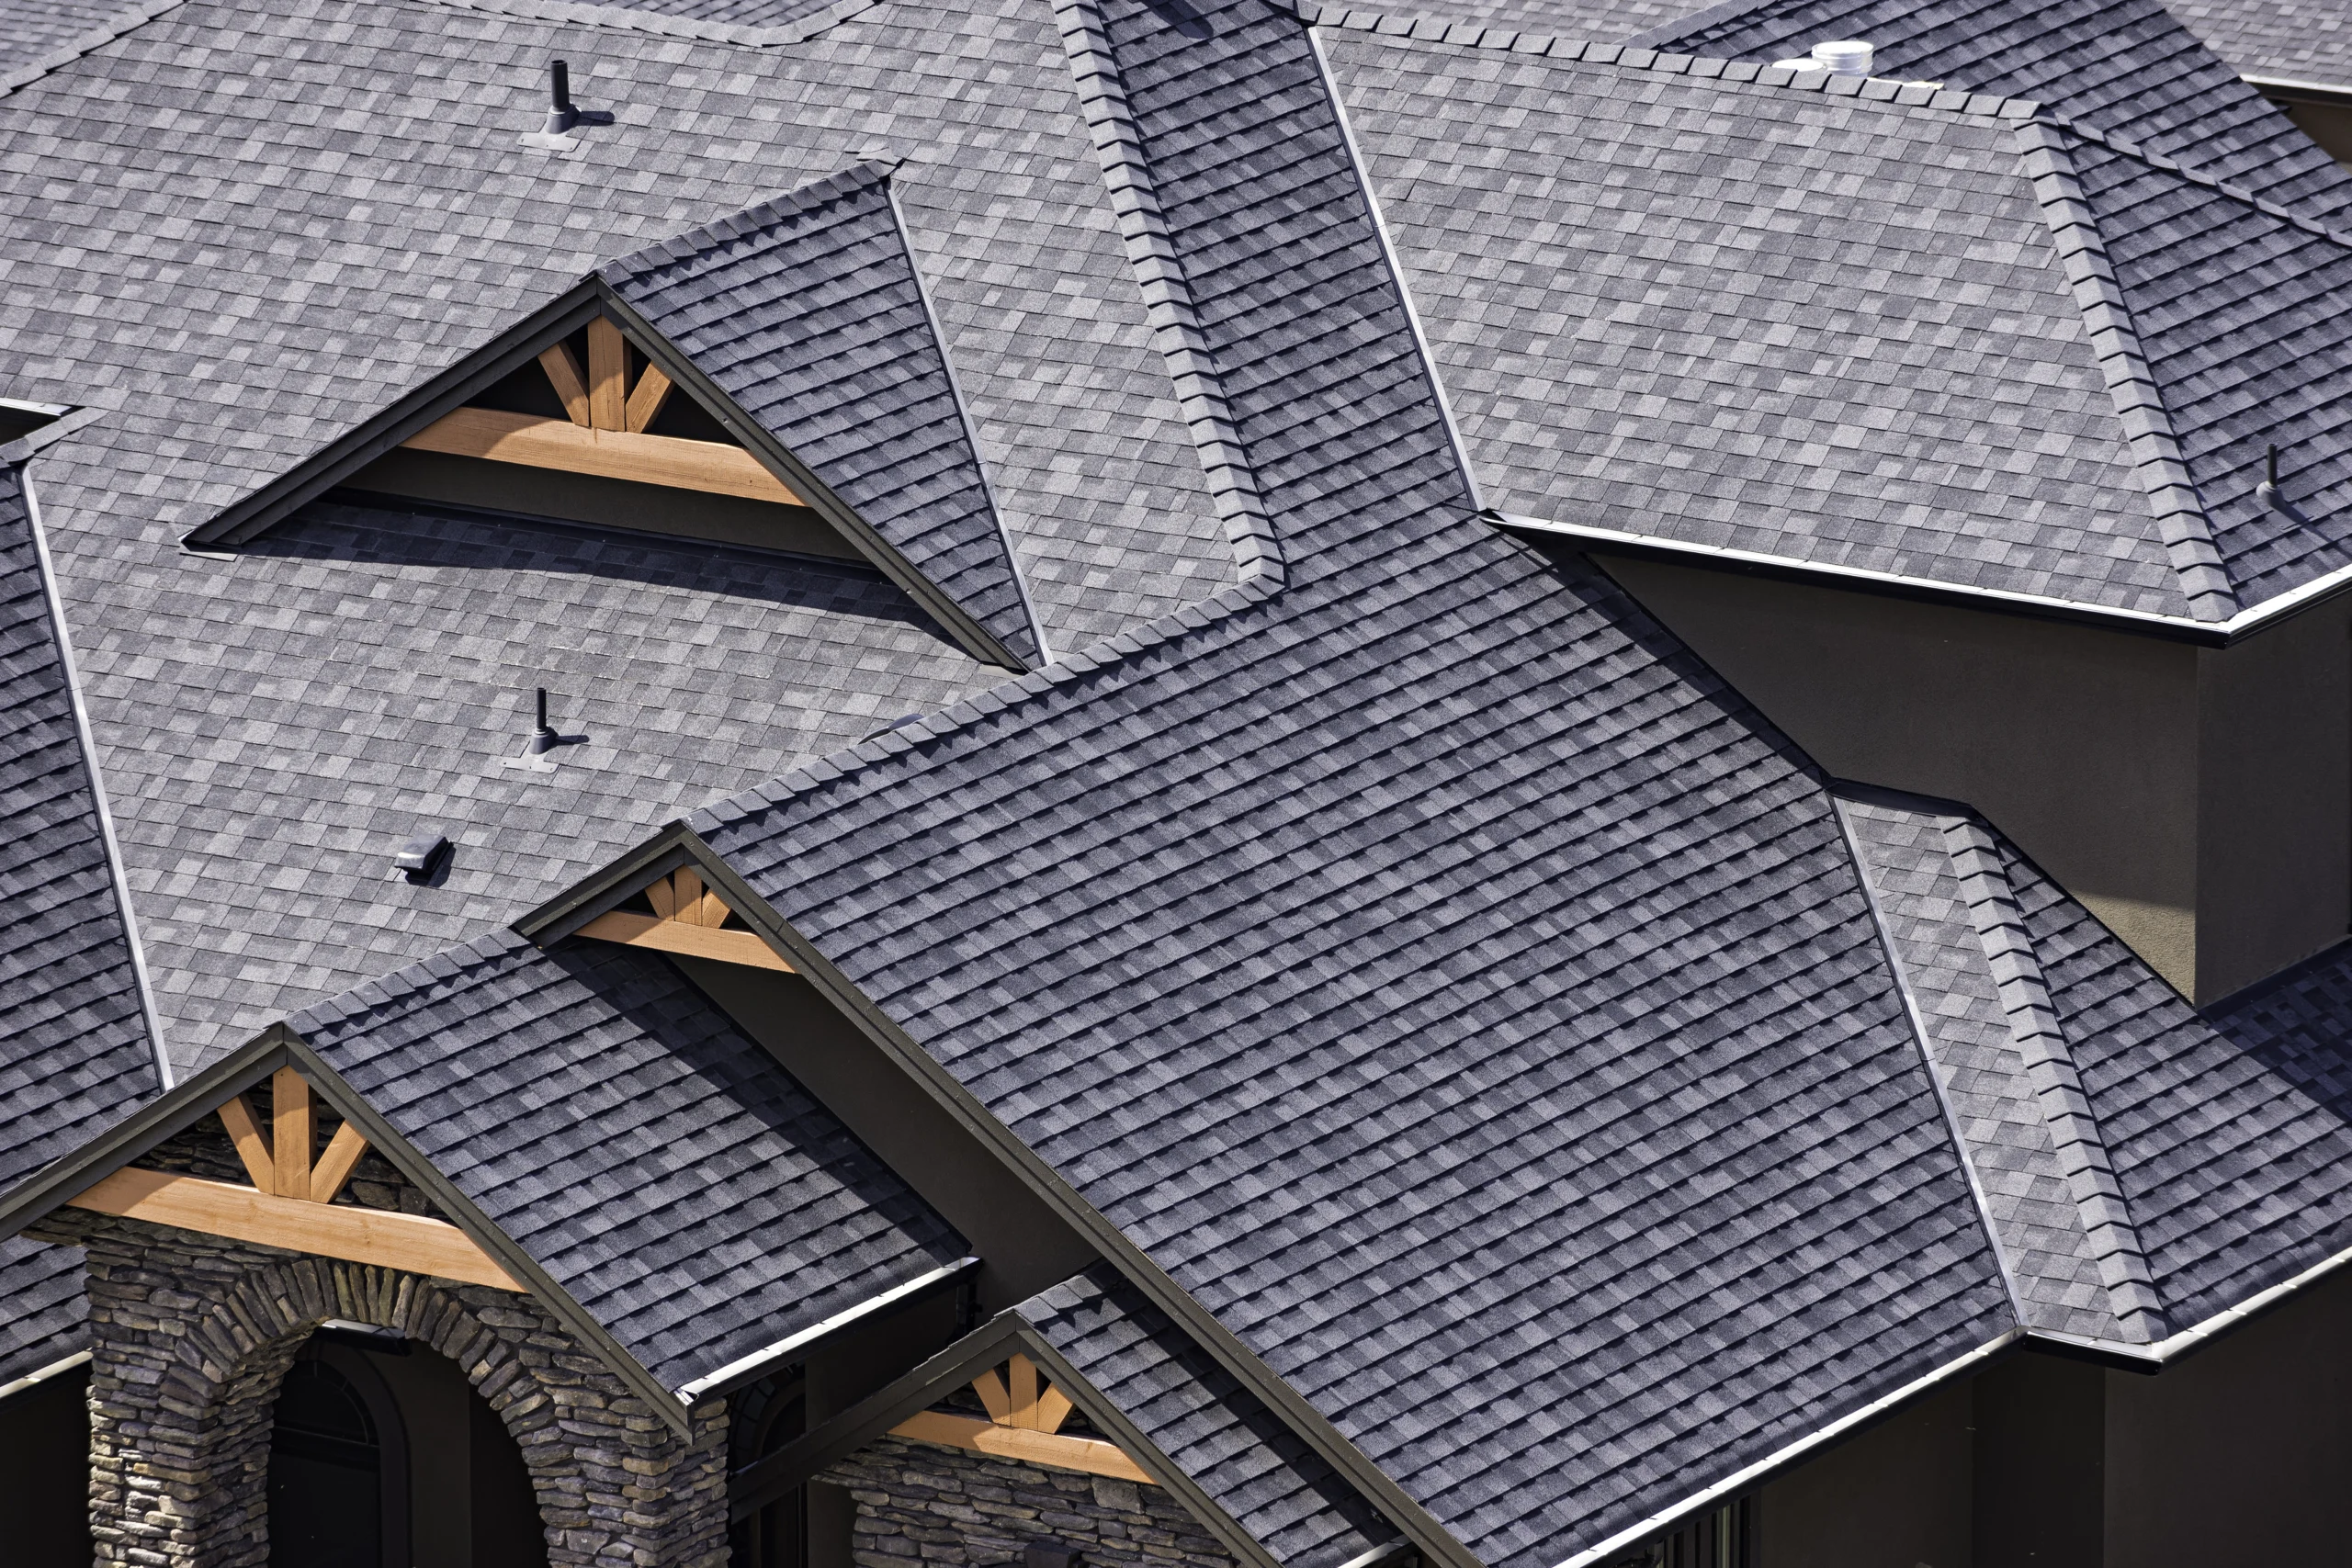
5 Tips for Preventative Maintenance 🛡️
After addressing your emergency roof repair, it’s essential to take preventative measures to avoid future issues:
1. Regular Inspections
Schedule regular roof inspections to catch minor issues before they become major problems. An annual inspection is a good practice.
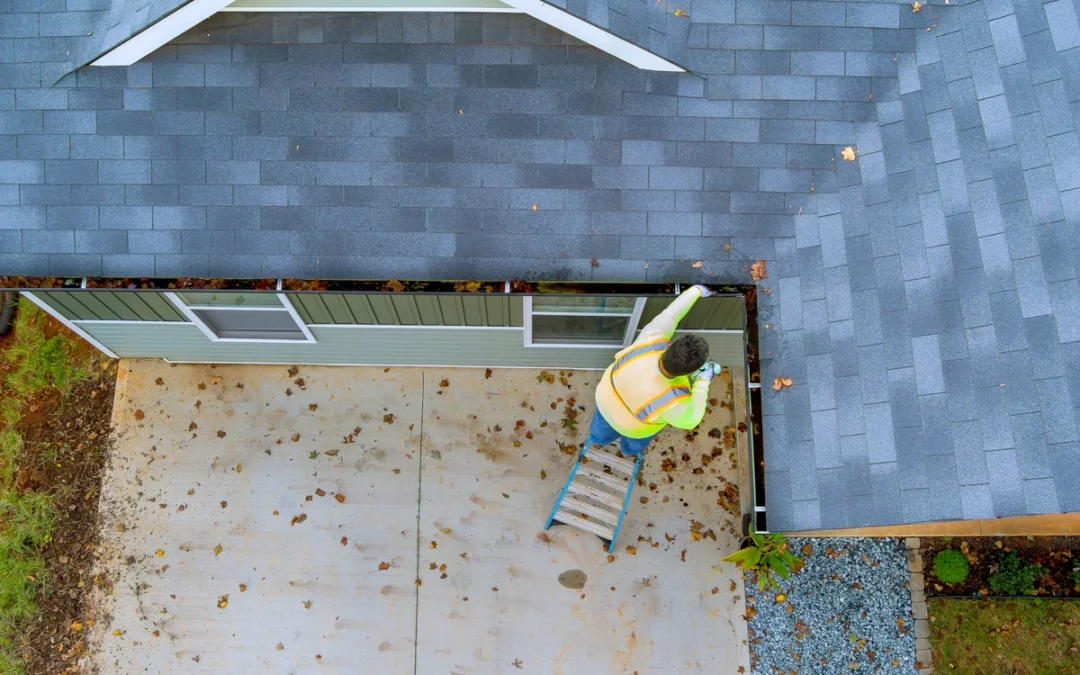
2. Clean Gutters
Keep your gutters and downspouts clear of debris to prevent water backup and damage to your roof.
3. Trim Trees
Regularly trim overhanging tree branches to prevent them from falling onto your roof during storms.
4. Weatherproofing
Consider reinforcing your roof with weatherproofing materials to make it more resilient against extreme weather conditions.
5. Update Your Insurance
Review your homeowner’s insurance policy periodically to ensure it provides adequate coverage for your home and roofing needs.
Get Top-Tier Emergency Roof Repair Services 🏡
Handling an emergency roof repair as a homeowner can be challenging, but with the right knowledge and precautions, you can protect your home from further damage. Remember to prioritize safety, document the damage, and, when in doubt, seek professional assistance. By taking immediate action and following up with proper repairs and preventative maintenance, you can keep your home safe and comfortable for years to come.
Contact our roofing pros at Alamo Roofing Contractors today! We’ll kick off your next roofing project with a free estimate!

by Frank Dixon | Nov 23, 2023 | Blog
Your home’s roof isn’t just a protective shield against the elements; it’s a statement about style and sustainability.
Ready to install a brand new roof, but not sure where to start?
Choosing the right roofing material ensures that your home stands out for all the right reasons while providing optimum protection against varying weather conditions. 🏠☔⛅
Top 8 Best Roofing Materials
Making an informed choice is essential when it comes to roofing materials. Let’s dive into some popular options to help you decide for your home.
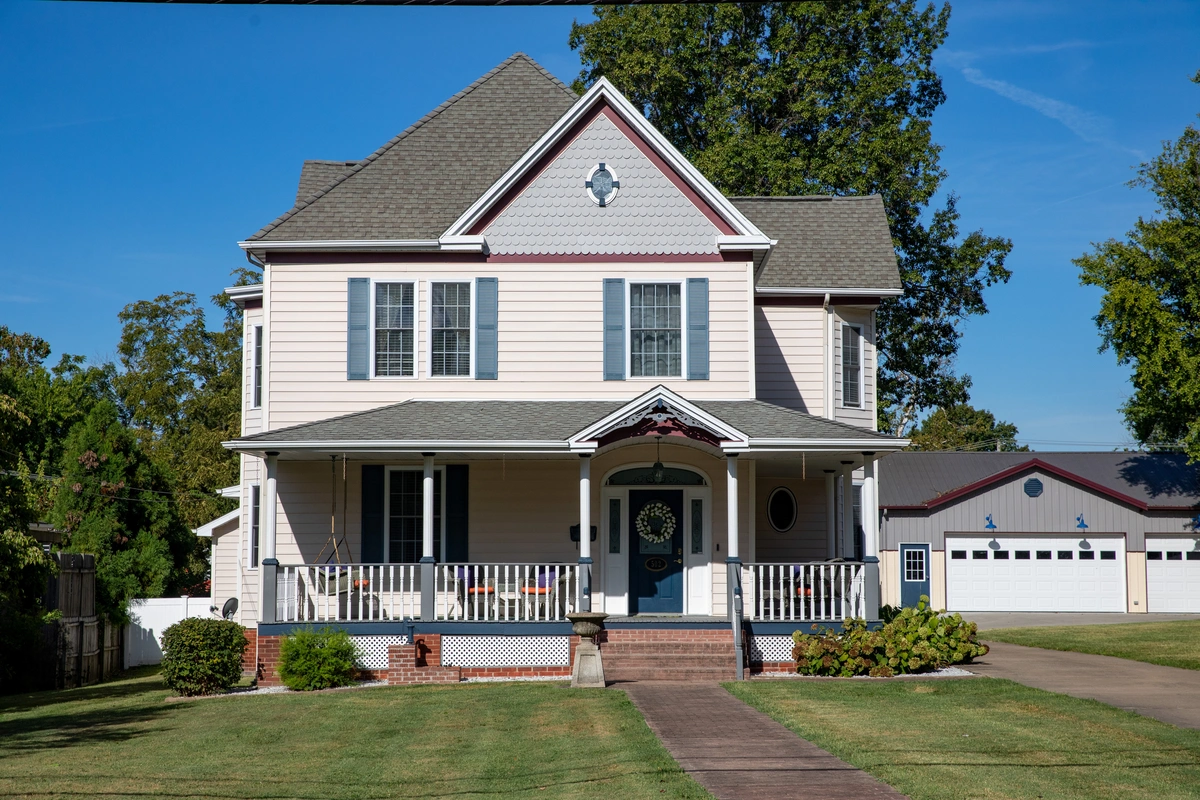
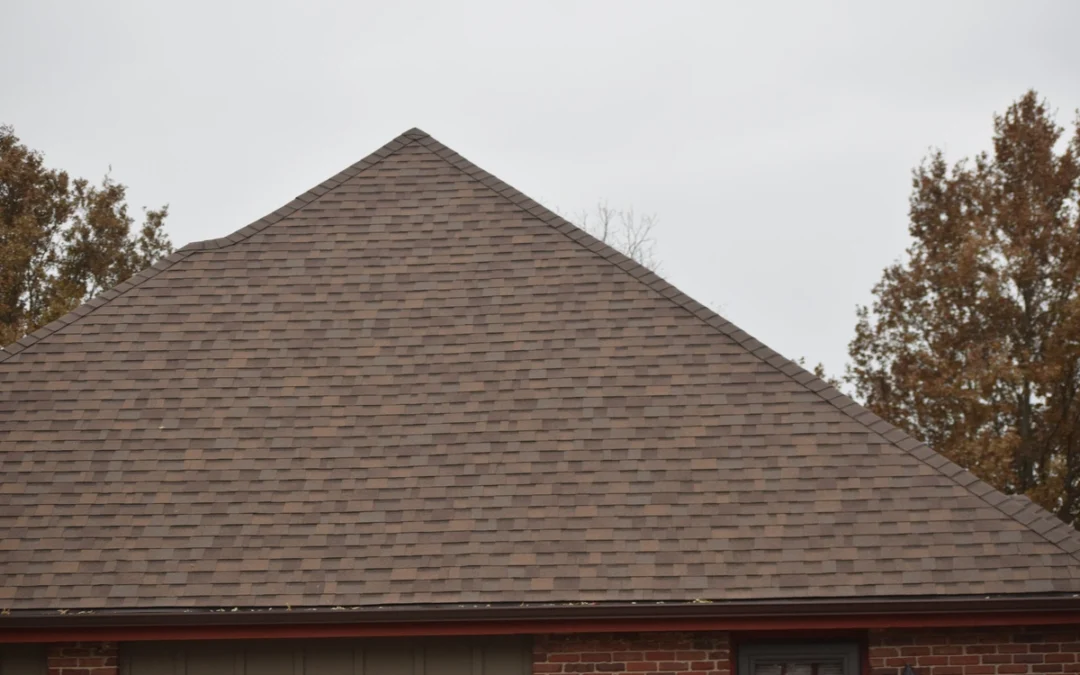
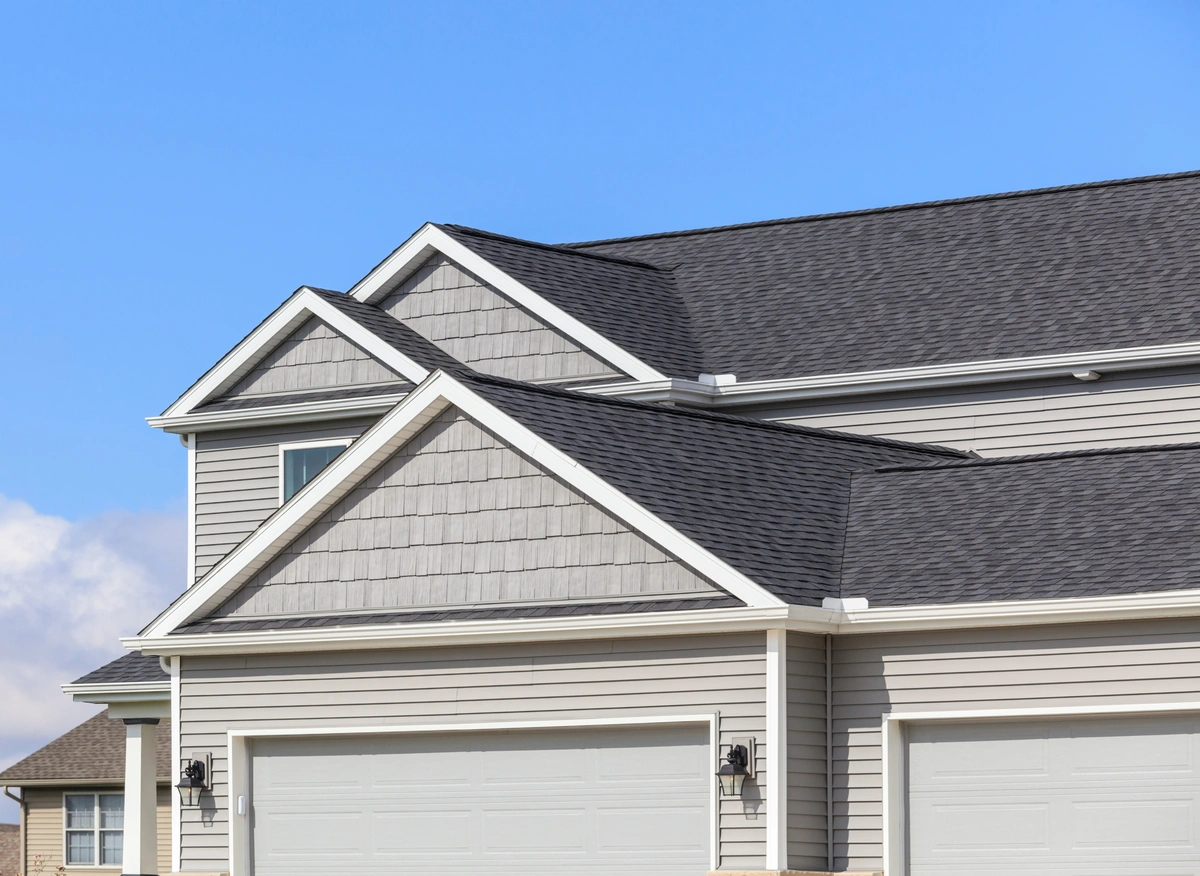
Asphalt Shingles
Undoubtedly one of the most popular roofing materials in many parts of the world, asphalt shingles are affordable and easy to install. They come in various colors, so you’re bound to find one that complements your home’s aesthetic.
With a lifespan of 20 to 30 years, these shingles are also relatively low maintenance. And good news for those living in fire-prone areas – many asphalt shingles are fire resistant!
Their ability to effectively reflect solar energy can help keep your home cooler during those hot summer days. 😎🔥
Metal Roofing
If you’re after longevity, metal roofing might be your best bet. Metal roofs can last40 to 70 years and resilient against wind, rain, and snow. They are also energy-efficient, as they reflect sunlight, helping to reduce cooling costs.
Available in various styles, including panels and shingles, metal roofs can suit both contemporary and traditional home designs. And, if you’re eco-conscious, you’ll be pleased to know that metal roofing materials are often made from recycled content and are fully recyclable. ♻️🌞
Wood Shingles and Shakes
Wood shingles and shakes are an excellent choice for those who desire a more natural and rustic look. Crafted from cedar, redwood, or pine, these roofing materials provide a distinctive appearance and offer good insulation. They have a charm that can add a touch of elegance to any home.
However, it’s essential to remember that wood shingles andshakes require regular maintenance to prevent decay and moss growth. But, with proper care, these roofs can last up to 30 years or more, making them both a stylish and durable choice for your home. 🍃🌲
Clay or Concrete Tiles
When it comes to durability combined with elegance, clay or concrete tiles are hard to beat. Often found gracing Mediterranean, Spanish, or Southwestern style homes, these tiles can last a century or more with proper care.
They are excellent insulators, ensuring your home stays cool in summer and warm in winter. Moreover, clay and concrete tiles are fireproof, offering an added layer of safety for homes. However, these tiles are not as light as the others. Make sure your home’s structure withstands the weight.
For those willing to invest in longevity and style, clay or concrete tiles are a fantastic choice. 🏰🔥
Slate Roofing
Slate roofing stands tall when we talk about the blend of longevity and natural beauty. These tiles, made from natural stone, possess an elegant charm that can upscale any home’s appearance.
Besides their aesthetic appeal, slate roofs can last a century, making them an ideal choice for homeowners looking for a one-time, long-lasting investment. While they might be pricier, their durability and timeless beauty can make the investment worth every penny. 🌲🏛️
Composite Roofing
Enter the world of composite roofing, where innovation meets durability. These shingles are crafted from materials like asphalt, laminate, and more. What makes them stand out? Their ability to mimic the appearance of wood or slate without the associated high costs or maintenance concerns.
Composite roofing is resistant to mold, rot, and damage from UV rays. Plus, with a lifespan of up to 50 years, these roofs are both cost-effective and sustainable. 🌟🛡️
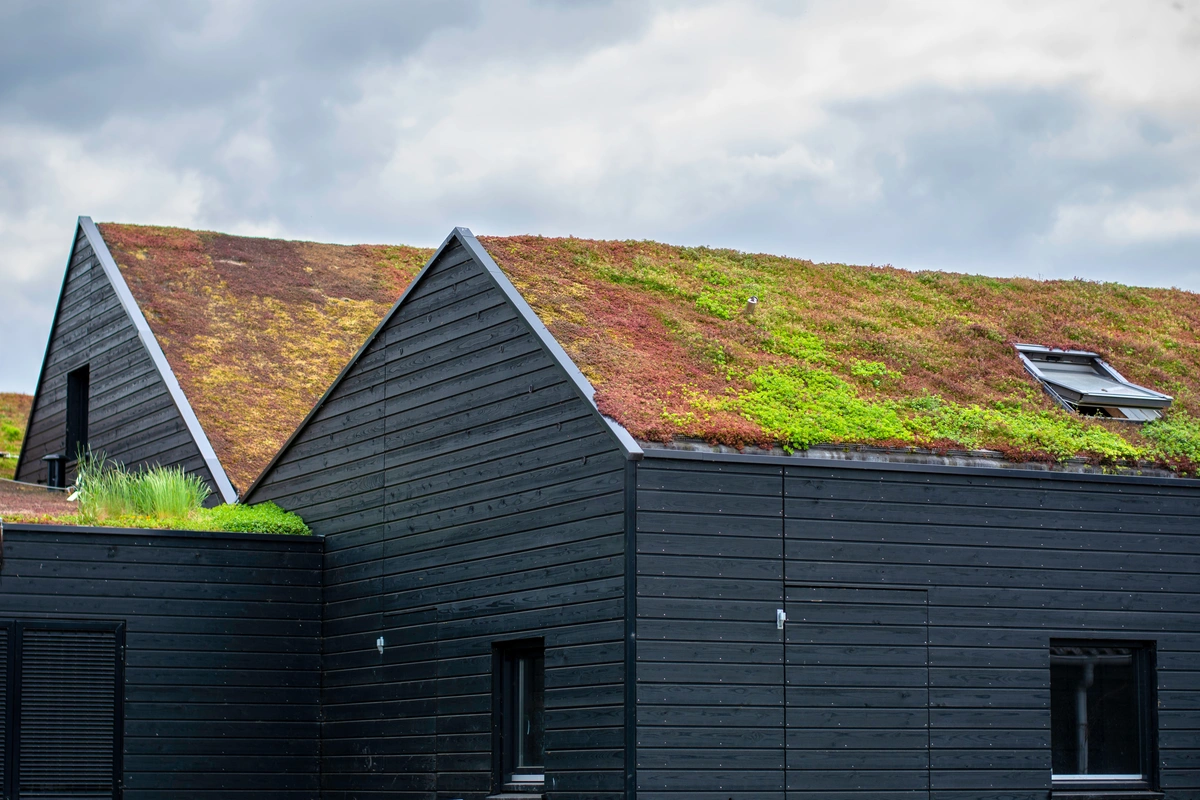
Green Roofs
Green roofs are not just roofs; they’re elevated gardens! This sustainable roofing option involves growing rooftop plants, and turning them into urban oases. Apart from the undeniable aesthetic appeal, green roofs offer excellent insulation, reducing the need for artificial heating or cooling.
They can also improve air quality, promote biodiversity, and manage stormwater effectively. Green roofs might be your answer if you’re looking for an eco-friendly and visually striking roofing solution. 🌱🏙️
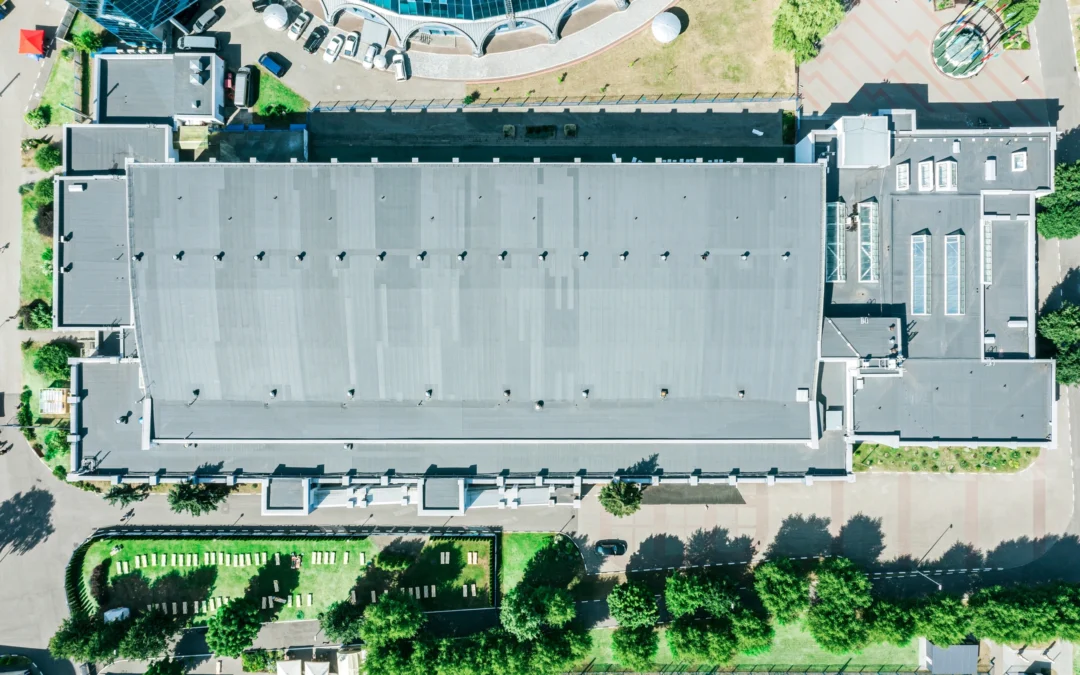
Built-Up Roofing
Popular for flat or low-sloped roofs, built-up roofing (BUR) is a multi-layered roofing system comprising alternating bitumen layers and reinforcing fabrics. These layers form a finished membrane that offers enhanced protection from the elements.
One significant advantage of BUR is its watertight feature, ensuring zero leakages. Additionally, the top layer, which often consists of gravel or stone, provides excellent UV protection and durability. For those with flat roofs, built-up roofing is a tried-and-tested choice. ☔🌆
How to Choose the Right Roofing Material
Picking the right roofing material isn’t just about the aesthetic appeal; it’s about functionality, longevity, and investment value. When making this vital decision, consider the following steps:
Assess Your Budget
While we all might love the upscale look of slate or the green benefits of a rooftop garden, knowing what you can afford is essential. Materials like asphalt shingles provide good quality at a more affordable price point. 💰
Understand Local Climate
Some materials fare better in specific weather conditions. Metal roofing, for instance, is excellent is you live in areas where heavy snowfall and high winds are a constant. If you live in a warmer area, clay tiles are more ideal. 🌦️
Maintenance Requirements
How much effort will you put into roof upkeep? Wood shingles require more attention than composite ones. Consider the long-term care needs before committing. 🔧
Home Style and Aesthetics
Match the roofing material with your home’s architectural style. For instance, Mediterranean homes often sport clay tiles, while more modern designs might lean towards metal or composite roofing. 🏡
Environmental Impact
If sustainability is a concern, materials like metal, which is recyclable, or green roofs, which promote biodiversity, might be up your alley. 🌱
By weighing these factors, you’ll land on a roofing material that’s beautiful and serves its purpose efficiently. 👌🔨
Seal the Deal with Alamo Roofing!
Choosing the right roofing material is pivotal, but it’s only half the battle. The other half? Selecting a trusted partner to bring your roofing vision to life. With Alamo Roofing, you’re not just getting a service but investing in expertise, quality, and commitment. Dive into a seamless roofing journey with us and watch your home transform. 🏡❤️🔨
by Frank Dixon | Nov 20, 2023 | Blog
When you look at a commercial building, the roof might not be the first thing that catches your eye. However, it is pivotal in protecting the structure and its occupants. With various commercial roofing systems available, it’s essential to understand which one is right for your needs.
Get started on your commercial roofing project today with ease and insight.
Whether constructing a new building or considering a roof replacement, we’re here to guide you through the most common commercial roofing systems. 🏢🔝
Understanding Commercial Roofing Systems
Commercial roofs differ from residential roofs in various ways, including design, materials, and installation techniques. These differences stem from the unique challenges of commercial buildings, such as larger square footage, specific performance needs, and a demand for longevity.
When selecting a roofing system for your commercial property, it’s crucial to weigh factors like durability, maintenance requirements, and cost. Now, let’s delve into the various commercial roofing types to find the perfect fit for your building. 🌆🔍
Common Types of Commercial Roofing Systems
To provide a clearer picture of the available options, let’s explore some of the most widely used commercial roofing systems as well as their pros and cons. This way, you will have all the information necessary to suggest the best option for your business.
Metal Roofing
A popular choice for many commercial properties, metal roofing is known for its durability and longevity. Made from panels or shingles of metal, this roofing system can resist harsh weather conditions, making it an excellent option for areas that experience severe storms.
The variety of metal materials, including steel, aluminum, and tin, offers flexibility in terms of aesthetics and performance. An added advantage? Metal roofs are energy-efficient, reflecting sunlight, which can help reduce cooling costs during warm months. 🌞🔩
Pros: Exceptionally durable and can last for decades. Highly resistant to fire, mildew, rot, and insect infestation. Reflective surfaces can also make them energy efficient, leading to cooler buildings and lower energy costs.
Cons: Can be more expensive upfront compared to other roofing types. Noise during rain or hail storms can be louder unless properly insulated. Over time, metal can dent or scratch, requiring maintenance.
Built-up Roofing Membrane (BUR)
Often referred to as “tar and gravel” roofs, built-up roofing membranes consist of multiple layers of tar or asphalt, sandwiched with reinforcing fabrics. These layers are then topped with a layer of gravel or stone. BUR has been used for over a century and is known for its multi-layer protection, which can be particularly beneficial for roofs with heavy foot traffic.
The thickness of BUR provides excellent insulation, ensuring energy efficiency for the building below. While its installation might be more labor-intensive, its durability makes it a trusted choice for many. 🚧🛡️
Pros: Offers multi-layer protection, making it extremely durable and watertight. Provides excellent UV protection and insulation, which can lead to energy savings. It’s also fire-resistant and can last for many years with proper maintenance.
Cons: The installation process can be lengthy and might produce strong odors. It’s heavier than other roofing types, so the building structure needs to be strong enough to support it. Additionally, it requires more maintenance and regular inspections to ensure its longevity.
Modified Bitumen Roofing
Modified bitumen roofing is an upgrade from the traditional built-up roofing system. Combining asphalt with modifiers and reinforcing polyester or fiberglass, it offers enhanced elasticity and flexibility, especially in fluctuating temperatures. This roofing system usually comes in rolls, which are applied using heat to seal the seams, ensuring a water-tight barrier.
Pros: One of the biggest advantages of modified bitumen roofing is its durability. It’s designed to withstand extreme weather conditions, making it less prone to cracking or becoming brittle over time. Its seamless nature means there are fewer opportunities for water leaks, ensuring better protection against moisture damage.
Cons: Without a reflective top layer, modified bitumen can absorb a significant amount of heat. This could increase the internal temperature of the building, leading to higher cooling costs.🌡️✨
Thermoset Roof Membrane
This roofing option, often known as EPDM (Ethylene Propylene Diene Terpolymer), is a durable rubber roofing solution. Its main advantage lies in its resistance to sun rays, ozone, and certain chemicals. It’s often used for larger roofs as it comes in wide sheets, minimizing the number of seams and potential leak points.
Pros: UV resistant, durable, and versatile. It’s less likely to suffer from damage caused by certain chemicals or the sun’s harsh rays.
Cons: The dark color can absorb more heat, potentially raising energy costs. Seams are glued or taped, which might be less durable than heat-welded seams.
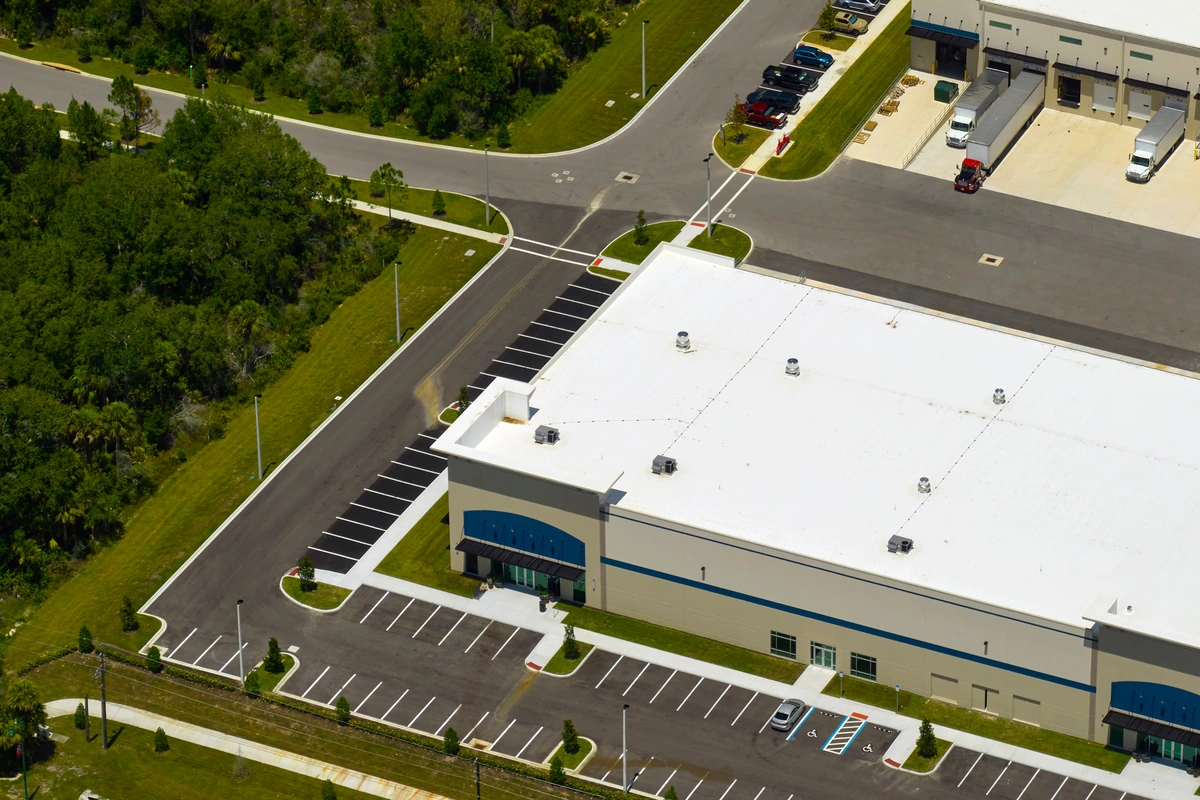
Thermoplastic Roof Membrane
PVC (Polyvinyl Chloride) and TPO (Thermoplastic Olefin) are the shining stars in the thermoplastic roofing category. These membranes are lightweight, durable, and highly reflective. They’re welded together with heat, ensuring a watertight seal, and are resistant to UV radiation, ensuring longevity.
Pros: Heat-welded seams for strength and water resistance. They’re also energy efficient due to their reflective nature.
Cons: TPO, being a newer product, has varied formulations, which can impact quality. PVC can be pricier compared to other roofing options.
Green Roofing
Going green is more than a trend; it’s a sustainable choice for the future. Green roofs aren’t just about the plants and vegetation they house; they also offer excellent insulation, reducing the costs of heating and cooling a building.
Additionally, they manage stormwater runoff and create habitats for local wildlife. Urban areas, in particular, can benefit from the reduced heat island effect and enhanced air quality green roofs bring.
Pros: Excellent insulation properties, environmental benefits, and aesthetic appeal. Enhances local biodiversity and offers recreational spaces in urban settings.
Cons: Initial installation cost is high. Requires regular maintenance and is not suitable for all building types.
With the right commercial roofing system in place, you can ensure the safety and longevity of your building. So, take your time, research, and consider consulting with professionals to make an informed decision. Your building deserves the best shield; we’re here to help you find it! 🏢🌂
Your Roof, Your Decision 🏠✨
Making a roofing choice is an important investment. Consider factors like longevity, maintenance, and energy efficiency. Alamo Roofing is here to help guide your decision, ensuring your building gets the best protection tailored to its needs. Reach out today and elevate your roofing game! 📞🔝
by Frank Dixon | Nov 16, 2023 | Blog
Roof shingles, while robust and durable, are not immune to the wear and tear caused by time and the elements. Over the years, they can accumulate dirt, moss, and even algae, diminishing their appearance and functionality.
No worries! 🌈 With a little elbow grease and the right techniques, you can restore your roof shingles to their pristine condition.
Here’s a step-by-step guide to ensure your roof shingles shine brightly again. 🏠✨
Take Safety Precautions
Before you embark on this cleaning adventure, it’s essential to prioritize safety. Roofs can be slippery when wet, and the last thing you want is an accident. Wear non-slip shoes, preferably with a soft sole to avoid damaging the shingles. Using a sturdy ladder with rubber feet can prevent slips and potential mishaps.
Remember, if you’re uncomfortable with heights or doubt your stability, hiring professionals or asking someone for assistance might be a good idea. Safety first! ⛑
Apply Cleanser and Scrub Shingles

Cleaning roof shingles is more than just splashing water. Using the right cleanser can make a significant difference, helping to lift stubborn grime and organisms that might harm the roof’s integrity.
Use a Pump Sprayer Filled with Bleach and Water Mixture
Mix one part bleach with three parts water in a pump sprayer. This mixture is potent enough to kill moss and algae but gentle on your shingles. If you’re concerned about your landscape plants getting affected by the bleach, consider wetting them before starting the process or using an eco-friendly roof cleanser.
After preparing your solution, spray it generously over the shingles, ensuring even coverage. Let it soak for 15-20 minutes, but don’t let it dry out. 🌊🌿
Start From the Bottom Row and Work Up to the Peak
While starting at the top and letting the cleanser flow down might be tempting, this method can lead to streaking. Starting at the bottom ensures a more uniform cleanse.
Using a soft-bristle brush, gently scrub the shingles to remove any dirt or moss. Be gentle – you don’t want to damage the shingles or strip away any granules. And remember, always brush downwards to prevent lifting the shingles. 🧹🔄
Rinse with Water
After scrubbing, it’s time to rinse off the cleanser. Using a garden hose with a spray nozzle, thoroughly rinse the shingles, starting from the top and working your way down. This method ensures that the debris washed away from the upper shingles doesn’t settle on the lower ones.
Be cautious not to use a pressure washer; its intense force can damage or push water underneath the shingles. A gentle yet thorough rinse will do the trick! 🚿💧
Freshly cleaned shingles can elevate your home’s appearance, making it look newer and more maintained. It also prolongs your roof’s life by preventing harmful organisms’ growth. So, grab your supplies, roll up your sleeves, and give your roof the care it deserves. Happy cleaning! 🌟🏠🧽
Prevent Regrowth
The adage “prevention is better than cure” rings especially true regarding roof moss. By taking proactive steps, you can prevent moss from taking hold in the first place, saving you time and money in the long run.
Trim Overhanging Trees: Moss thrives in shaded, damp environments. Ensuring that sunlight can reach your roof makes it less hospitable for moss to grow. Trim any branches that cast shadows over your roof to let in the sunlight. ☀️✂️
Keep Gutters Clean: Clogged gutters can cause water to pool on your roof, creating the perfect environment for moss to flourish. Regularly cleaning out your gutters, especially after a storm or during fall, can help keep your roof dry. 🍂🌧️
Maintain a Clean Roof
Regular maintenance can do wonders in preventing moss regrowth. A clean roof is not just about aesthetics; it’s about ensuring the longevity and integrity of your home’s topmost shield.
But how do you go about it without causing damage?
Choose Gentle Cleaning Methods
While it might be tempting to blast away the moss with a high-pressure washer, this can cause more harm than good by stripping away the protective granules on your shingles. Instead, opt for gentler methods.
Use a soft-bristle brush to scrub away moss and a mixture of water and mild detergent to cleanse the area. For persistent moss, consider consulting professionals like Alamo Roofing who can advise or offer specialized treatments that won’t harm your roof. 🧼🚿
Schedule regular roof inspections. Sometimes, small patches of moss can go unnoticed, especially if they’re in areas that aren’t easily visible. Regular inspections allow you to catch and address these issues early on. 🔍📆
There are various treatments available that can deter moss growth. These range from zinc or copper strips installed at the roof’s peak (which release moss-killing ions when it rains) to specially formulated shampoos and treatments. Always ensure any treatment used is environmentally friendly and won’t harm the structural integrity of your shingles. 🌱🔒
Safeguarding Against Potential Hazards
Often, the unseen factors pose the most significant threats to your roof. Besides the evident moss and grime, various other elements can negatively affect your roof’s lifespan and integrity.
Weathering and UV Damage: Over time, the sun’s ultraviolet rays can degrade the shingles’ asphalt. While you can’t control the sun, UV-resistant shingles or a UV-protective sealant can minimize the damage. 🌞🛡️
Birds and Pests: Birds building nests, or pests like squirrels or raccoons, can cause unseen damage. Regularly check for any signs of nests or damage caused by animals. If you do spot these critters, take humane measures to deter them, such as installing bird spikes or consulting pest control. 🐦🐿️
Fallen Debris: Wind can blow debris onto your roof. Over time, accumulated leaves, twigs, or even trash can trap moisture against your roof, accelerating wear and providing a breeding ground for moss and algae. After significant storms or during seasons when trees shed, take a moment to visually inspect your roof or consider a professional inspection to ensure no debris harms your roofing structure. 🍃🌬️
Roof’s New Groove with Alamo Roofing!
A clean roof doesn’t just uplift the aesthetics of your home; it ensures longevity and reduces long-term costs. Alamo Roofing brings expertise, commitment, and quality to every project. When thinking roofing, think Alamo. Let’s embark on this journey to a cleaner, brighter roof together. Dive in with us! 🏡❤️🔨
by Frank Dixon | Nov 15, 2023 | Blog
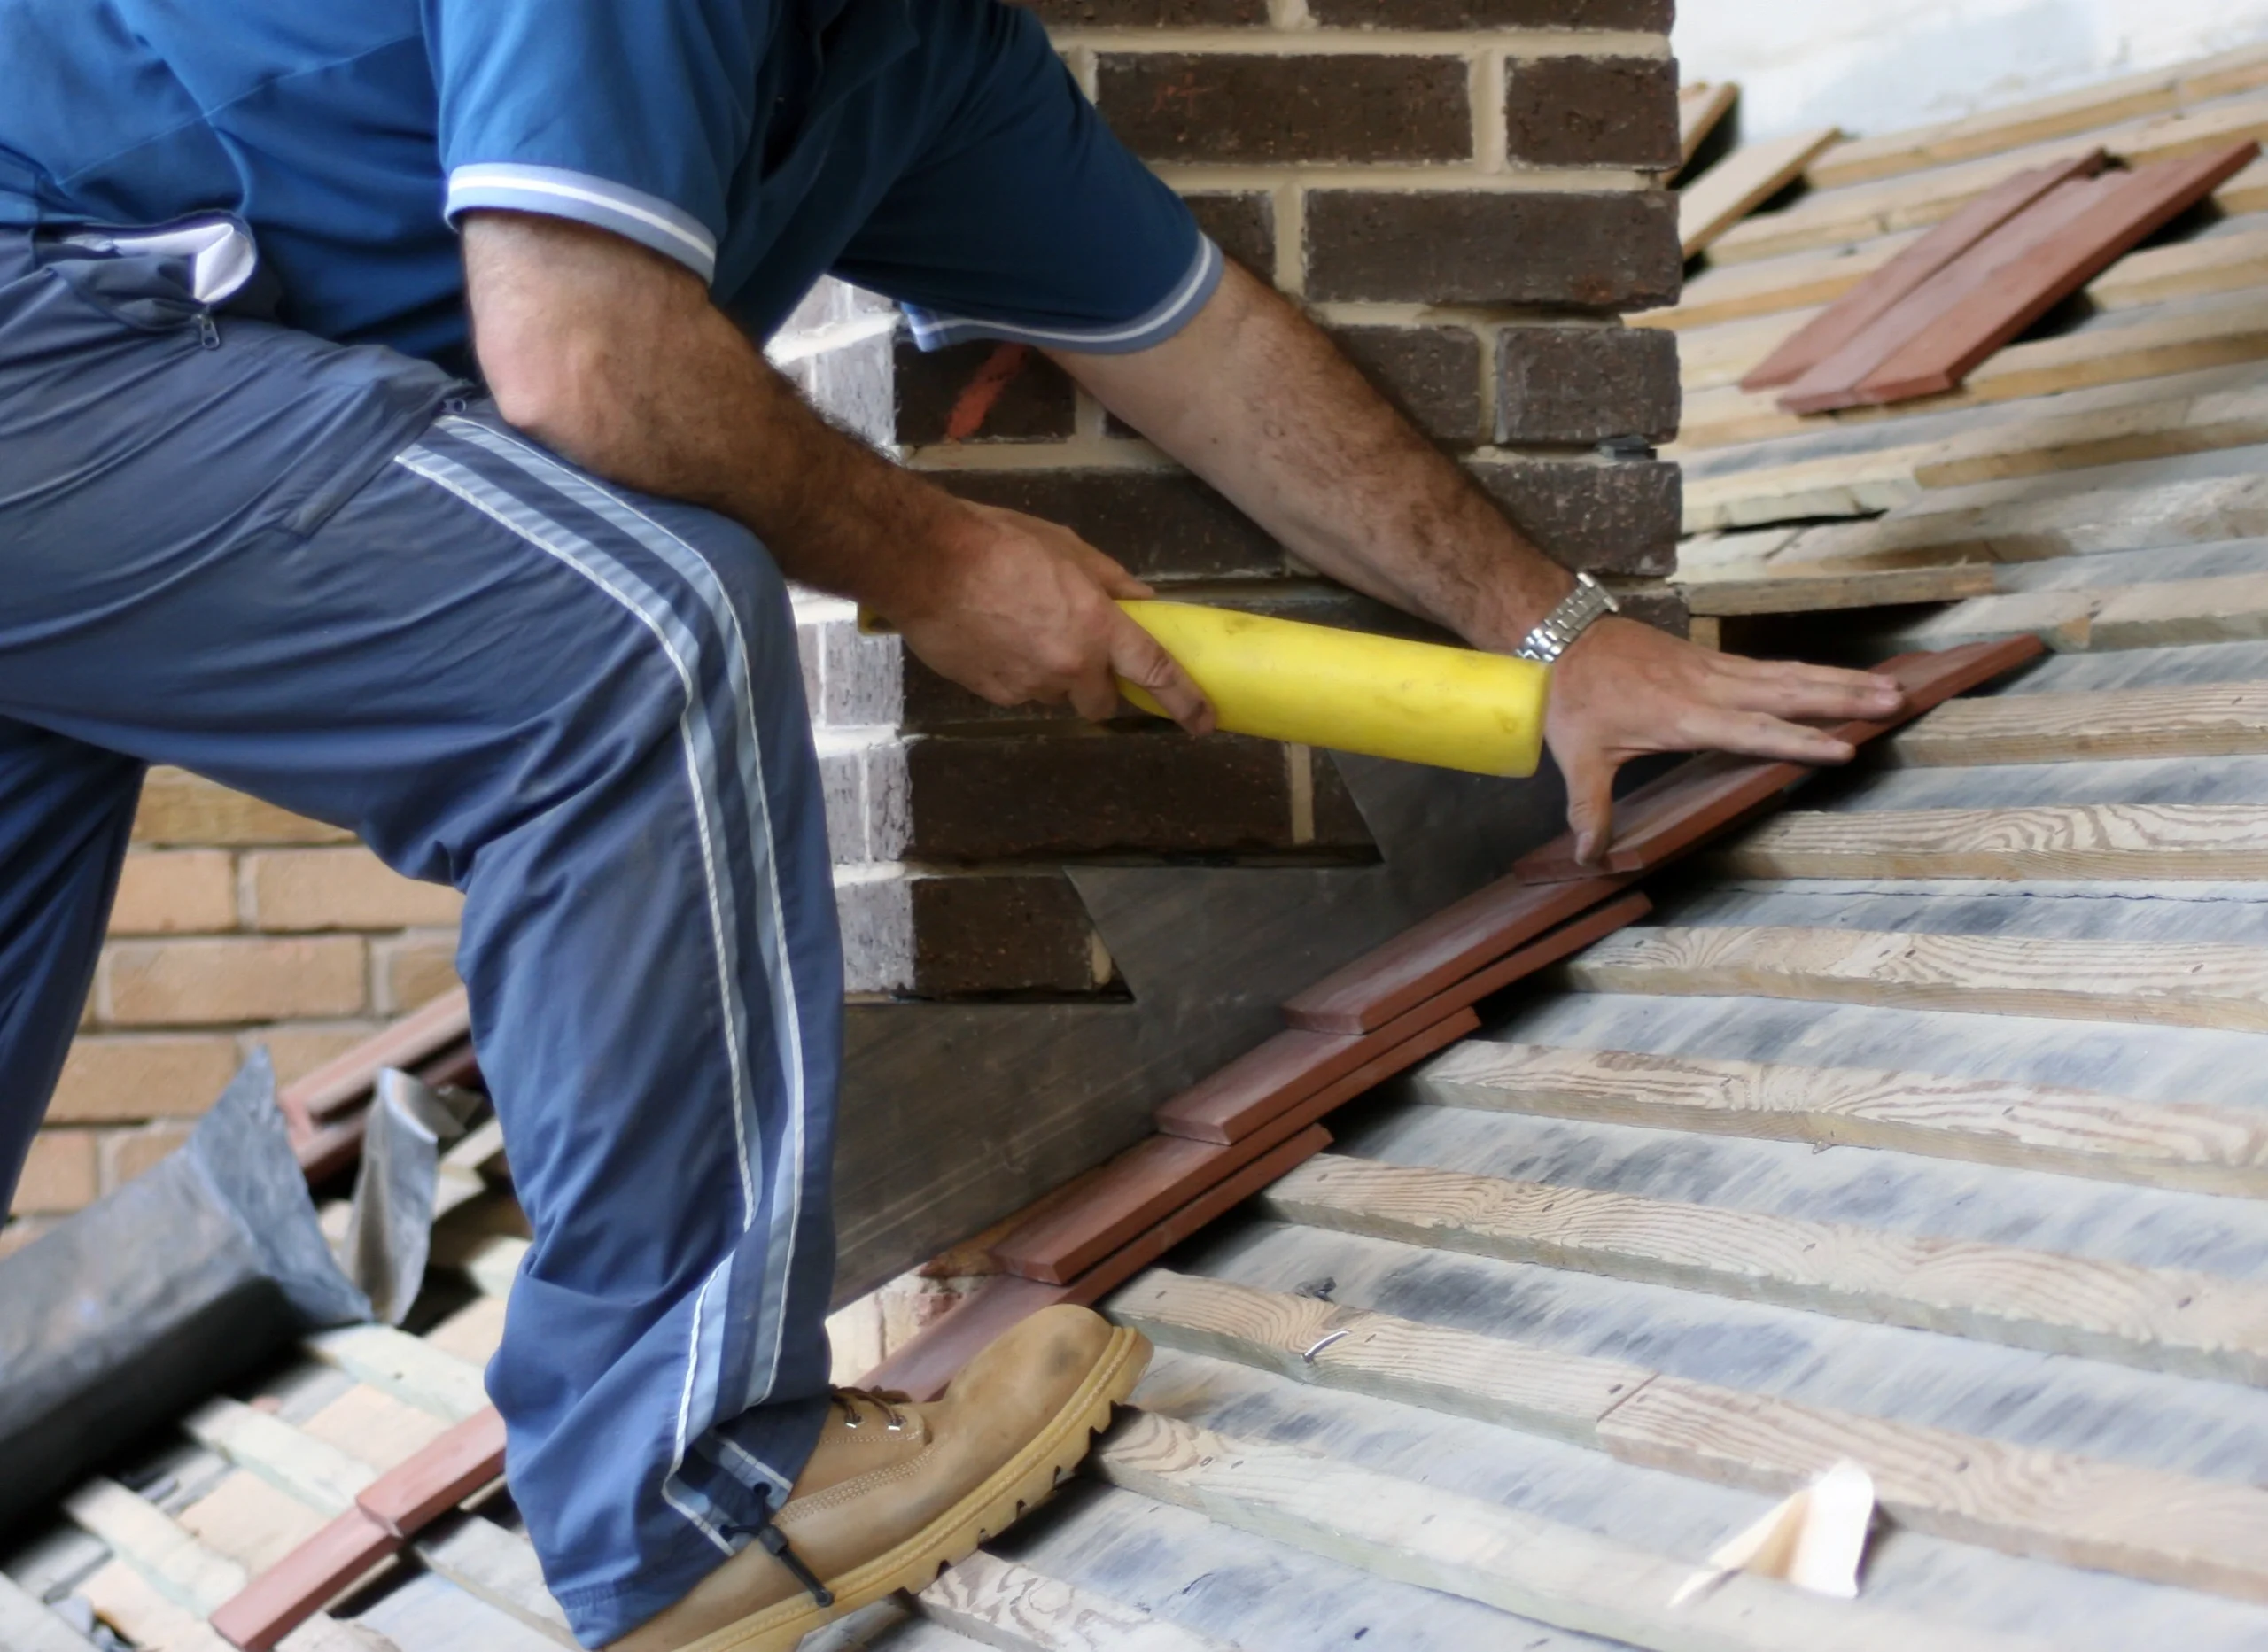
Roof flashing is a vital component of your roofing system. To function properly, your roof depends on the flashing to have been installed properly and remain in good condition.
Of course, most homeowners don’t really know what roof flashing is — which means they also don’t know when it’s time to have it inspected or replaced.
Homeowners who don’t keep up with the various components of their roofing systems, especially the roof flashing, will eventually have to deal with water damage and the cost of repairing said damage. That’s why we’re going to discuss everything a homeowner should know about their roof flashing, including signs of damage, costs, and more.
Keep reading to learn more about how to repair your roof and flashing.
Roof Flashing Explained
So, what is roof flashing?
Roof flashing is the thin piece of galvanized metal that’s installed around your roof’s drip edge and other components, such as:
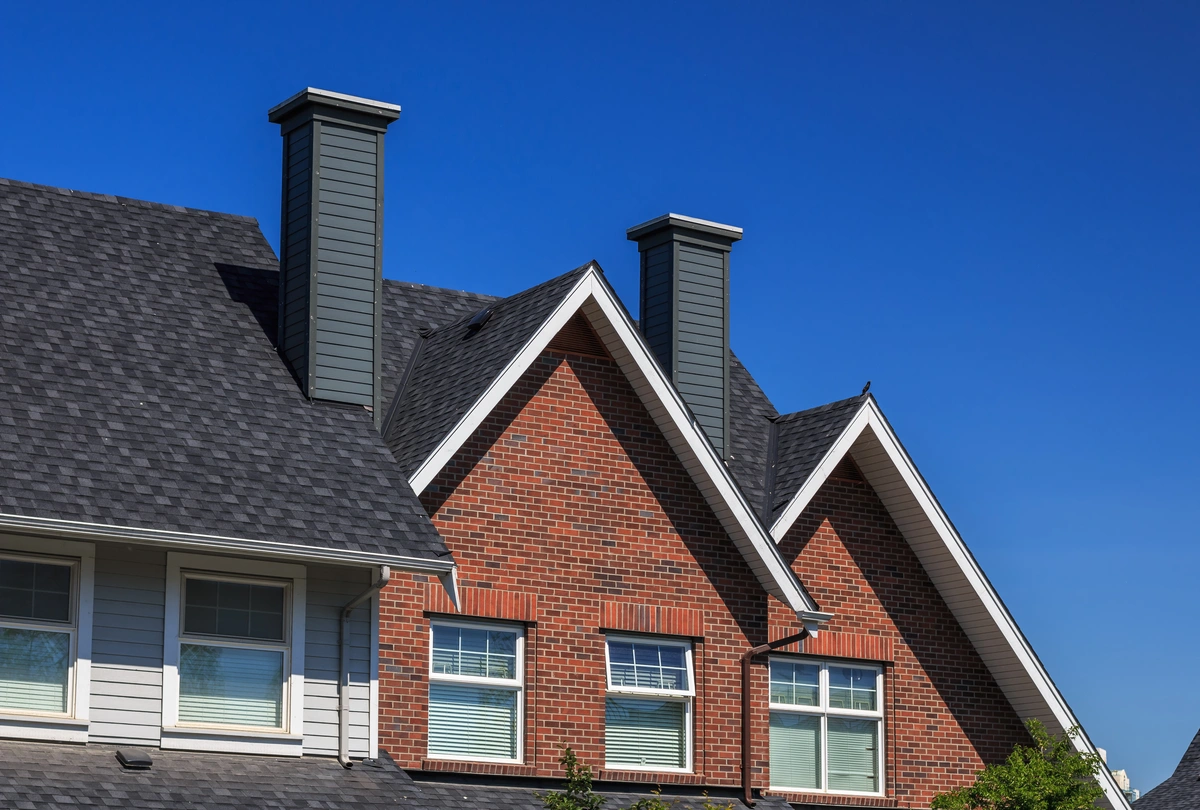
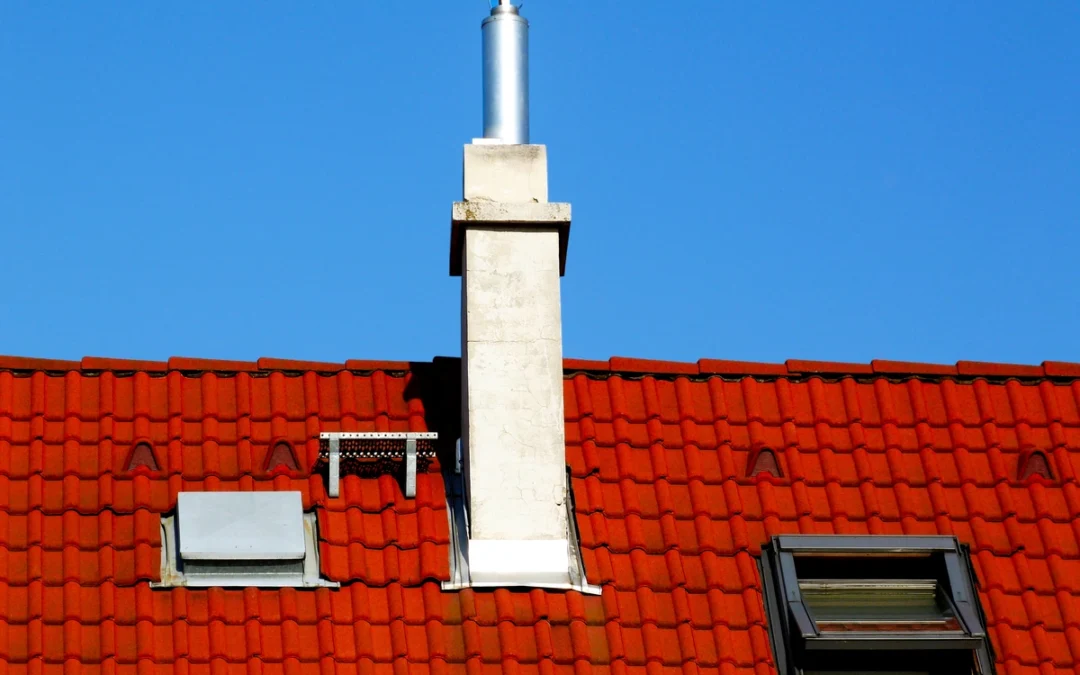
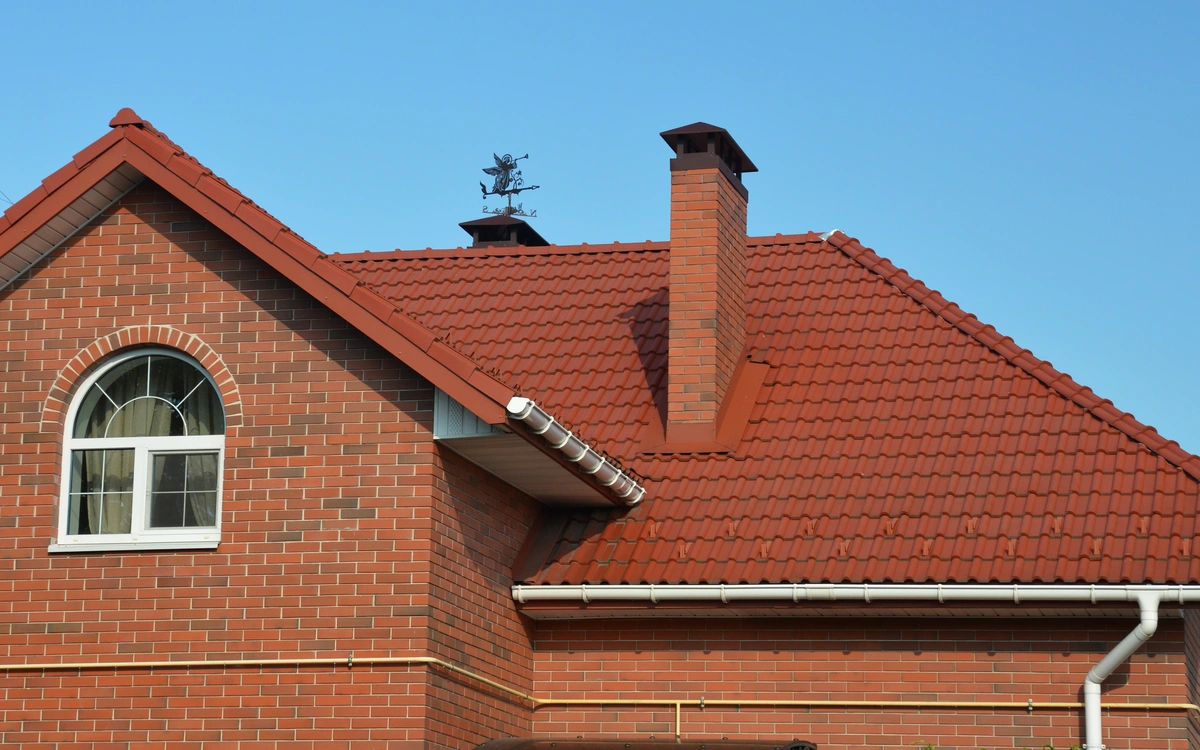
- Chimneys
- Skylights
- Valleys
- Vents
The purpose of roof flashing is to redirect water flow off of your roof to prevent moisture from seeping into any openings or cracks around vulnerable areas. This would include the area where the base of your chimney meets the roof decking and shingles, for example.
As far as the sheet metal used to make roof flashing, aluminum is the most common material. It’s the most affordable and durable of all the roof flashing materials, however, you’ll also find that the sheet metal also comes from galvanized steel, copper, and other metal amalgams. Their durability is also directly related to the other roofing materials used — for example, a copper roof will typically require copper roof flashing for a more seamless aesthetic and to maintain the overall structural integrity of the roof surface.
Generally speaking, metal flashing should be thought of as your roof’s most critical component when it comes to protection from the elements. Without it, your entire roofing system would be incredibly vulnerable to leakage and moisture build-up, which can lead to costly issues such as wood rot, mold, and rapid deterioration.
Types of Roof Flashing
While all the metal flashing on your roof serves the same purpose, it’s important to understand that there are several different types of roof flashing. The various types of roof flashing are categorized by the part of the roof they’re installed with, with the most common types of roof flashing being:
- Base flashing: Base flashing is used around the chimneys of a roof. Chimney roofs usually need pieces of flashing to ensure waterproofing around the base of their components.
- Step flashing: Step flashing refers to rectangular metal flashing that’s bent at a 90-degree angle in the middle to create a water-repelling pathway. This roof flashing is installed in multiple layers to prevent the roof’s walls from absorbing water by leading that water in the opposite direction.
- Valley flashing: Valley flashing is always installed around the open roof valleys and works by channeling rainwater off the roof and into the gutters. This roof flashing also prevents the buildup of debris that tends to collect during storms and heavy winds.
- Drip edge flashing: Drip edge flashing gets installed around the edges of the roof — otherwise known as the roof’s drip edge. This flashing moves rainwater off the roof which prevents excess moisture from getting into the starter shingles and causing them to rot and deteriorate.
- Vent pipe flashing: Vent pipe flashing is installed around the base of your roof’s vent pipes. This flashing is meant to seal the ventilation pipes, which keeps out drafts and prevents leaks and water damage from occurring in that area.
- Continuous flashing: Continuous flashing is the long metal sheet that’s installed on the roof’s surface, just beneath the shingles. Continuous flashing directs water flow over to the roof’s edge and straight into the gutter, and it’s most commonly found on asphalt shingle roofs.
- Counter flashing: Counter flashing is installed on top or opposite of the base flashing. Counter flashing is what prevents water from seeping into the roof’s shingles as well as the chimney.
How Much Does Roof Flashing Cost?
The average cost of roof flashing ranges between $15 and $25 per linear foot. When calculating the cost of materials per linear foot, most roof flashing repairs end up costing between $200 and $500, while a complete roof flashing replacement can cost $1,500 or more — depending on the number of roofing components you have.
Of course, the ultimate cost of replacing your roof flashing will also involve certain factors, including the installation and roofing materials required. Your roofing contractor may also discover other issues during their initial inspection, which means you may have a more complex and costly repair job on your hands.
The other factors that your roofing contractor will take into consideration when writing up an estimate will also include:
- Flashing material
- Size of the area that requires new flashing
- The extent of any damage your roof has to its existing flashing and other components
- Chimney size and type
- The configuration of your roof
- Detailed inspections (not all roofers provide free inspections)
- Cleanup
Signs It’s Time For New Roof Flashing
It can be challenging to determine on your own whether your roof is in need of flashing repairs or completely new flashing. The most obvious signs to look out for include:
- Rust stains on the firebox of your chimney
- Water stains on upper level ceilings and walls
- Water leakage in your attic or access space
- Corrosion or rust holes in areas where flashing is visible
Rust is typically the primary sign that your roof’s flashing is in bad shape. If you notice rust when looking up at your roof or any of the other signs that your flashing has gone bad, you’ll want to get in touch with a trusted roofing professional immediately to determine the extent of the damage.
As a homeowner, you need to address roofing issues — especially damaged roof flashing — right away. Otherwise, minor issues will quickly become major issues that threaten the structural integrity of your roofing system and home, which will end up costing you a lot more in the long run.
Have you noticed the signs of bad flashing on your roof? If so, schedule an appointment with the roofing specialists at Alamo right away!
by Frank Dixon | Nov 13, 2023 | Blog
Dealing with roof damage can be stressful, but knowing how to navigate the insurance claim process can ease the burden significantly. Every step, from assessing the damage to communicating with your insurance company, is crucial in ensuring you receive the coverage you deserve.
Ready to untangle the knots and glide through the roof insurance claim process with ease? Let’s delve into the details for prompt and precise roof repairs.
Types of Roof Damage Covered by Homeowners Insurance
Understanding the scope of your insurance coverage is the first step in your journey. Homeowners’ insurance policies typically cover a variety of roof damages, but it’s the specifics that often make all the difference. So, what’s generally covered, and where do the lines blur? Let’s find out. 🤔📜
Insurance policies typically cover damages resulting from unexpected and unpreventable incidents. Some of the most common types of damaging incidents are natural disasters, such as:
- Hurricanes
- Tornadoes
- Hailstorms
Your policy might also have your back in case of fire damage, vandalism, or other accidents beyond your control. ⛈️🔥
However, it’s essential to know the exclusions. Wear and tear over time or damages resulting from a lack of maintenance might not be covered. It’s a dance between the outlined perils in your policy and the exclusions, each playing a pivotal role in determining your coverage. 🚫💵
Steps to Filing a Roof Insurance Claim

Filing a roof insurance claim is a systematic process. Although it might seem daunting, breaking it down into manageable steps can make it more straightforward and less stressful.
Let’s explore the steps to file your claim correctly and efficiently. ✍️📈
Assess the Damage
The aftermath of a storm or accident can leave your roof with visible or hidden damages. It’s imperative to assess the extent of the damage. Take clear photographs and make detailed notes of all affected areas. Documentation is your ally, providing tangible proof of the damage when filing your claim.
A thorough inspection by you or a professional helps create a comprehensive record of the damages. It’s not just about noting the obvious issues but uncovering the hidden damages that could escalate if not addressed. 📸📝
Understand Your Insurance Coverage
Before contacting your insurance company, arm yourself with a deep understanding of your policy. Familiarize yourself with the coverage limits, deductibles, and any specific requirements or exclusions. Each policy is unique, so it’s crucial to know the specifics.
- Does it cover replacement costs or actual cash value?
- Is there a specific timeframe within which you need to file the claim?
Knowing these details ensures you’re not walking into the claim process blind but equipped with the knowledge to advocate for your entitlements. 📚🔍
A clear understanding of your policy empowers you to ask informed questions and seek clarifications where needed. If there are gray areas or roofing jargon that isn’t clear, don’t hesitate to reach out to your insurer for explanations.
Document the Damage
Thorough documentation goes beyond initial assessment. It encompasses gathering detailed information that paints a comprehensive picture of the extent of the damage. Collect receipts of items damaged, if applicable, and consider obtaining a professional roof inspection report.
Every piece of evidence strengthens your claim, ensuring the insurance company gets a clear and undeniable picture of the damage extent and necessary repairs or replacements. The mantra here is, the more detailed, the better! 📋📸
Also, consider creating a log of the dates and times of any repairs or maintenance done before the damage. A well-detailed log provides a historical view of your roof’s condition and maintenance history.
This can be an invaluable asset during the claim process, especially when establishing the condition of your roof before the damage occurred. It builds a case for your claim, showcasing your diligence in maintaining the roof’s condition. ✏️📅
File a Claim with Your Insurance Company
With your documentation, it’s time to initiate the claim process. Contact your insurance company promptly and provide them with detailed information and documentation of the damage.
Ensure you follow their specified procedure for filing a claim to avoid delays or complications. Your promptness and comprehensiveness in this step can significantly influence your claim’s processing speed and outcome. Keep records of all communications with the insurance company for future reference. 📞🗃️
Meet with an Insurance Adjuster
An insurance adjuster will likely visit your home to evaluate the damage firsthand. Be present during this professional roof inspection to provide insights and clarifications where necessary.
The adjuster’s assessment plays a crucial role in determining the compensation amount, so ensuring they get an accurate and comprehensive view of the damage is essential. Cooperation and openness during this visit can foster a positive and beneficial engagement. 🏠🤝
Tips for a Successful Roof Insurance Claim
Navigating the roof insurance claim process requires:
- Thorough preparation
- Detailed documentation
- Effective communication
Don’t wait for damages to escalate before filing your claim. The sooner you initiate the process, the higher your chances of a favorable outcome. ⏰📈
Always ensure that your documentation is detailed and comprehensive. Photos, videos, receipts, and professional inspection reports can be your strongest allies in proving the extent of the damage. Clarity and detail are your watchwords here. 📸📝
Lastly, communication is king. Maintain open lines of communication with your insurance company, respond promptly to their inquiries, and seek clarifications where necessary. Being informed and responsive can significantly streamline the claim process, making it less daunting and more manageable. ☎️👥
Your Roof, Our Priority
At Alamo Roofing, we understand the stress and uncertainty of roof damage and the ensuing roof insurance claim process. That’s why we’re here to lend a helping hand, offering expertise, guidance, and professional services tailored to turn your challenge into a seamless experience.
With Alamo Roofing, every step is a stride toward restoration, peace of mind, and satisfaction. Ready to turn the page to a hassle-free claim and repair process? Trust us to get the job done right. After all, we do this every “shingle” day.