by Frank Dixon | Apr 5, 2024 | Roofing
When it comes to maintaining a healthy home, proper ventilation is key – and your roof plays a crucial role in keeping things airy and dry. Installing roof vents is a great way to improve air circulation and prevent issues like moisture buildup and attic heat. But how exactly does one go about installing roof vents? In this article, we’re going to guide you through the process in eight simple steps. So, grab your hard hat and let’s get started on this ventilation adventure!
Inside this blog:
- 8 key steps for installing a roof vent
- Details and tips under each step to ensure a successful installation
Keep reading to explore the 8 easy steps for installing a roof vent so your home can breathe better!
Step 1: Assess Your Ventilation Needs
Before diving into the installation process, take a moment to assess your ventilation needs. Consider factors like the size and layout of your attic, the type of roofing material, and any existing ventilation systems in place. This will help you determine the number and placement of roof vents required for optimal airflow.
- Evaluate Attic Size: A larger attic may require more roof vents to ensure proper ventilation and airflow.
- Consider Roofing Material: Certain roofing materials, such as asphalt shingles or metal, may impact ventilation needs and vent placement.
- Assess Existing Ventilation: If your home already has attic vents or exhaust fans, take these into account when planning your roof vent installation.
Step 2: Choose the Right Ventilation System

Next, it’s time to select the appropriate ventilation system for your home. Roof vents come in various types, including ridge vents, box vents, turbine vents, and soffit vents. Each type has its own advantages and installation requirements, so choose the one that best suits your needs and preferences.
- Ridge Vents: Installed along the peak of the roof, ridge vents provide continuous airflow along the entire length of the roof ridge.
- Box Vents: Also known as static vents, box vents are installed on the roof surface and rely on natural convection to exhaust hot air from the attic.
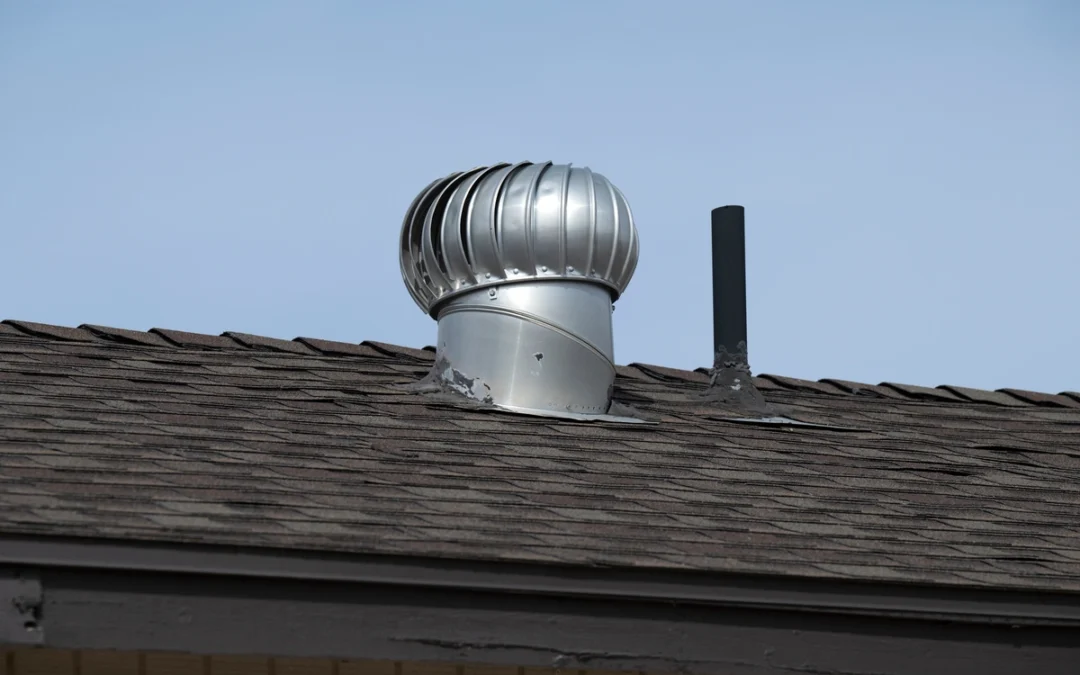
- Turbine Vents: These vents feature rotating turbines that harness wind power to create suction and remove hot air from the attic.
- Soffit Vents: Installed under the eaves of the roof, soffit vents allow fresh air to enter the attic while exhausting hot air through roof vents.
Step 3: Gather Your Materials and Tools
Before you begin the installation process, make sure you have all the necessary materials and tools on hand. This may include roof vents, roofing nails, roofing cement, a pry bar, a utility knife, a caulking gun, and safety equipment such as gloves and goggles.
- Materials: Roof vents, roofing nails, roofing cement, caulking
- Tools: Pry bar, utility knife, caulking gun
- Safety Equipment: Gloves, goggles, hard hat
Step 4: Choose the Installation Location
Once you’ve selected your ventilation system and gathered your materials, it’s time to choose the installation location for your roof vents. The optimal placement will depend on factors like attic size, roof slope, and existing ventilation systems.
- Attic Size: Ensure adequate vent coverage for the entire attic space to promote proper airflow and ventilation.
- Roof Slope: Position roof vents near the peak or ridge of the roof for maximum effectiveness and airflow.
- Existing Ventilation: Avoid placing roof vents too close to existing exhaust vents or intake vents to prevent airflow obstruction.
Step 5: Prepare the Roof Surface
Before installing the roof vents, you’ll need to prepare the roof surface to ensure a secure and watertight seal. This may involve removing shingles or cutting holes in the roof deck, depending on the type of ventilation system you’ve chosen.
- Remove Shingles: If installing ridge vents or box vents, carefully remove the shingles along the ridge or designated vent area using a pry bar and utility knife.
- Cut Holes: For turbine vents or soffit vents, mark and cut holes in the roof deck using a saw or drill, following the manufacturer’s guidelines for vent size and placement.
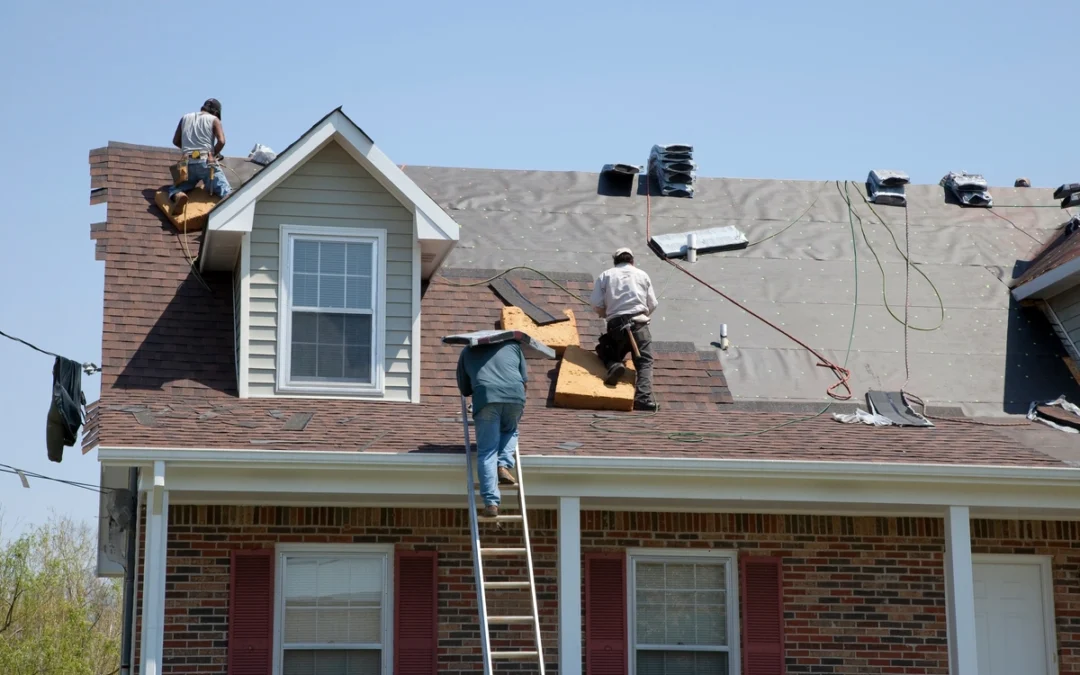
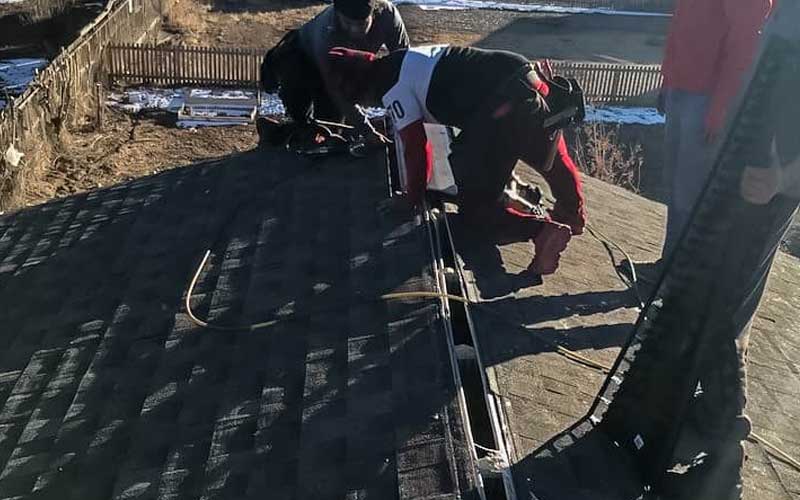
Step 6: Install the Roof Vents
With the roof surface prepared, it’s time to install the roof vents. Follow the manufacturer’s instructions carefully, ensuring proper alignment and secure attachment to the roof surface.
- Secure Attachment: Use roofing nails or screws to secure the vents to the roof deck, ensuring a tight seal and preventing water infiltration.
- Apply Roofing Cement: Apply roofing cement around the edges of the vent base to create a watertight seal and prevent leaks.
Step 7: Seal and Flash the Vents
Once the roof vents are installed, it’s essential to seal and flash them properly to prevent water infiltration and ensure long-lasting performance. Use roofing cement, flashing, and caulking to seal any gaps and create a watertight barrier around the vents.
- Apply Flashing: Install flashing around the base of the vents to direct water away from the vent opening and prevent leaks.
- Seal Gaps: Use roofing cement or caulking to seal any gaps or seams between the vent and the roof surface, ensuring a watertight seal.
Step 8: Perform a Final Inspection
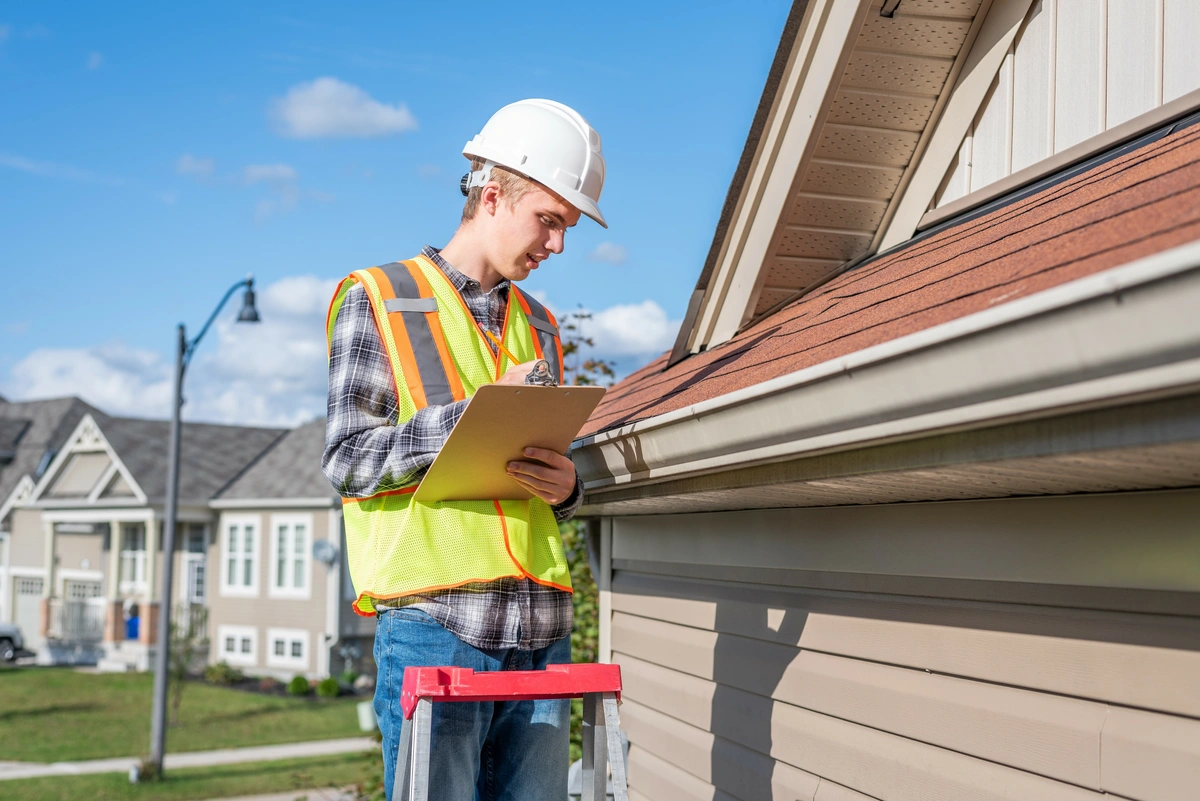
Before calling it a day, take a moment to inspect your handiwork and ensure that the roof vents are properly installed and sealed. Look for any signs of damage, gaps, or leaks, and make any necessary adjustments or repairs to ensure optimal performance.
- Check for Damage: Inspect the roof vents for any signs of damage or defects that could compromise their effectiveness or longevity.
- Test for Leaks: Run a hose over the roof surface to simulate rainfall and check for any leaks or water infiltration around the vents.
- Make Adjustments: If you spot any issues during the inspection, make the necessary adjustments or repairs to ensure that the roof vents are properly installed and sealed.
🌬️ Enjoy Your Improved Ventilation With a Roof Vent
You’ve successfully installed roof vents and taken a significant step toward improving the ventilation and air quality of your home. By following these eight simple steps and taking the time to assess your ventilation needs, choose the right ventilation system, and install the vents properly, you can enjoy a healthier, more comfortable living environment for years to come. So, sit back, relax, and breathe easy knowing that your home is well-vent
Contact our expert team at Alamo Roofing Contractors today and experience top-notch customer service and committed craftsmanship. We can’t wait to hear your questions and ideas about your next home improvement project! Get in touch with us today and we’ll get the ball rolling.

by Frank Dixon | Feb 7, 2024 | Roofing, Roofing Contractor
We all know that roofing projects can be a significant investment, but the good news is that you don’t have to break the bank to ensure a sturdy and reliable roof over your head.
Are you about to schedule a roof quote, but not sure what kind of costs your roofing needs entail?
Whether you’re planning a roof repair, replacement, or upgrade, we’ve got you covered with these 6 roof financing tips to help you navigate the world of home improvement financing.
Inside this blog:
- The 6 key roof financing tips to help homeowners secure a new roof
- Advice and benefits for each financing tip
Keep reading to learn how you can score a brand new roof this year with the financing option that fits your scenario!
1. Explore Different Financing Options 🌐

Before you jump into any financing agreement, it’s crucial to explore your options. There are various ways to finance your roofing project, each with its pros and cons:
- Personal Savings: Using your savings is the most cost-effective option as it doesn’t involve interest rates or fees, giving you complete control over your roofing project finances.
- Home Equity Loans: If you have substantial equity in your home, a home equity loan can offer a low-interest option, leveraging the value of your property to fund your roof improvements. On the other hand, if you don’t have sufficient equity in your home or don’t own a home, you can always opt for a personal loan.
- Roofing Loans: Some lenders offer specific roofing loans with competitive rates, making it easier for homeowners to access dedicated financing for their roofing needs.
- Credit Cards: Using a credit card can be convenient, but high-interest rates can add up quickly, so it’s crucial to have a clear repayment plan in place before charging your roofing expenses.
- Financing Plans with Roofing Companies: Many roofing companies offer financing plans tailored to their services, simplifying the financing process and potentially providing specialized options for your roofing project.
Carefully consider which option aligns best with your financial situation and goals.
2. Check Your Credit Score 💳
Your credit score plays a significant role in securing favorable financing terms. Before applying for a loan or financing plan, check your credit score. A higher credit score often leads to lower interest rates and better loan terms. You can request a free credit report from agencies like Equifax, Experian, or TransUnion to ensure accuracy.
Monitoring your credit score and taking steps to improve it can open doors to more advantageous financing opportunities, making your roofing project even more affordable.
3. Get Multiple Quotes 💬
Don’t settle for the first financing offer that comes your way. Get quotes from multiple lenders or roofing companies to compare interest rates, terms, and fees. This allows you to choose the most cost-effective option for your roofing project. Remember, a little extra effort in shopping around can save you a bundle in the long run. By gathering multiple quotes, you empower yourself to make an informed decision and secure the financing that aligns best with your financial goals and needs.
4. Understand the Terms and Fees 📜

Financing agreements come with terms and fees that can vary widely. Be sure to read the fine print and ask questions to fully understand the terms of the loan or financing plan. Look out for:
- Interest Rates: Understand whether the interest rate is fixed or variable and how it may change over time, as this knowledge can help you anticipate future financial commitments.
- Origination Fees: Some lenders charge upfront fees for processing your loan, so it’s essential to factor these fees into your overall financing cost.
- Prepayment Penalties: Check if there are penalties for paying off your loan early, as this information can influence your decision on how aggressively you want to repay the loan.
- Monthly Payments: Ensure the monthly payments fit comfortably within your budget, so you can manage your roofing project expenses without straining your finances.
Knowing these details will help you avoid any surprises down the road.
5. Create a Budget 📊
A budget is your best friend when it comes to financing a roofing project. Calculate the total cost of the project, including materials, labor, and any additional expenses. Then, create a budget that outlines how you’ll cover these costs. Be realistic about your financial capabilities, and make sure you have a solid plan in place. Remember that a well-thought-out budget can help you stay on track and avoid unexpected financial stress during your roofing project.
6. Consider Energy-Efficient Roofing 🌿
Investing in an energy-efficient roofing system can have long-term financial benefits. Energy-efficient roofs can reduce your utility bills, potentially offsetting some of the financing costs. Additionally, some government incentives and rebates are available for eco-friendly roofing projects. Explore these options to make your investment even more financially attractive.
By choosing energy-efficient roofing, you not only enhance your home’s value but also contribute to a greener environment while saving money in the process. It’s a win-win-win!
Pro Tip! Roofing Materials and Cost Savings💲
When planning your roofing project, consider the type of roofing material you choose. While some materials may have a higher upfront cost, they can offer long-term savings through increased durability and energy efficiency. Asphalt shingles, metal roofing, and clay tiles are all viable options to explore.
Lock in a New Roof With the Right Financing
Financing your roofing project doesn’t have to be a headache. By exploring your options, checking your credit score, getting multiple quotes, understanding the terms and fees, creating a budget, and considering energy-efficient roofing, you can embark on your home improvement journey with confidence. Remember, your roof is an investment in the safety and value of your home, so choose your financing wisely, and enjoy the peace of mind that comes with a reliable roof overhead.
With these tips in your toolkit, you’re well-equipped to make informed decisions and ensure your roofing project goes off without a hitch.
Reach out to our pro team of roofing contractors at Alamo Roofing today to get started on your next roof project! Whether you need a few minor repairs, a whole replacement, or you have questions about the roof that hangs over your home’s head, we’re excited to help you out!
by Frank Dixon | Jan 23, 2024 | Roofing, Roofing Contractor
Your roof is your home’s first line of defense against the elements. When it comes to roofing repairs or replacements, you want the best professionals on the job. In Valparaiso, Indiana, you’re in luck because we’ve compiled a list of the 4 best roofing companies that can help you keep a sturdy roof over your head. Let’s explore these top-notch roofers and find the perfect fit for your home!
Inside this blog:
- A rundown of the 4 top Valparaiso roofing companies to choose from in 2024
- Location and key highlights for each roofing company
- How to choose the right roofing company for your needs (checklist)
Keep reading to figure out which roofing company is right for you!

1. Discount Roof
📍 Location: 1152 Marsh St. Suite D
Discount Roof has dedicated years to perfecting their expertise. Whether it’s proficient roof repairs, precise siding installations, efficient attic insulation, or reliable gutter repairs, they’re an all-in-one destination for enhancing your home’s exterior.
With over three decades of industry experience, Discount Roof consistently provides top-tier exterior home remodeling services. Whether it’s roofing, siding, windows, or attic insulation, we’ve got all your needs covered. Their team is well-trained and experienced, delivering the most reliable home remodeling and roofing services at the most competitive prices.
Discount Roof employs the industry’s finest materials and employ top-notch installation techniques to guarantee the utmost reliability for siding, roofing, windows, and various other home improvement projects.
✨ Highlights for Discount Roof:
- Shingle Master Certified Contractor
- Family owned business
- Quick, Informative No-Pressure Estimates
2. Tri-County Roofing & Gutters
📍 Location: 858 W Lincolnway
Tri-County Roofing & Gutters is a family-owned and operated business specializing in roof repairs and replacement, gutter services, and insulation. Their company is deeply rooted in Northwest Indiana, and has been a part of the community since 1969.
At Tri-County, their dedicated team works tirelessly to embody their motto, “Done Right,” in every project they undertake. They take great pride in delivering top-notch customer service, starting from the initial inquiry for an estimate to the final clean-up around the home. Their roofing technicians have been part of the team for many years, bringing a wealth of experience to diagnose, recommend, and install the most dependable and cost-effective roofing systems for your home.
✨ Highlights for Tri-County Roofing & Gutters:
- Over 50 years in the roofing industry
- Tons of 5-Star reviews on Google
- Offer a wide range of services
3. DMG Exteriors
📍 Location: 3104 Grand Trunk Road, Unit 11N
DMG Exteriors stands as a prominent general contractor in the northwest Indiana region and the broader Mishawaka area, renowned for delivering outstanding service and unparalleled outcomes across a spectrum of exterior home projects and requirements. For more than a decade, DMG seasoned roofing experts have taken pride in delivering roofing services to Indiana homeowners. Their extensive experience has equipped them with a deep understanding of how time and weather impact roofs in Indiana, providing them with valuable insights when assessing necessary repairs. They provide top-notch products, exceptional craftsmanship, and unmatched services, ensuring that homeowners receive both the quality they deserve and the reliable solutions they require.
The professionals at DMG Exteriors hold complete licenses, bonding, and insurance coverage. Furthermore, they stay current with the latest technologies, innovations, and industry-leading practices.
✨ Highlights for DMG Exteriors:
- Google Guaranteed Service Provider
- GAF Master Elite roofing contractor
- BBB Accredited business
4. Alamo Roofing Contractors
📍 Location: 6064 Lute Rd.
Alamo Roofing Contractors provides residential and commercial roofing services across Northwest Indiana and Illinois. They take immense pride in being the foremost contractors in Portage, and their foundation is based on the principles of honesty, integrity, and exceptional craftsmanship. Their sense of pride extends from their valued customers to the top-of-the-line quality of their products, evident in their workmanship. The roofers at Alamo approach all roofing requirements with utmost seriousness and a steadfast commitment to ensuring the successful completion of every project.
Customers in Valparaiso, Indiana truly love working with Alamo Roofing Contractors because their team of roofers recognizes the significance of engaging in direct, in-person interactions and actively addressing all queries and concerns Whether they’re assisting with roofing, siding, or gutter installations, Alamo roofers top priority is to attentively heed your requirements, ensuring your complete satisfaction with the end results.
✨ Highlights for Alamo Roofing Contractors:
- Fast & reliable emergency storm damage response
- Discount for all military and first responders
- Known as one of the top roofing contractors in Valparaiso
- Industry-leading asphalt & metal roof installations
Choosing the Right Roofing Company: A Quick Checklist 📋
When selecting the best roofing company for your Valparaiso home, keep the following checklist in mind:
- Licensed and Insured: Ensure the company is licensed and carries proper insurance to protect you and your property.
- Local Experience: Look for a company with a strong local presence and a track record of serving your community.
- References and Reviews: Check online reviews and ask for references to gauge the company’s reputation and customer satisfaction.
- Written Estimates: Obtain detailed written estimates from multiple companies to compare pricing and services.
- Warranty Coverage: Inquire about the warranties they offer for labor and materials.
- Clear Communication: Choose a company that communicates effectively and addresses your questions and concerns.
- Quality Materials: Confirm that they use high-quality roofing materials from reputable manufacturers.
- Timely Completion: Discuss project timelines and ensure the company can complete the work within your desired timeframe.
Choose Alamo Roofing For Your Next Project in Valparaiso
With this guide and the top Valparaiso roofing contractors, you’re well-equipped to make an informed decision for your roofing project. Whether you need a minor repair or a complete roof overhaul, these experts have you covered. Here’s to a sturdy and secure roof over your home!
Contact our team of expert roofers at Alamo Roofing today and we’ll make sure your next roofing project goes as smoothly as possible. Let’s kickoff your next endeavor with a free estimate!
by Frank Dixon | Jul 17, 2023 | Blog, Roof maintenance, Roofing
 Roofing on Portage, IN, homes keeps the onslaught of winter snows and baking summer heat away.
As such, it’s evident to homeowners why trusses, decking boards, and shingles are necessary. But many do not know the function of roof ventilation. But this is a very key aspect that shouldn’t be ignored when you upgrade your roof.
Does your home need roof ventilation? As any experienced roofing company in Portage, IN, can tell you, roof vents are vital in aiding your roof’s function and extending its lifespan.
Roof Vents Facilitate Air Circulation
Roofing in Portage, IN, homes needs vents to expel warm, moist air and draw in cooler, drier air.
If there’s no ventilation in place (or insufficient ventilation), this through-flow of air doesn’t occur, resulting in a stuffy interior environment, higher electric bills, and other issues.
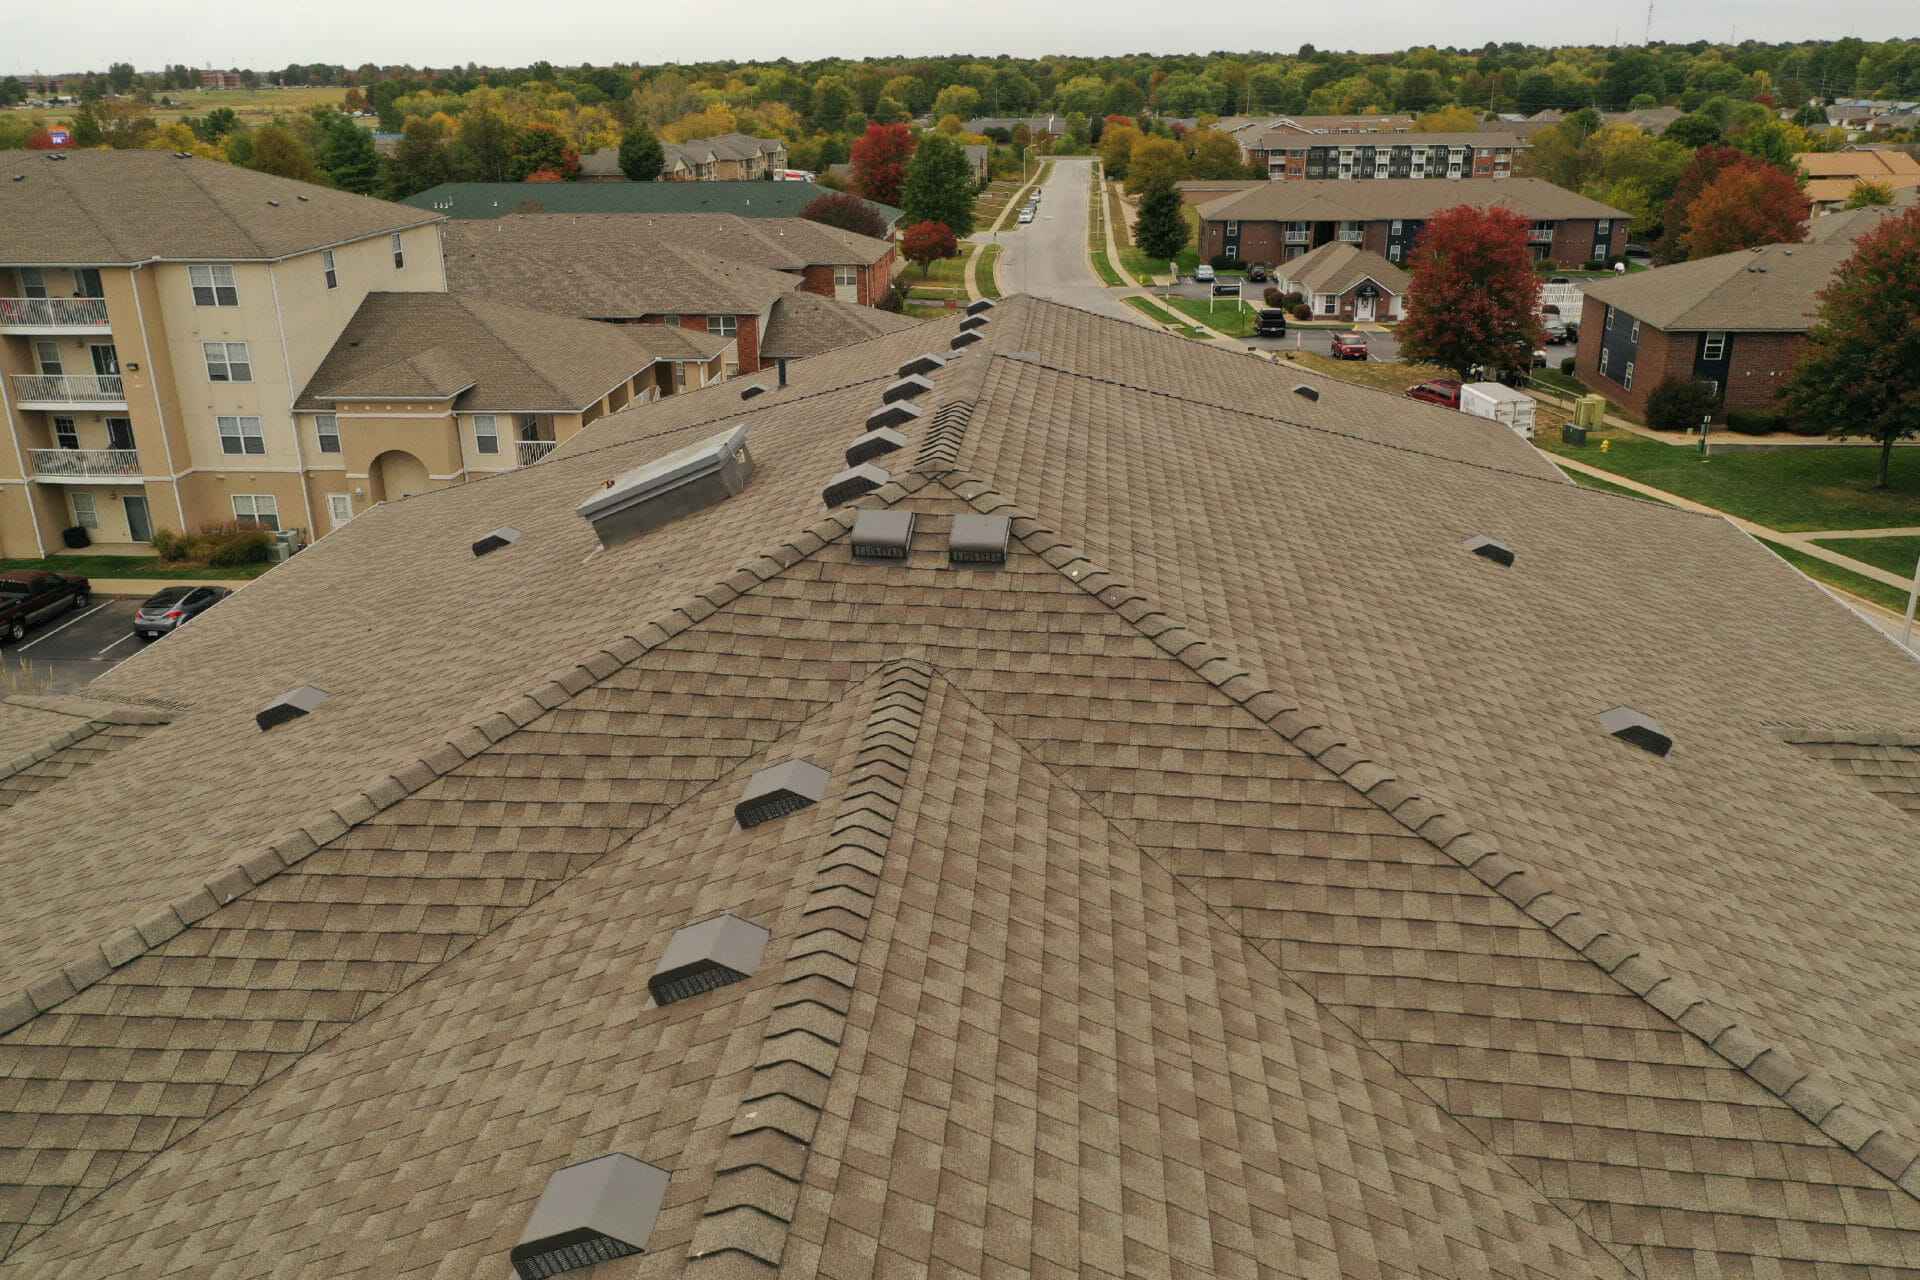
The Two Types of Roof Vents
Roofers in Portage, IN, recommend installing vents that let warm air out (exhaust ventilation) and vents that draw cool air in (intake ventilation).
Both these vent types come in an array of options, with exhaust vents ranging from discreet ridge vents to flamboyant whirlybirds.
Intake vents are generally located along the soffit; fascia vents and drip edge vents are less effective. Cupola vents look lovely but are more decorative than functional.
The Benefits of Air Circulation
Exhaust vents let warm, moist air out, and the resulting drop in pressure sucks cooler air in. The resultant through-flow yields the following benefits.
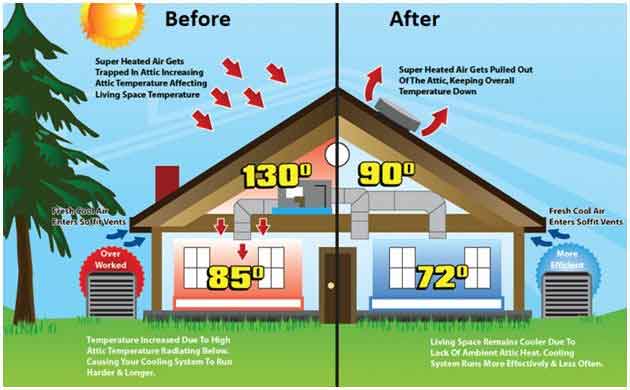
1. Moderation of Attic Temperature
Warm air sitting in your attic makes it uncomfortably hot in summer. Whether you need to access the space for maintenance or use it as a storage area, keeping your attic cooler in the summer is beneficial.
Roofing contractors in Portage, IN, also recommend ventilation to help maintain attic temperatures close to ambient during winter.
2. More Comfortable Living Spaces
An attic that’s too hot can make your living quarters below uncomfortably warm in summer and unpleasantly cold in winter.
Unless your insulation is insufficient or you have too much ventilation, roof vents won’t suck heat out of your home in winter.
3. Lower Power Bills
Ventilation moderates temperatures in your attic, thereby regulating temperatures in your home because it isn’t acting as a heat source or heat sink.
As a result, your HVAC system doesn’t have to work as hard, saving you money on power bills.
4. Less Moisture Build-up
Because warm air can hold more water vapor, a build-up of warm air under the roof results in moisture problems in your house.
The result is a proliferation of issues that residential roofing contractors in Portage, IN, often see in poorly-ventilated homes, including wood rot, water damage, and mold growth.
5. Longer Shingle Lifespan
Even if roofers in Portage, IN, have installed excellent shingles, if the air below the shingles constantly remains warm and moist, the shingles will deteriorate and crack.
6. Prevention of Ice Dams
Warm air in the attic in winter melts snow, which slides down to the cooler gutters and refreezes. This ice can break gutters and injure people by falling on them, and its meltwater can back into your walls.
Roof Ventilation: Final Thoughts
Well-installed, properly-maintained roof vents are critical because they help regulate your home’s temperature and keep the indoor environment dry.
Ask your local roofing company in Portage, IN, to inspect your attic to ensure it’s properly ventilated.
by Frank Dixon | Jul 9, 2023 | Blog, Roof Replacement, Roofing
Replacing your roofing in Portage, IN, is a major decision, and it begets many questions. For instance: should you hire professionals or attempt to take on the project yourself?
If you’re struggling to make the choice, we might be able to help.
Here’s everything you need to know about DIY vs. professional roof replacement.
The Pros of Going DIY
There is one primary reason why some people attempt to replace their roofs themselves rather than hire a residential roofing company in Portage, IN.
Save Money
If you’re looking to save money in the short term, a DIY roof job seems like the obvious choice. When you install your own roof, there are no labor charges, which is a big way to cut costs.
However, choosing not to use professional roofers in Portage, IN, is usually a bad idea, as they are much more likely to do a safe and high-quality job.
DIY Cons
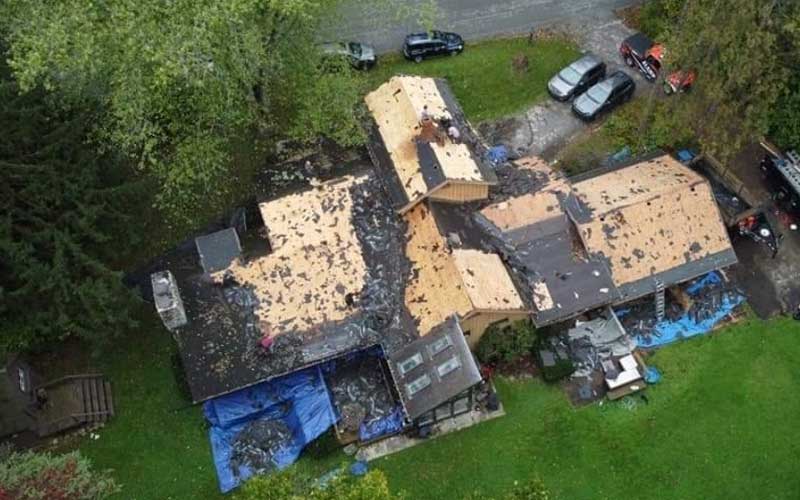
There are tons of potential danger zones associated with DIY roofing in Portage, IN.
Safety Hazards
From carrying heavy supplies to climbing up and down ladders, there are many dangers associated with roofing that make it unsuitable for amateurs.
Plus, do you have harnesses and all the necessary safety equipment for a roof replacement? If not, renting it will cost a pretty penny – and attempting the job without it is not an option.
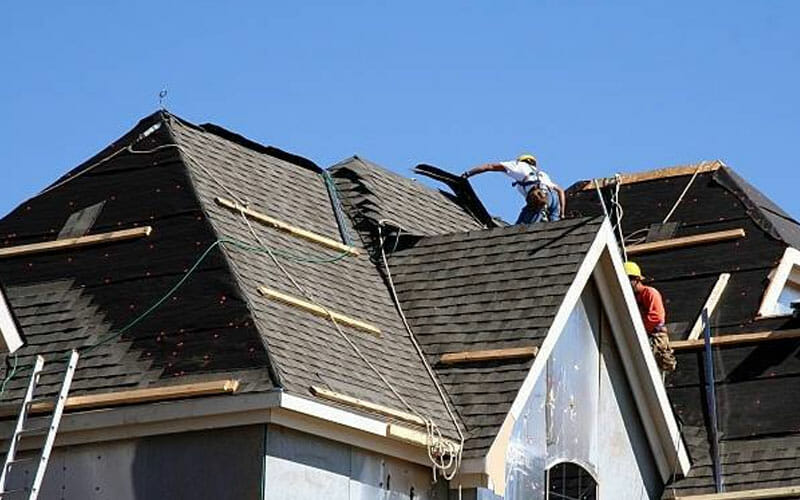
Lack of Experience
Roofing contractors in Portage, IN, are trained in all aspects of the industry. As a novice, you don’t have the expertise needed to do the job well.
From removing old panels and laying shingles to getting the job done as efficiently as possible to limit exposure to the elements, the project is a lot more complicated than you think.
This is another reason why it makes a lot more sense for professional roofers in Portage, IN to replace your roof.
Pros of Hiring Professionals
There are many benefits to having professionals replace your roofing in Portage, IN.
Quality and Efficiency
When you hire a roofing company in Portage, IN, the product will be finished to the highest standards on a schedule that limits inconvenience to your household.
You’re guaranteed a sturdy, safe roof that lasts its expected lifespan or longer – with a warranty, too.
No Property Damage
Roofing contractors in Portage, IN, know what they’re doing, so there’s little chance your property will be damaged.
Every step of the process will be executed carefully, and the best companies are insured to further protect against accidents.
Professional Cons
And for the lone disadvantage…
The Cost
Hiring a roofing company in Portage, IN, will cost you more upfront.
However, it will save you money in the long run, as you will likely have to call a pro for premature repairs if you take on the replacement yourself.
The Takeaway: Always Go Pro
If you want to save money down the line and value a quality roof that will last for years to come, it’s always a good idea to hire professionals.
Hiring roofers in Portage, IN, ensures that your structure is built to last using the best available materials.