Exploring Roof Components and What is Included in a Roof Replacement!

Exploring Roof Components and What is Included in a Roof Replacement!

Replacing a roof is one of the most significant investments you will make as a homeowner. It not only enhances the curb appeal of your home but also ensures that your family and belongings are protected from the elements. Whether you have experienced storm damage, your roof is simply aging, or you are looking for a more durable material, understanding the various components involved in a roof replacement is essential for making well-informed decisions. Homeowners in Valparaiso, Hammond, and Naperville should know that a roof replacement involves more than just the shingles on top - each element of the roof plays a crucial role in its overall performance and longevity.

In this guide, we will examine what is included in a roof replacement, how each component contributes to your home's structural integrity, and why hiring a professional roofing contractor to handle the job is key so that your new roof lasts for years to come. Whether you are considering asphalt shingles, metal roofing, or any other material, this article will give you the information you need to understand your roof replacement from start to finish.

1. Roof Decking or Sheathing

The roof decking, also known as the sheathing, is the foundational structure that supports all other components of your roof. Made from materials such as plywood or oriented strand board (OSB), the decking provides the surface on which the underlayment, shingles, and other materials are laid. It is typically installed across the roof's trusses and plays an integral role in ensuring the roof's stability and strength.

During a roofing replacement, contractors will carefully inspect the condition of the decking. If the decking is warped, cracked, or rotting, it will need to be replaced. This is essential so that the new roofing materials adhere properly and that the roof does not develop any structural weaknesses. In areas like Valparaiso, Hammond, and Naperville where harsh winters and heavy snow can cause stress on a roof, high-quality decking is essential for preventing sagging or collapsing under the weight of snow or ice.

2. Underlayment - The Hidden Protector

Underlayment is often one of the most underrated yet crucial components in a roof replacement. Positioned directly above the roof decking, underlayment serves as a secondary layer of defense against water penetration. This is especially important in areas with heavy rainfall or snow, where water can seep under shingles and into the roof structure if not properly managed.

There are two primary types of underlayment installed by residential roof services: felt and synthetic. Traditional felt underlayment is made from asphalt-saturated material, while synthetic underlayment offers superior durability and moisture resistance. The latter is growing in popularity for its longer lifespan and better performance under extreme weather conditions. During a roof replacement, the quality of underlayment used is just as important as the shingles or tiles. An underlayment with high water resistance and tear strength can significantly improve the overall performance of the roof.

By investing in high-quality underlayment, you can extend the life of your roof, prevent leaks, and reduce the risk of mold and water damage. Homeowners in Valparaiso, Hammond, and Naperville should prioritize quality underlayment during their roofing replacement project so that their roof can withstand the region's weather challenges.

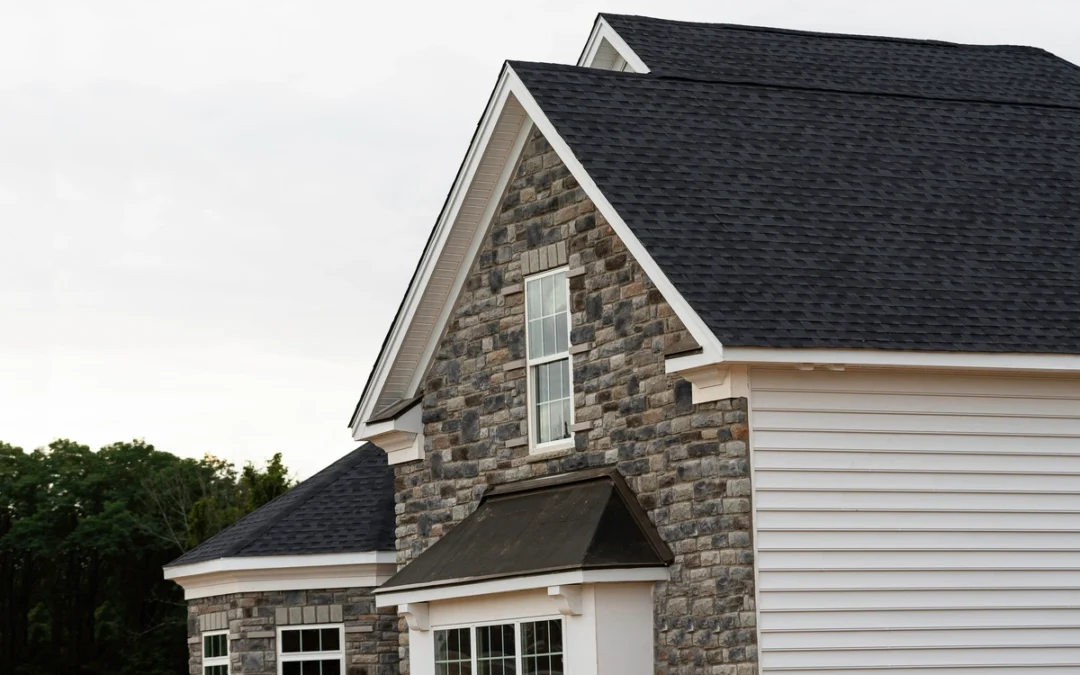
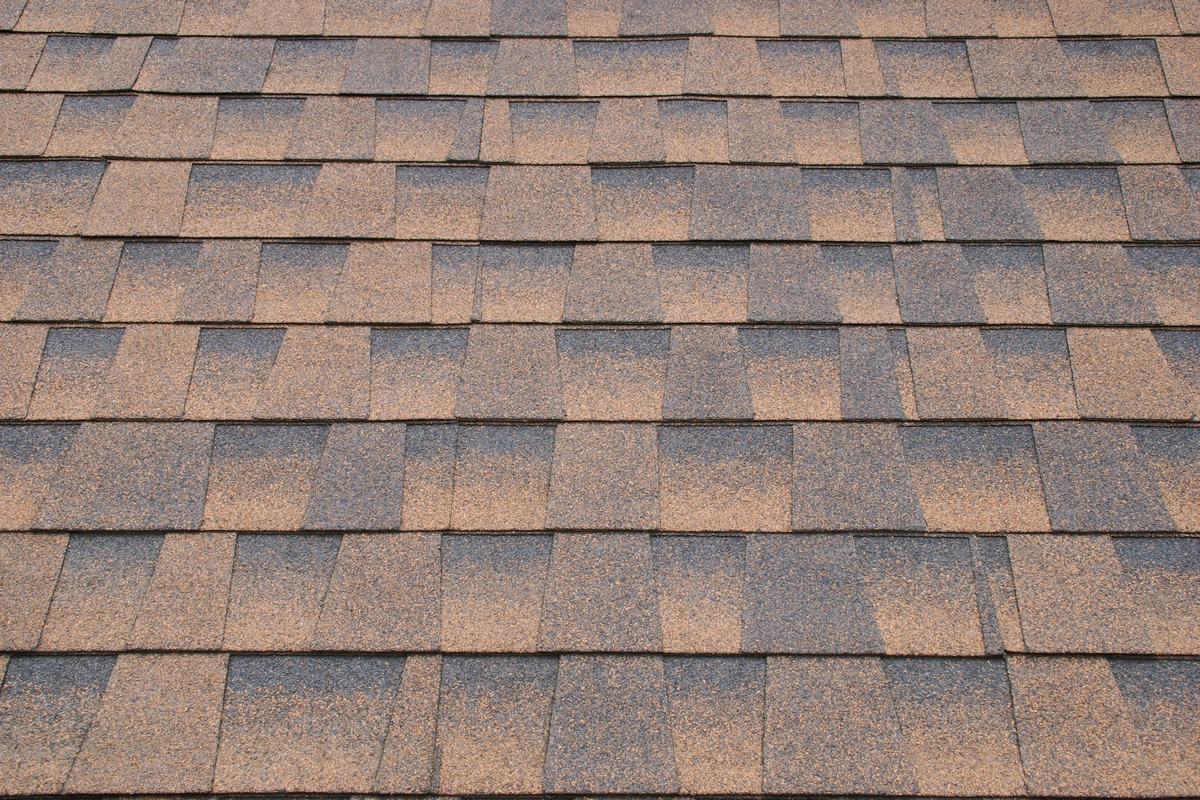
3. Roof Shingles or other Materials - Aesthetic and Protection Combined

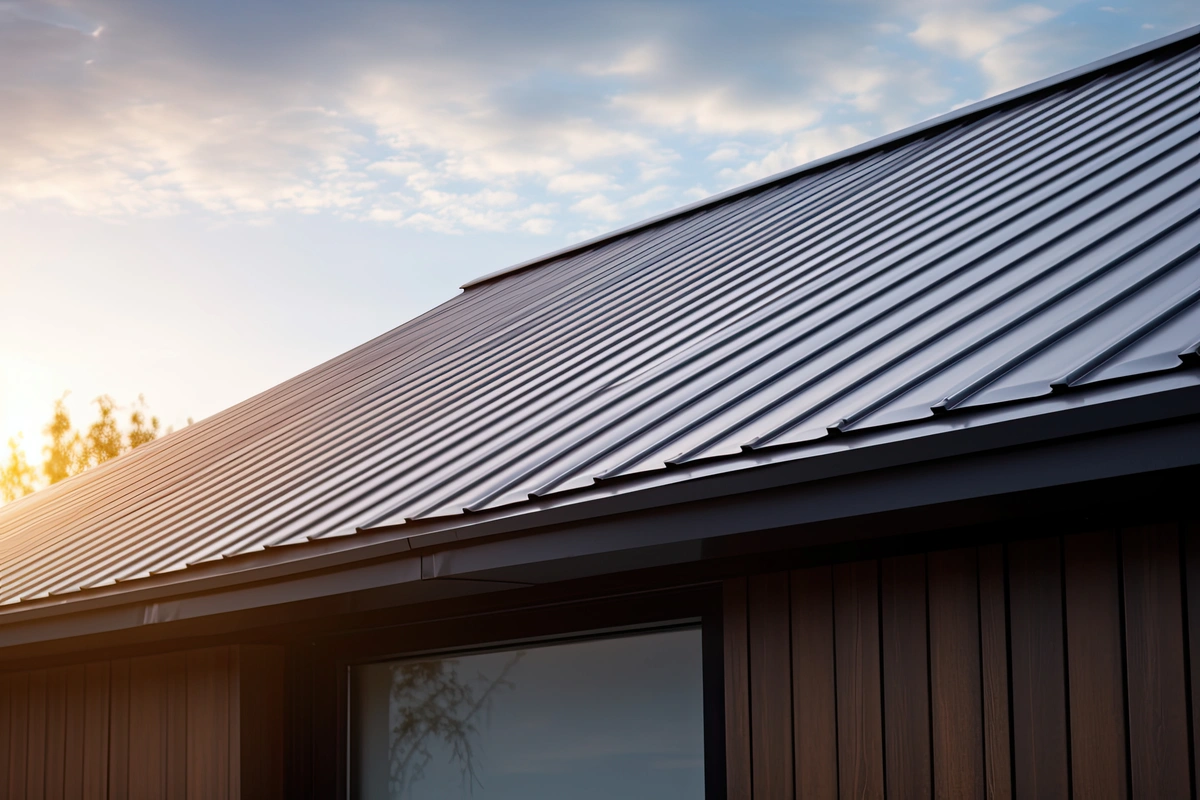
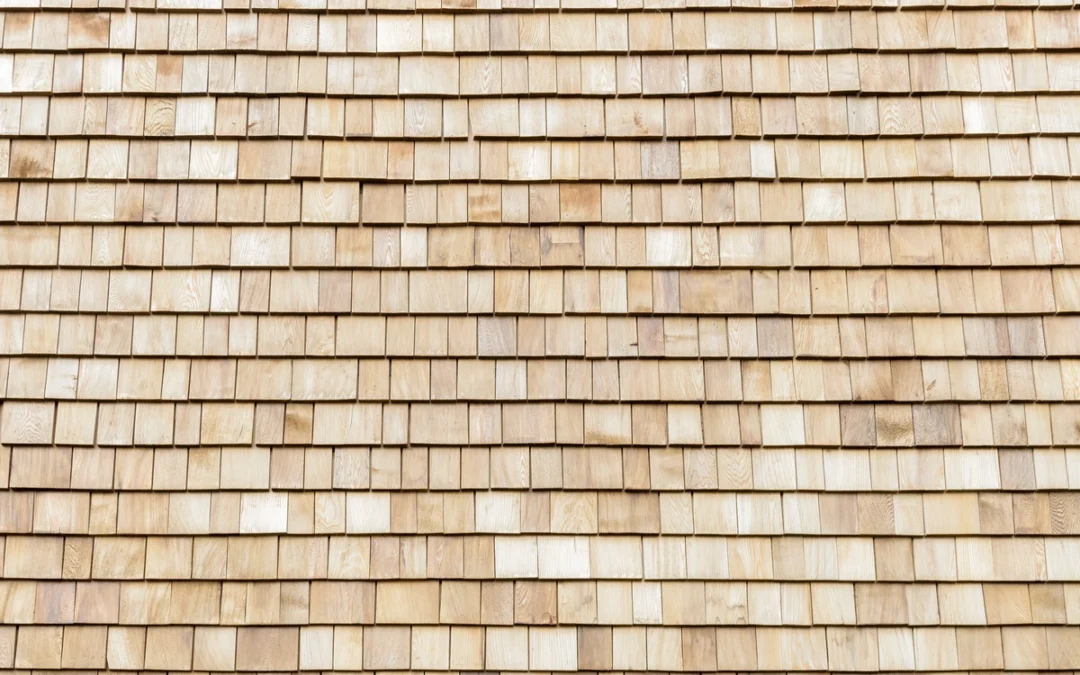
Shingles are the most visible part of your roof and also serve as its primary line of defense against the elements. There are various types of roofing shingles available, each offering distinct benefits in terms of durability, style, and cost. Asphalt shingles are the most common choice for residential roofing due to their affordability, ease of installation, and wide range of colors and styles; however, other materials like wood, slate, and metal are becoming increasingly popular, especially in homes where homeowners are looking for enhanced durability or a more unique aesthetic.

During the roof replacement process, it is essential to choose the right material for your home carefully. Asphalt shingles are effective at insulating the house, while metal roofing, though more expensive, can last significantly longer and offers excellent resistance to wind and fire. Homeowners in Valparaiso, Hammond, and Naperville may also want to consider the energy efficiency of their roofing material. Some shingles come with reflective coatings that help reduce energy costs by reflecting heat from the sun, making them an excellent choice for homes in areas that experience extreme temperatures.

Beyond functionality, shingles contribute to the overall look of a home. The right color and style can enhance your home's curb appeal, making your roof a key feature of the exterior design. Homeowners should work closely with residential roof services to choose materials that complement their home's architecture while also offering the durability and protection needed for the region's weather.

  • Starter Shingles - The Essential First Layer: Starter shingles are a critical component in a roofing replacement, though they are often overlooked. These shingles are specially designed to be installed along the eaves of your roof, providing a secure foundation for the first row of regular shingles. Starter shingles help prevent wind uplift by securing the edges of the shingles, reducing the risk of them being blown off during storms. They also create a tight seal along the roofline, preventing water from seeping underneath the shingles and causing leaks. Including starter shingles in your roof replacement ensures better overall performance and enhanced protection against the elements.

4. Flashing - Preventing Leaks and Water Damage

Flashing is a vital component of any roof replacement project. It is installed around vulnerable areas like chimneys, vents, skylights, and roof valleys to prevent water from seeping through the roof and causing leaks. Flashing is typically made from durable materials such as aluminum, copper, or galvanized steel. These metals are resistant to corrosion and can withstand the stresses of extreme weather conditions.

When replacing your roof, flashing should be carefully inspected and replaced if necessary. Old or damaged flashing can lead to water infiltration, which can cause significant damage to the underlying structure and insulation. It is essential so that the flashing is installed correctly and securely to provide lasting protection. Professional residential roof services make sure that the flashing is properly integrated into the roofing system, providing an extra layer of security and preventing potential future problems.

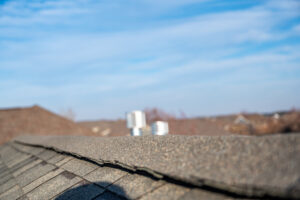
5. Ventilation - Having Long-Term Roof Health

Ventilation is another crucial factor in a successful roof replacement. Proper attic ventilation helps to regulate temperature and moisture levels in the attic space. Without adequate ventilation, hot air and moisture can become trapped in the attic, leading to problems such as mold, wood rot, and premature deterioration of roofing materials. This can be especially problematic in areas like Valparaiso, Hammond, and Naperville, where temperature fluctuations between seasons can put additional strain on roofing materials.

Various roof ventilation systems exist, such as ridge vents, gable vents, soffit vents, and box vents. Ridge vents are installed along the peak of the roof to allow hot air to escape, while soffit vents at the roof's eaves allow cooler air to flow in. Gable vents are positioned at the ends of roof gables to facilitate air intake, and box vents promote heat escape through the roof surface. Together, these ventilation systems create a balanced airflow that helps maintain an even temperature and moisture level in the attic, reducing the risk of damage to the roof.

When performing a roofing replacement, it is essential to make sure that the ventilation system is functioning properly. Inadequate ventilation can lead to trapped heat, which can cause roofing materials to degrade more quickly. In addition, poor ventilation can lead to moisture buildup in the attic, increasing the risk of mold and mildew growth.

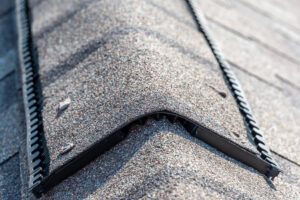
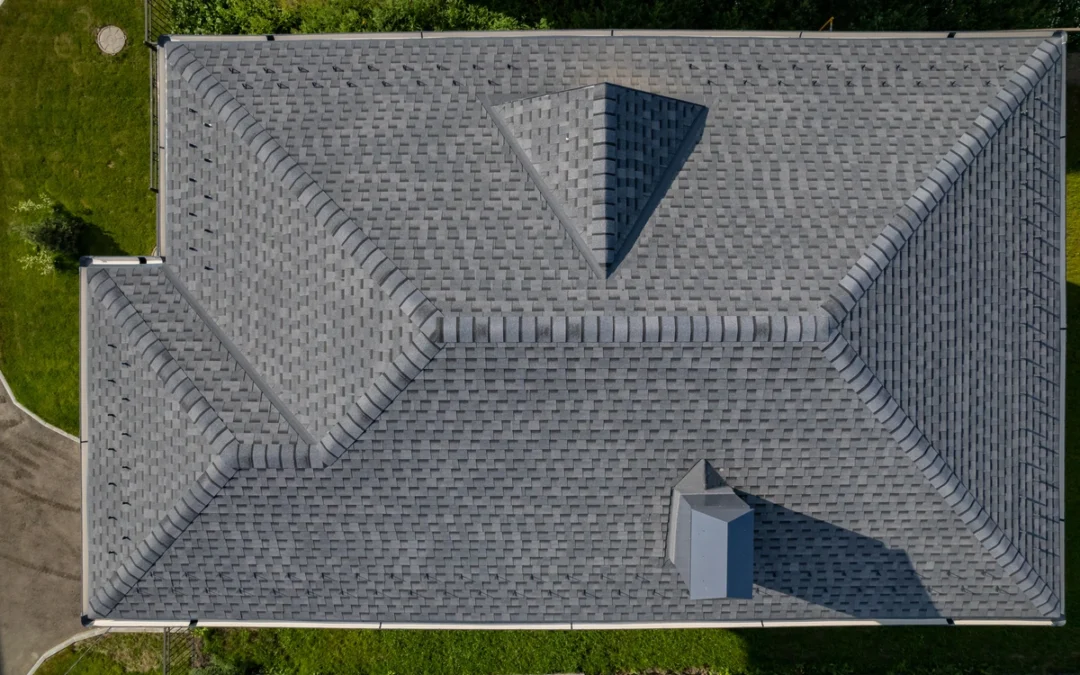
6. Ridge Caps and Roof Trim - Final Touches for Protection and Style

Ridge caps and roof trim serve both functional and aesthetic purposes when replacing a roof. Ridge caps are installed along the roof's peak, where two slopes meet, to prevent water from infiltrating these vulnerable areas. Ridge caps are especially important in areas with heavy rain or snow, as water can easily slip through unsealed joints and cause leaks.

On the other hand, roof trim is installed along the edges of the roof and provides a finished look to the roofline. It helps protect the edges of the roof from water and debris, so that the roofing materials stay securely in place. Both ridge caps and trim contribute to the overall appearance of your home's exterior, adding a polished, cohesive look to your roof.

7. Gutter Systems - Protecting Your Home's Foundation

The gutter system is one of the most important yet often overlooked components of a roofing replacement. Gutters channel rainwater off the roof and away from the house's foundation. Without a properly functioning gutter system, water can accumulate around the foundation, leading to erosion, mold growth, and even structural damage.

When replacing your roof, it is a good time to assess your gutters and consider upgrading them if necessary. Gutters come in a range of materials, such as aluminum, copper, and steel, and can be customized to match the aesthetic of your home. A high-quality gutter system will direct water away from the house, helping protect the foundation and prevent costly damage over time.

8. Roof Insulation - A Key to Energy Efficiency

Roof insulation is an essential aspect of your roof replacement that directly impacts your home's energy efficiency. Insulation helps prevent heat from escaping in the winter and keeps your home cooler during the summer months. This not only improves comfort levels but also reduces energy costs over time.

Several types of insulation are used in roofing, including fiberglass batt insulation, spray foam insulation, and rigid foam boards. Each type offers different benefits depending on your home's needs. For example, spray foam insulation provides an excellent air seal and can improve both insulation and ventilation, while fiberglass batt insulation is a cost-effective option that offers decent thermal resistance.

During your roofing replacement, it is important to be certain that your roof insulation is adequate for your home's size and the local climate. Adding or upgrading insulation can improve your home's energy efficiency and reduce the strain on your heating and cooling systems.

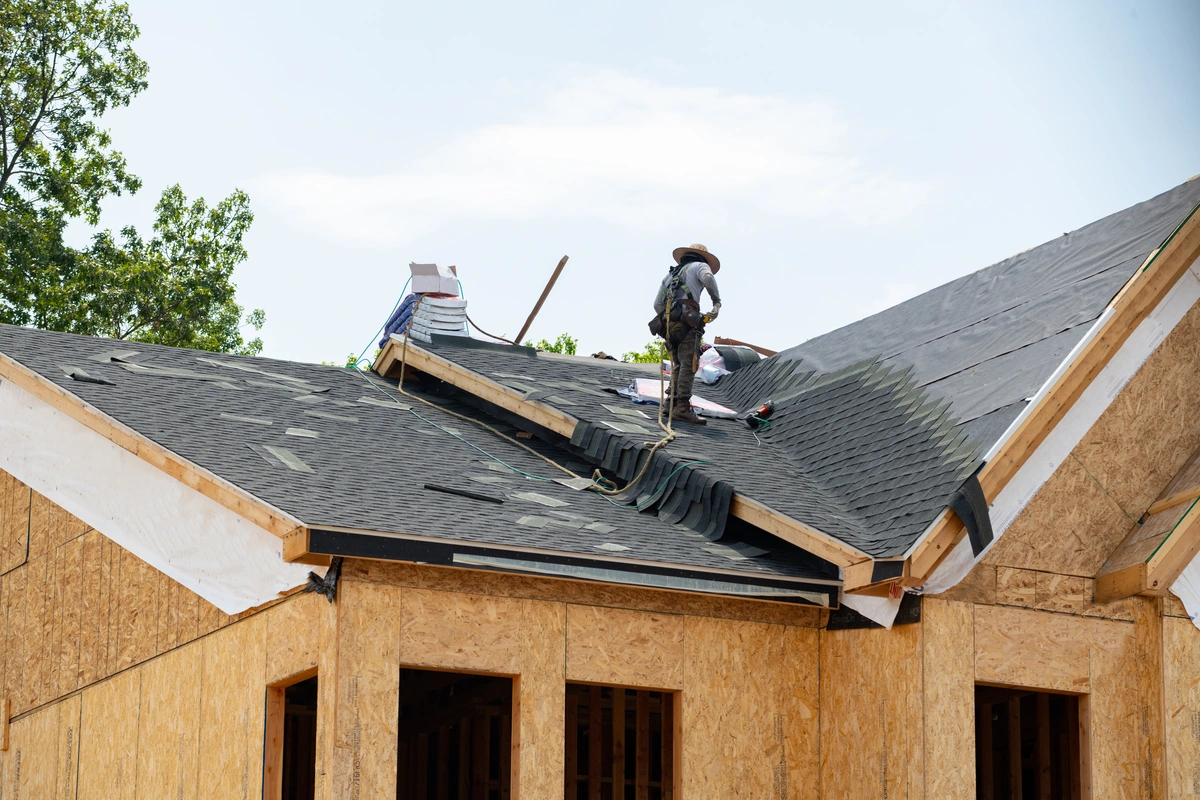
Professional Roof Installation Process

A successful roof replacement requires more than just quality materials - it also depends on the expertise of the roofing contractor. Hiring a professional roofing contractor makes sure that all components of the roof are properly installed, from the decking to the shingles and flashing. Experienced contractors will also be sure that your roof is installed in compliance with local building codes and that all manufacturer warranties are honored.

The roof replacement process typically begins with an inspection of the existing roof, followed by the removal of old materials. Next, the decking, underlayment, and flashing are installed before the shingles or other roofing materials are applied. Ventilation systems are also installed at this stage, followed by ridge caps and trim. Finally, depending on the scope of the project, gutters and insulation may be addressed.

Common Mistakes to Avoid During a Roof Replacement

While a roof replacement offers many benefits, homeowners should avoid several common mistakes to ensure a successful project. Some of these mistakes include choosing low-quality materials, neglecting ventilation, and hiring inexperienced contractors. By avoiding these pitfalls, homeowners can save money in the long run and ensure that their roof performs optimally for many years.

Conclusion

A roof replacement is an important investment in the longevity and protection of your home. Understanding the key components involved in the process will help you make informed decisions so that your new roof provides the best possible protection. By hiring professional residential roof services and selecting high-quality materials, you can rest assured that your roof replacement will be a success. If you are ready to begin your roof replacement project in Valparaiso, Hammond, or Naperville, contact a local roofing service for expert advice and services!


Key Takeaways

  • Comprehensive Roof Components: A roof replacement involves much more than just replacing the shingles. Key components include decking, underlayment, flashing, ventilation, and ridge caps, all of which work together to protect your home from the elements and ensure long-term durability.
  • Quality Materials Matter: From the decking to the shingles and underlayment, choosing high-quality materials is crucial for the performance and lifespan of your roof. Materials like synthetic underlayment and durable flashing provide enhanced protection, especially in areas prone to harsh weather, like Valparaiso, Hammond, and Naperville.
  • Professional Installation is Key: Proper installation is just as important as the materials used in your roofing replacement. Hiring an experienced roofing contractor makes certain that all components are installed correctly, adhering to local building codes and manufacturer warranties.
  • Energy Efficiency: Roof insulation and proper ventilation are essential for maintaining energy efficiency in your home. These components help regulate temperature, reduce energy costs, and protect your roof from damage caused by trapped moisture or heat.
  • Gutters and Trim: Remember the importance of a functional gutter system and roof trim. These elements not only contribute to the aesthetic appeal of your roof but also protect your home's foundation from water damage.
  • Starter Shingles: Starter shingles provide an essential first layer of protection along the eaves of the roof, preventing wind uplift so that your shingles stay secure and waterproof.
  • Long-Term Protection: A roof replacement is an investment in your home's future. By choosing the right materials and experienced professional installation, you will protect your home from water damage, improve its curb appeal, and enhance its energy efficiency for years to come.

FAQs

1. What is included in a roof replacement?
A roof replacement involves removing the old roofing materials and installing new components, including decking or sheathing, underlayment, shingles, flashing, ridge caps, gutters, and insulation. Each part plays a role that contributes to the roof's longevity and performance.

2. How long does a roof replacement take?
Depending on the size and complexity of the project, an average of one to three days can be required. Weather conditions and the roofing material chosen can also impact the timeline.

3. What is the difference between roof decking and underlayment?
Roof decking or sheathing provides the foundation for all other roofing layers. It is typically made from plywood or OSB. Underlayment is a waterproof layer installed above the decking, providing an extra layer of protection against water infiltration.

4. Are starter shingles necessary?
Yes, starter shingles are essential to make certain the first row of shingles is secure and protected from wind uplift. They create a tight seal along the eaves and prevent water from getting underneath the shingles.

5. How do I choose the best roofing material for my home?
When choosing roofing material, consider factors such as durability, aesthetics, energy efficiency, and local weather conditions. Asphalt shingles are popular due to affordability and ease of installation, but metal, wood, or slate can be more durable options for certain homes.

6. How does roof ventilation affect my roof's performance?
Proper roof ventilation helps regulate temperature and moisture levels in your attic. Without adequate ventilation, excess heat and moisture can damage the roof structure, leading to mold, rot, and premature roof deterioration.

7. What role does flashing play in my roof replacement?
Flashing is installed around vulnerable areas like chimneys, vents, and roof valleys to prevent water infiltration. It is a crucial part of the roof that protects against leaks and water damage in high-risk areas.

8. Can I replace my roof myself, or should I hire a professional?
While some homeowners may attempt a DIY roof replacement, it is generally not recommended. Roofing replacement requires expertise to ensure proper installation and avoid costly mistakes. Hiring a professional ensures the job is done right and complies with local building codes.

9. How often should I replace my roof?
The lifespan of a roof varies depending on the material used. Asphalt shingles typically last 20 to 30 years, while metal roofs can last 40 to 70 years. Regular inspections and maintenance can help extend the life of your roof and prevent the need for early replacement.

10. Are roof replacements covered by insurance?
Homeowners' insurance may cover roof replacements if the damage is due to a covered event, such as a storm. Wear and tear or age-related damage is generally not covered. It is important to review your policy and contact your insurance provider to understand your coverage.

Roof Ridge Cap Shingles: 11-Step Installation Guide

A close view of ridge cap shingles of a roof

Ridge cap shingles are an essential component of a roofing system. They provide the finishing touch that seals the ridge of your roof, offering protection against water infiltration and enhancing the overall aesthetics. Proper installation of ridge cap shingles ensures the durability and performance of your roof. This guide will walk you through the step-by-step process of installing ridge cap shingles, from preparation to final inspection.

Inside this blog:

  • Why Ridge Cap Shingles Are Important
  • A Helpful Installation Guide
  • Common Mistakes to Avoid

Why Ridge Cap Shingles Are Important

Before diving into the installation process, it’s essential to understand the significance of ridge cap shingles. These shingles:

  • Seal the Roof Ridge: They cover the peak of the roof where two roof planes meet, providing a watertight seal.
  • Enhance Durability: Properly installed ridge cap shingles help prevent wind uplift and water infiltration.
  • Improve Aesthetics: They give the roof a finished look, contributing to the overall curb appeal of the home.

Tools and Materials Needed

Gather the necessary tools and materials before starting the installation:

  • Ridge cap shingles
  • Roofing nails (1 1/2 to 2 inches)
  • Hammer or pneumatic nailer
  • Utility knife or shingle cutter
  • Chalk line
  • Roofing adhesive (optional)
  • Ladder or scaffolding
  • Safety harness
  • Work gloves
  • Measuring tape

A Helpful Installation Guide

Follow these steps to install ridge cap shingles:

1. Preparation and Safety

Safety is paramount when working on a roof. Ensure you have a sturdy ladder and wear a safety harness to prevent falls. It’s also recommended to work with a partner who can assist you and provide additional safety oversight.

2. Remove Old Ridge Cap Shingles

If you are replacing old ridge cap shingles, use a pry bar or roofing shovel to carefully remove them. Be gentle to avoid damaging the underlying roof deck. Clear away any debris and inspect the roof for any damage that needs repair before installing the new shingles.

3. Measure and Cut Ridge Cap Shingles

Measure the length of the roof ridge to determine how many ridge cap shingles you’ll need. Ridge cap shingles often come in bundles with three connected shingles that you can easily cut apart with a utility knife. Each piece typically covers about 1 foot of ridge line.

4. Snap a Chalk Line

Using a chalk line, mark a straight line along the ridge. This will serve as a guide to ensure your shingles are aligned properly. A straight line is crucial for both the aesthetic appearance and functionality of the ridge cap shingles.

5. Start at the End of the Ridge

Begin installing the ridge cap shingles at the end of the ridge that’s opposite the prevailing wind direction. This ensures that the shingles overlap in a way that provides maximum protection against wind-driven rain.

6. Install the First Ridge Cap Shingle

Place the first ridge cap shingle over the ridge, centering it over the peak. Ensure that the end of the shingle extends over the edge of the roof. Secure the shingle with roofing nails, placing a nail on each side about 1 inch above the overlap line. If you’re using roofing adhesive, apply a bead along the underside edges of the shingle for extra security.

7. Overlap and Nail Down Subsequent Shingles

Continue placing the next ridge cap shingle so that it overlaps the first one by about half an inch. Secure it with nails in the same manner. Ensure each shingle is aligned with your chalk line and properly overlapped to maintain a seamless and watertight seal.

8. Maintain Consistent Overlap

As you proceed along the ridge, maintain a consistent overlap to ensure uniform coverage and appearance. Check periodically to make sure the shingles are aligned with the chalk line and adjust as necessary to keep the installation straight.

9. Cut the Final Shingle to Fit

When you reach the end of the ridge, measure the remaining space and cut the final shingle to size using a utility knife. Ensure the cut end is securely nailed down and covered with a roofing adhesive.

10. Seal the Ridge Caps

For additional protection against wind and rain, you can apply roofing adhesive under the edges of the ridge cap shingles. This extra step helps to secure the shingles and prevent them from lifting in high winds.

11. Final Inspection

Once all the ridge cap shingles are installed, perform a final inspection. Check for any exposed nails, loose shingles, or misaligned pieces. Ensure that all shingles are securely fastened, and the ridge line is straight and properly covered.

A close up of ridge shingle


Common Mistakes to Avoid

To ensure the successful installation of a new roof, be aware of these common mistakes and how to avoid them:

  • Incorrect Nail Placement: Nails should be placed properly to avoid exposure and ensure a secure fit. Placing nails too close to the edge can lead to shingle lifting.
  • Improper Overlap: Consistent overlap is crucial. Too little overlap can lead to leaks, while too much can waste materials and look uneven.
  • Skipping the Chalk Line: Not using a chalk line can result in crooked installation, affecting both aesthetics and functionality.
  • Neglecting Safety: Always prioritize safety by using appropriate gear and working with a partner when possible.

Maintenance Tips for Ridge Cap Shingles

Proper maintenance can significantly extend the life of your ridge cap shingles and overall roofing system. Here are a few tips:

  • Regular Inspections: Conduct regular roof inspections, especially after severe weather, to check for any damage or loose shingles.
  • Clean Debris: Keep the roof free of debris such as leaves and branches that can trap moisture and cause damage.
  • Repair Promptly: Address any signs of wear and tear promptly to prevent small issues from becoming major problems.
  • Professional Inspection: Schedule periodic professional inspections to ensure your roof remains in good condition and any potential issues are addressed early.

We’ll Be Happy To Install Your Roof Shingles

Installing ridge cap shingles is an essential task that contributes significantly to the overall performance and appearance of your roof. By following this step-by-step guide, you can ensure a successful installation that will protect your home for many years. Contact Alamo Roofing for a professional roofing assessment and let us take care of all your roofing needs. Whether you’re looking to install new ridge cap shingles, repair existing ones, or require a complete roof overhaul, Alamo Roofing has you covered.

Are Composite Roof Shingles Any Good? (Pros & Cons)

Are Composite Roof Shingles Any Good? (Pros & Cons)

When it comes to choosing the right roofing material for your home, the options can seem endless. Among the choices available, composite roof shingles have been gaining popularity for their durability and aesthetic appeal. But are they really any good? Let’s dive into the world of composite roof shingles to uncover their pros and cons, helping you make an informed decision for your home.

Inside this blog:

  • The pros + cons of composite roof shingles that homeowners should know
  • How to decide whether composite roofing shingles are right for your home

Keep reading to learn about composite roof shingles and if they’re exactly what your home needs for a makeover!

What Are Composite Roof Shingles?

composite-shingles

Before we dive into the pros and cons, let’s start with the basics. Composite roof shingles are engineered roofing materials made from a blend of materials, typically including asphalt, fiberglass, and recycled materials like plastic or rubber. This combination creates a durable and versatile roofing option that mimics the look of traditional materials like wood or slate but with added benefits.

👍 The Pros: Why Composite Roof Shingles Might Be Right for You

Composite roof shingles offer several advantages that make them a compelling choice for homeowners. Here are some of the key pros to consider:

Durability

Composite shingles are designed to withstand the elements, including harsh weather conditions like wind, rain, and hail. They are less prone to cracking, splitting, or warping compared to traditional materials.

Aesthetic Appeal

These shingles come in a wide range of colors, styles, and textures, allowing homeowners to achieve the look of wood shakes, slate, or tile without the associated maintenance or cost.

Affordability

Composite roof shingles are often more budget-friendly than their natural counterparts, making them an attractive option for homeowners looking to achieve a high-end look without breaking the bank.

Easy Installation

Unlike some other roofing materials that require specialized installation techniques, composite shingles are relatively easy to install, which can help reduce labor costs and installation time.

🤔 The Cons: Considerations to Keep in Mind Before Choosing Composite Shingles

While composite roof shingles offer many benefits, there are also some potential drawbacks to be aware of. Here are a few cons to consider:

Limited Lifespan

While composite shingles are durable, they may not last as long as some natural materials like slate or tile. Depending on the quality of the shingles and environmental factors, they may need to be replaced sooner than expected.

Susceptibility to Algae and Moss

moss-roof

Some composite shingles may be more prone to algae and moss growth, particularly in humid climates or areas with significant shade. Regular maintenance, such as cleaning and treatment, may be necessary to prevent these issues.

Environmental Impact

While composite shingles often contain recycled materials, they may not be as environmentally friendly as other options like metal roofing or cedar shakes. Additionally, the production process for composite shingles may involve the use of fossil fuels and other resources.

Is Composite Roofing Right for You? Factors to Consider

Now that we’ve explored the pros and cons of composite roof shingles, how do you determine if they’re the right choice for your home? Here are some factors to consider:

1. Climate

When picking roofing materials like composite shingles, it’s crucial to think about where you live and what kind of weather you face. Are you in a place with mild, predictable weather, or do you deal with extreme conditions like heavy storms or scorching heat? Composite shingles are pretty good all-rounders, but they might struggle a bit in places with really harsh weather. So, it’s essential to consider if they’re the right fit for your climate.

  • Moderate Climates: In areas where the weather tends to be on the milder side, composite shingles can be a great choice. They’re durable enough to handle occasional rain or snow without any trouble.
  • Extreme Conditions: However, if you live somewhere with extreme weather conditions like hurricanes, heavy snowfall, or intense heat waves, you might want to think twice about composite shingles. They might not hold up as well under these extreme circumstances, and you might need a more robust roofing option.

2. Budget

Let’s talk about money. When it comes to roofing materials, cost is a big factor for many homeowners. Composite shingles often seem like a wallet-friendly option upfront, but it’s essential to look at the bigger picture. Sure, they might cost less initially, but what about down the line? Are you prepared for potential repair or replacement costs in the future?

  • Affordable Upfront: Composite shingles typically come with a lower price tag compared to other roofing materials, which can be appealing if you’re on a tight budget.
  • Long-Term Costs: However, it’s crucial to consider the long-term costs and potential lifespan of composite shingles. While they might save you money upfront, they might need to be replaced sooner than other options, which could end up costing you more in the long run.

3. Aesthetic Preferences

Your home’s appearance matters, and your roof plays a significant role in its overall look. Luckily, composite shingles come in a wide range of colors and styles, giving you plenty of options to match your home’s aesthetic.

  • Versatile Styles: Whether you prefer the classic look of asphalt shingles or want something that mimics the appearance of wood shakes or slate tiles, composite shingles have you covered.
  • Color Options: From earthy tones to vibrant hues, composite shingles offer a variety of color options to suit your personal taste and complement your home’s exterior.

4. Maintenance

Nobody likes spending their weekends cleaning gutters or repairing roof damage. When choosing roofing materials, it’s essential to consider how much maintenance they require. Composite shingles are relatively low-maintenance compared to natural materials like wood or slate, but they still need some TLC to keep them in good condition.

  • Less Maintenance: Composite shingles generally require less maintenance than other roofing materials. They’re resistant to rot, decay, and insect damage, so you won’t have to worry about regular treatments or repairs.
  • Periodic Cleaning: However, it’s still essential to perform periodic cleaning and inspections to ensure your composite shingles stay in top shape. Removing debris and keeping your gutters clear can help prevent water damage and prolong the lifespan of your roof.

🏡 Making the Right Choice for Your Home When it Comes to Your Roof

Composite roof shingles offer a durable, affordable, and aesthetically pleasing option for homeowners in search of a reliable roofing material. By weighing the pros and cons and considering factors like climate, budget, and maintenance preferences, you can make an informed decision that meets your needs and enhances the beauty and value of your home.

So, whether you’re building a new home or considering a roof replacement, don’t overlook the potential benefits of composite shingles for your humble abode.

Contact our expert team at Alamo Roofing Contractors today and experience top-notch customer service and committed craftsmanship. We can’t wait to hear your questions and ideas about your next home improvement project! Get in touch with us today and we’ll get the ball rolling.

Avg. Cost of Metal Roof vs Shingle Roof (2024 Analysis)

Avg. Cost of Metal Roof vs Shingle Roof (2024 Analysis)

When it comes to protecting your home from unpredictable weather, your roof is without a question your first line of defense. But with so many options out there, how do you decide between a classic shingle roof or a sturdy, cutting-edge metal one? Don’t worry, in this article we’re diving into the nitty-gritty of these two roof choices in 2024 so that you can make an informed decision.

Inside this blog:

  • Breaking down metal and shingle roofs based on their durability, environmental impact, and installation and maintenance requirements
  • A cost analysis comparing the average costs between metal and shingle roofs for homeowners to consider in 2024
  • 4 factors to consider when choosing between these two roofs for your home

Keep reading to learn which type of roofing system is right for you!

The Battle of the Roofs: Metal vs. Shingle

Metal or shingle? Let’s break it down.

Durability

When it comes to your home’s roof, there’s no question that durability is the most important factor in keeping you and your loved ones safe. So, let’s take a closer look at the resilience of these two roofing types.

Metal Roofs

metal-roof

  • Tough as nails
  • Withstands extreme weather conditions like a champ
  • Lifespan of 40-70 years, sometimes even longer

Shingle Roofs

  • Reliable, but not as rugged as metal
  • Prone to damage in harsh weather
  • Lifespan typically around 20-30 years

Environmental Impact

Let’s explore which one of these roofs may have a better impact on our environment.

Metal Roofs

  • Often made from recycled materials
  • Fully recyclable at the end of its life cycle
  • Reflects sunlight, reducing energy consumption for cooling

Shingle Roofs

  • Typically made from asphalt, which is petroleum-based
  • Contributes to landfill waste when replaced
  • Less energy-efficient due to heat absorption

Installation and Maintenance

Time to roll up our sleeves. Which roof is easier to install and maintain?

Metal Roofs

  • Lightweight and easy to install
  • A metal roof installation requires minimal maintenance over its lifespan
  • Prone to denting if not installed properly, though

Shingle Roofs

  • An asphalt shingle roof requires professional installation but generally straightforward
  • More prone to damage and requires regular inspections and repairs
  • Susceptible to moss and algae growth, requiring cleaning

Cost of Metal vs Shingle Roof

Now, let’s talk money. The age-old question: Which roofing option is cheaper upfront and in the long run?

Metal Roof

  • Metal roofing typically has a higher upfront cost
  • Lower long-term cost due to longevity and minimal maintenance
  • Avg. cost per square foot: $7.50 – $12.50

Shingle Roof

asphalt-roof

  • Asphalt shingles typically have a lower upfront cost compared to metal
  • They may require more frequent repairs and replacements over time, increasing long-term costs
  • Avg. cost per square foot: $3.50 – $7.50

🤔 The Verdict: What’s Right for You?

Choosing between a metal roof and a shingle roof ultimately depends on your priorities and budget. Here are 4 factors to consider:

1. Budget: Opting for Shingles to Mind Your Finances

For those mindful of their financial bottom line, shingles emerge as a prudent choice. With a comparatively modest initial investment, shingle roofs present an appealing avenue to navigate the roofing landscape without draining your savings. However, it’s essential to note that while shingles may alleviate immediate budgetary concerns, they may incur greater long-term expenses due to potential repair and replacement needs.

Thus, while shingles offer an accessible entry point, it’s wise to consider the broader financial implications over time.

2. Longevity: Metal Roofs for Endurance and Investment

In the pursuit of enduring quality, metal roofs emerge as stalwart contenders. Designed to withstand the tests of time, metal roofs boast an impressive lifespan that often outpaces the tenure of homeownership. While the upfront costs may appear steep, viewing it as a strategic investment yields significant returns over the years.

With a metal roof overhead, homeowners can relish in the assurance of prolonged durability, mitigating concerns of frequent repairs or replacements. For those envisioning a lasting legacy within their home, the enduring appeal of metal roofs stands as a compelling choice.

3. Environment: Embracing Sustainability with Metal Roofs

For environmentally-conscious individuals, the allure of metal roofs lies in their eco-friendly credentials. Crafted from recycled materials and boasting recyclability at the end of their lifecycle, metal roofs embody sustainability at its core. Beyond their recyclability, metal roofs serve as champions of energy efficiency, reflecting sunlight to reduce cooling demands.

By opting for a metal roof, homeowners not only minimize their ecological footprint but also contribute to a greener, more sustainable future. For those prioritizing environmental stewardship, the choice of a metal roof aligns seamlessly with their values.

4. Aesthetics: Harmonizing Roofing Choices with Home Style

In the realm of aesthetics, roofing choices play a pivotal role in shaping the visual identity of a home. Whether it’s the timeless charm of shingles or the contemporary allure of metal, each option bears its distinct visual appeal. To ensure harmony between roof and home style, careful consideration of architectural elements and design motifs is paramount. By aligning roofing materials with the overarching aesthetic vision, homeowners can elevate the curb appeal of their abode, enhancing its allure and character.

Ultimately, the choice between shingles and metal roofs serves as a creative expression of homeowners’ stylistic preferences, enriching the visual tapestry of residential landscapes.

🏠 Metal vs Shingle: Which Roof Will You Choose For Your Home?

In the battle of metal vs. shingle roofs, there’s no one-size-fits-all answer. Both options have their pros and cons, so it’s essential to weigh them carefully before making a decision. Whether you’re drawn to the durability of metal or the classic appeal of shingles, remember to prioritize what’s best for your home and your budget.

Contact our expert team at Alamo Roofing Contractors today and experience top-notch customer service and committed craftsmanship. We can’t wait to hear your questions and ideas about your next home improvement project! Get in touch with us today and we’ll get the ball rolling.

How to Install Roof Shingles in 9 Steps (DIY Guide)

How to Install Roof Shingles in 9 Steps (DIY Guide)

So, you’ve decided to take on the challenge of installing roof shingles yourself – kudos to you for tackling this DIY project! Whether you’re replacing damaged shingles or giving your home a fresh new look, installing roof shingles is a task that can be done with the right tools, materials, and a bit of elbow grease. In this guide, we’ll walk you through the process in nine simple steps, empowering you to transform your roof and elevate your home’s curb appeal like a pro.

Inside this blog:

  • 9 actionable steps for shingling your roof like a pro
  • Details under each step to ensure a successful shingle installment 

Keep reading to learn how you can shingle your own roof in true DIY fashion!

Step 1: Gather Your Tools and Materials

Before you climb up that ladder, make sure you have all the necessary tools and materials on hand. Here’s what you’ll need:

  • Tools: Hammer, roofing nails, utility knife, chalk line, roofing nail gun (optional), ladder, safety harness
  • Materials: Roof shingles, underlayment, drip edge, flashing, roofing cement, roofing adhesive

Step 2: Prepare the Roof Surface

Once you’re equipped with the right tools and materials, it’s time to prepare the roof surface for a roof replacement shingle installation. Here’s what to do:

Remove Old Roofing Materials

When it’s time to swap out those old, tired shingles for shiny new ones, you’ve got to start by getting rid of the old ones. Here’s how:

  • Get the Right Tools: Grab yourself a pry bar or a roofing shovel – these babies are your ticket to shingle removal success.
  • Take it Slow: Carefully pry up the old asphalt shingles, starting from the bottom edge of the roof and working your way up. Be gentle to avoid damaging the roof deck underneath.

Inspect the Deck

install-roof-decking

Now that you’ve cleared away the old shingles, it’s time to take a good look at the roof deck underneath. This step is crucial for ensuring that your new shingles have a solid foundation to rest on. Here’s what to do:

  • Get Up Close and Personal: Take a close look at the roof deck, paying attention to any signs of damage or rot. Look for things like sagging, soft spots, or discoloration – these could indicate trouble.
  • Don’t Skip the Corners: Make sure to inspect every corner and crevice of the roof deck, including areas near chimneys, vents, and other protrusions.

Step 3: Install the Underlayment

The underlayment acts as a protective barrier between the roof deck and the shingles, helping to prevent water infiltration and prolong the life of your roof. Follow these steps to install the underlayment:

  • Roll Out the Underlayment: Start at the bottom edge of the roof and roll out the underlayment horizontally, overlapping each row by a few inches.
  • Secure in Place: Use roofing nails or staples to secure the underlayment to the roof deck, ensuring a tight seal.

Step 4: Apply Drip Edge and Flashing

Drip edge and flashing help to direct water away from vulnerable areas of the roof, such as the eaves and valleys. Here’s how to install them:

  • Install Drip Edge: Nail the drip edge along the eaves of the roof, overlapping the underlayment.
  • Place Flashing: Apply flashing along roof valleys, chimneys, and other protrusions, securing it with roofing nails or screws.

Step 5: Snap Chalk Lines

Before you start laying down shingles, it’s essential to snap chalk lines on the roof to ensure straight and even rows. Here’s how to do it:

  • Mark Starting Point: Determine where you want to start laying shingles and mark this point on the roof.
  • Snap Lines: Use a chalk line to snap horizontal lines across the roof, guiding the placement of the first row of shingles.

Step 6: Begin Shingling

Now comes the fun part – laying down the shingles! Follow these steps for a professional-looking installation:

  • Start at the Bottom: Begin at the bottom edge of the roof and work your way up, overlapping each row of shingles as you go.
  • Nail in Place: Use roofing nails to secure each shingle, placing them near the top edge to ensure they’re covered by the next row.

Step 7: Cut Shingles as Needed

As you work your way up the roof, you’ll likely encounter areas where full shingles won’t fit. Use a utility knife to trim shingles to size as needed, ensuring a neat and tidy appearance.

Step 8: Install Ridge Caps

roof-ridge-cap

Once you’ve reached the top of the roof, it’s time to install ridge caps to finish off the job. Ridge caps cover the peak of the roof and provide additional protection against water infiltration. Here’s how to install them:

  • Cut Ridge Caps: Use a utility knife to cut ridge caps to size, ensuring they fit snugly along the peak of the roof.
  • Secure in Place: Nail ridge caps in place along the ridge of the roof, overlapping each cap to create a watertight seal.

Step 9: Perform a Final Inspection

Congratulations – you’ve successfully installed roof shingles like a pro! Before you call it a day, take a moment to perform a final inspection to ensure everything is in order:

  • Check for Loose Shingles: Make sure all shingles are securely fastened and there are no loose or missing nails.
  • Inspect Seals: Check that all flashing and ridge caps are properly sealed to prevent water infiltration.
  • Clean Up: Remove any debris from the roof and surrounding area, leaving your home looking clean and tidy.

Enjoy Your Newly Shingled Roof

With these nine simple steps, you’ve transformed your roof and added value to your home. Whether you’re tackling a small repair or giving your entire roof a facelift, installing roof shingles yourself is a rewarding DIY project that can save you time and money. So, grab your tools, don your safety gear, and get ready to elevate your home’s curb appeal one shingle at a time!

Contact our expert team at Alamo Roofing Contractors today and experience top-notch customer service and committed craftsmanship. We can’t wait to hear your questions and ideas about your next home improvement project! Get in touch with us today and we’ll get the ball rolling.

How Long Do Roof Shingles Last? (On Average)

How Long Do Roof Shingles Last? (On Average)

If you’re a homeowner, you know that your roof is a crucial part of your house’s protection and curb appeal. And when it comes to the roof, one question that often lingers is, “How long do roof shingles last?” But before you start worrying that your roof shingles are going to fall apart and leave an unintended, huge skylight in your ceiling; let us break down the average shingle lifespan for you. 

Think it may be time to upgrade your roofing system?

In this guide, we’ll focus particularly on the common asphalt shingles and the popular architectural shingles.

Inside this blog:

  • A brief overview of asphalt shingles vs architectural shingles
  • 5 key factors that affect the longevity of roof shingles

Keep reading to discover how long your roof shingles will last and what you can do to ensure they remain a solid protector of your home.

Understanding the Basics of Your Roof Shingles

Before we dive into the nitty-gritty of shingle lifespan, let’s get familiar with the different types of roof shingles commonly used. The two primary types are asphalt and architectural shingles. 

Asphalt Shingles

These are the most common type of shingles found on residential roofs. They are affordable, easy to install, and come in various colors and styles. Asphalt shingles have a relatively shorter lifespan compared to architectural shingles.

Architectural Shingles

architectural-shingles

These shingles are a bit more expensive but offer better durability and aesthetics. They are thicker and come in a variety of textures, making them a popular choice for homeowners looking for longevity and style.

Average Lifespan of Roof Shingles ⏳

The lifespan of roof shingles can vary depending on several factors. Here’s a rough estimate of how long you can expect your shingles to last:

Asphalt Shingles

On average, asphalt shingles can last anywhere from 15 to 30 years. This lifespan depends on factors like climate, maintenance, and the quality of the shingles themselves.

Architectural Shingles

These shingles have a longer lifespan, typically ranging from 25 to 50 years. With proper care and maintenance, some high-quality architectural shingles can even last up to 50 years or more.

5 Factors Affecting Shingle Longevity 

Several factors play a role in determining how long your roof shingles will last. Let’s break them down:

1. Climate

The weather in your region is a significant factor. Shingles in areas with harsh climates, such as extreme heat or cold, may deteriorate faster.

2. Quality of Shingles

Investing in high-quality shingles can make a big difference. Cheaper shingles might save you money upfront, but they often have a shorter lifespan.

3. Installation

install-roof-shingles

Proper installation is crucial. Shingles that are not installed correctly may fail prematurely.

4. Maintenance

Regular roof inspections and maintenance can extend the life of your shingles. Clean gutters, remove debris, and check for any damaged or missing shingles.

5. Ventilation

Proper attic ventilation can help regulate temperature and humidity, reducing the strain on your shingles.

Signs Your Shingles Need Attention 🛑

Now that you know the average lifespan and the factors affecting it, here are some signs that your roof shingles may need your attention:

  • Curling or Buckling: If your shingles are curling at the edges or buckling, it’s a sign of aging and wear.
  • Missing Shingles: Missing shingles leave your roof vulnerable to leaks and further damage.
  • Granule Loss: If you find granules from your shingles in your gutter, it’s a sign of shingle deterioration.
  • Moss or Algae Growth: The growth of moss or algae can lead to shingle decay.
  • Water Stains on Ceilings: If you notice water stains on your interior ceilings, it’s a clear indication of a potential roof leak.

Roof Shingle Maintenance

To make your roof shingles last as long as possible, here are some maintenance tips:

  • Regular Inspections: Schedule annual roof inspections to catch any issues early.
  • Clean Gutters: Clogged gutters can lead to water backup and damage your shingles.
  • Trim Overhanging Trees: Branches rubbing against your roof can cause shingle damage.
  • Remove Debris: Keep your roof clear of leaves, branches, and other debris.
  • Professional Repairs: If you notice any issues, don’t hesitate to call a professional roofer for repairs.

Roof Shingle Types: Pros + Cons

Let’s break down the pros and cons of the two most common shingle types:

Asphalt Shingles

✔️Pros: An asphalt roof is affordable, easy to install, and comes in various styles and colors.

✖️Cons: An asphalt shingle roof has a longer lifespan compared to architectural shingles, but it may not withstand severe weather as well.

Architectural Shingles:

✔️Pros: Longer lifespan, better durability, and a wide range of textures and styles.

✖️Cons: More expensive upfront cost.

When to Consider a Roof Replacement

So, when is it time to consider replacing your roof shingles? Here are some scenarios:

  • If your shingles have reached or exceeded their expected lifespan.
  • If you’re experiencing frequent leaks or water damage.
  • If your shingles show signs of extensive damage or deterioration.
  • If you’re planning to sell your home and want to increase its value.

Cost of a Roof Shingle Replacement

The cost of replacing your roof shingles can vary widely depending on factors like the type of shingles, your location, and the size of your roof. On average, you can expect to pay anywhere from $5,000 to $12,000 for a roof replacement. It’s essential to get multiple quotes from reputable roofing contractors to ensure you’re getting a fair price.

Get Shingles That Can Stand the Test of Time

In the world of homeownership, knowing how long roof shingles last is vital for maintaining the integrity and value of your home. While the average lifespan varies between asphalt and architectural shingles, the key takeaway is that proper maintenance and care can significantly extend the life of your roof. Regular inspections, prompt repairs, and choosing the right shingle type for your needs are all crucial steps in ensuring your roof stands strong for years to come.

So, whether you’re basking in the sun or braving the storms, your roof shingles will be your trusty protectors, keeping you safe and cozy inside your beloved home.

Reach out to our pro team of roofing contractors at Alamo Roofing today to get started on your next roof project! Whether you need a few minor repairs, a whole replacement, or you have questions about the roof that hangs over your home’s head, we’re excited to help you out!

(219) 224-2636