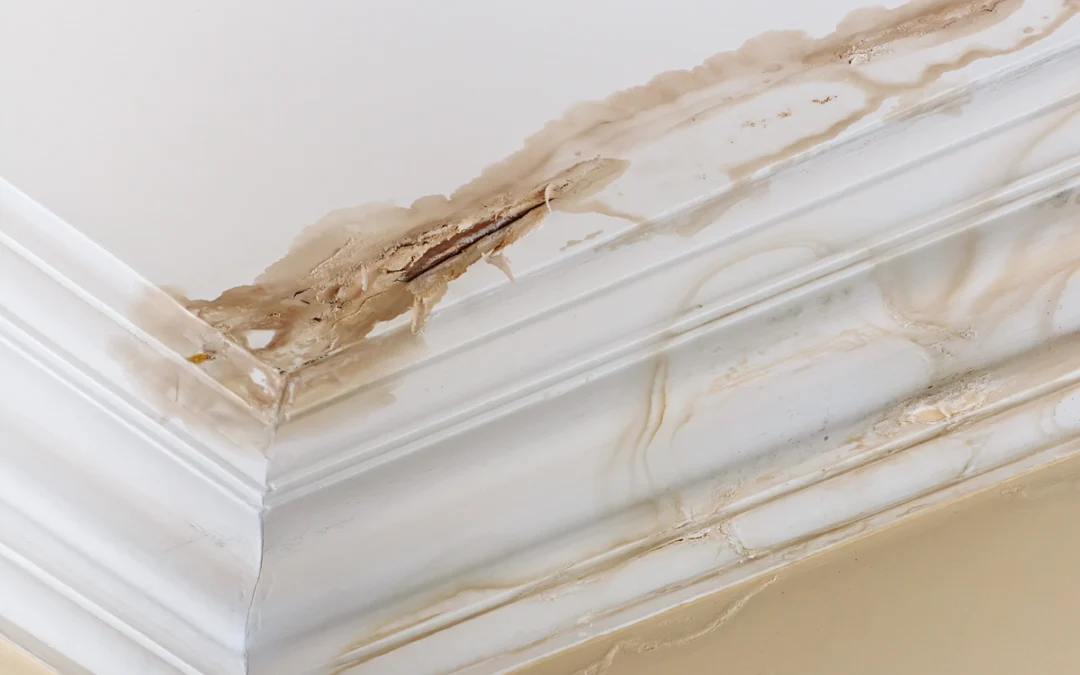
You walk into your home after a long day, only to discover a puddle on your living room floor. Yikes! Panic sets in as you realize you have a water leak. It’s a situation no homeowner wants to face, but it happens. When it does, knowing how to navigate the insurance claim process can make all the difference. In this guide, we’ll walk you through the steps to make a successful water leak insurance claim.
Inside this blog:
Pro tips for how to make a successful water leak insurance claim in 2024
Keep reading to discover all you need to know about water leak insurance claims and become an empowered homeowner!
Assess the Damage and Identify the Source 💧
The first step to making a successful water leak insurance claim is understanding the extent of the damage and identifying the source of the leak. Here’s what you should do:
Safety First: Ensure your safety and that of your family. If the leak poses electrical hazards or structural risks, vacate the premises until it’s safe to return.
Stop the Leak: If possible, stop the source of the leak to prevent further damage. This might involve turning off the main water supply or shutting off a specific valve.
Document the Damage: Take clear photos and videos of the damage. This visual evidence will be essential when filing your claim.
Identify the Cause: Determine what caused the leak. Was it a burst pipe, a faulty appliance, a roof leak, or roof storm damage? Understanding the cause will help when communicating with your insurance company.
Contact Your Insurance Company 📞
Now that you’ve assessed the damage, it’s time to contact your insurance company. Here are the key steps:
Review Your Policy: Before you make the call, review your insurance policy to understand what’s covered and what’s not. Pay attention to any deductibles or limits on coverage.
Report Promptly: Contact your insurance company as soon as possible. Many policies require you to report a claim within a certain timeframe.
Provide Detailed Information: Be ready to provide detailed information about the incident, including the date, time, and cause of the water leak.
Ask Questions: Don’t hesitate to ask questions about the claims process, what to expect, and the timeline for resolution.
Mitigate Further Damage 🛠️
While waiting for your insurance company to process your claim, it’s essential to take steps to prevent further damage. Here’s what you can do:
Temporary Repairs: If it’s safe and within your skillset, make temporary repairs to stop additional water from entering your home. This may involve patching a roof or sealing a leaky pipe.
Document Mitigation Efforts: Keep records of any steps you take to mitigate damage. This shows your proactive approach to minimizing the claim’s cost.
Keep Damaged Items: Don’t dispose of damaged items until your insurance adjuster has assessed them. They may need to inspect and document the damage.
Understand Your Coverage 💡
Understanding your insurance coverage is crucial to a successful claim. Policies can vary widely, so be aware of the following:
Coverage Types: Determine whether your policy covers the type of water leak you’ve experienced. For instance, some policies may cover burst pipes but not flood damage.
Deductibles: Know your deductible amount. This is the portion of the claim you’re responsible for paying out of pocket.
Coverage Limits: Be aware of any coverage limits on your policy. Some policies cap coverage for specific types of damage.
Exclusions: Familiarize yourself with any exclusions in your policy. Some common exclusions include damage from neglected maintenance or gradual water damage.
Document Everything 📝
A successful water leak insurance claim hinges on documentation. Here’s how to do it right:
Keep a Claim Journal: Create a claim journal to record all interactions with your insurance company. Note the date, time, people involved, and details of the conversation.
Save Correspondence: Keep copies of all emails, letters, or forms exchanged with your insurer. This includes your initial claim report and any follow-up communication.
Receipts and Invoices: Save receipts and invoices for repairs and expenses related to the leak. These will be crucial for reimbursement.
Cooperate with the Adjuster 🧐
Once you’ve filed your claim, your insurance company will assign an adjuster to assess the damage. Here’s how to work effectively with them:
Be Available: Make yourself available for the adjuster’s visit. Be punctual and cooperative during the inspection.
Provide Documentation: Share all documentation and evidence you’ve collected, including photos, videos, and repair estimates.
Ask Questions: Don’t hesitate to ask the adjuster questions about their assessment and the next steps in the process.
Review the Adjuster’s Report: Carefully review the adjuster’s report to ensure it accurately reflects the damage and the necessary repairs.
Negotiate Fairly and Persistently
In some cases, there may be disagreements between you and your insurance company about the settlement amount. Here’s how to handle negotiations:
Know Your Rights: Familiarize yourself with your rights as a policyholder. Insurance regulations can vary by state.
Get Multiple Estimates: If you believe the initial settlement offer is too low, obtain multiple repair estimates from reputable contractors. These estimates can support your case.
Appeal if Necessary: If negotiations stall, don’t be afraid to escalate the issue or request a review by a higher authority within the insurance company.
Consider Mediation: In cases of unresolved disputes, mediation may be an option to reach a fair settlement.
Seek Legal Advice: If all else fails, consult with an attorney experienced in insurance claims to explore your legal options.
Water Leak Insurance Claim: Be an Empowered Homeowner
Dealing with a water leak and the subsequent insurance claim can be stressful, but being prepared and informed can help you navigate the process smoothly. Remember to communicate clearly with your insurance company, document everything, and persistently pursue a fair settlement. With these steps, you’ll be on your way to resolving the issue and restoring your home to its pre-leak condition. Stay dry and good luck!
Contact our team of expert roofers at Alamo Roofing today and we’ll make sure your next roofing project goes as smoothly as possible. Let’s kickoff your next endeavor with a free estimate!
Indiana’s climate can bring hailstorms all year long. Most of the time, they do happen in spring and summer, but it isn’t shocking to experience a winter hail storm. What happens when those little blocks of ice smash into our homes and cause damage? What should we as homeowners be on the lookout for? Here is the information you need to know about damage when it comes to hail.
Damage Caused by Hail Size
Each size of hail can have varying amounts of damage. Here is a list of the common complications caused by the size of hail.
¾” Hail
This type of hail is around the size of a dime. Of course, the damage caused by this size of hail is substantially less than larger-sized hail, but can’t be overlooked. This size of hail will cause damage to vinyl siding, window screens, metal fascia, and deck paint.
1” Hail
If you experience hail this size, be prepared to do some cleanup. Hailstorm damage to your home will consist of cracking and dents on your shingles and siding. However, if winds accompany the storm, your home could have extra damage such as broken windows and holes in the walls. Gutters and downspouts can also require repair after this type of damage.
1 ¼” Hail
As the size of the hail increases, so does the destruction. Larger holes can occur or areas of weakness so it is wise to have an inspection done and address any areas of concern.
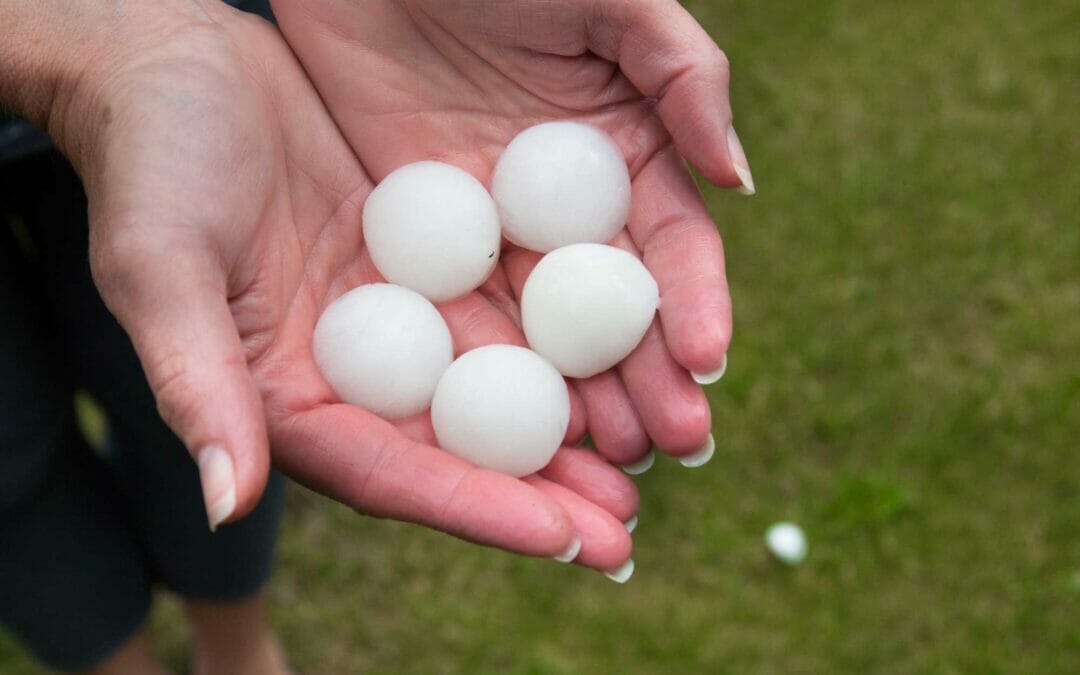
1 ½” Hail
Broken windows, dented vehicles, and structural damage can occur with hail this size. Be sure to stay inside when this type of storm is in your area as great bodily harm can occur. Hail this size is similar to the size of a ping-pong ball.
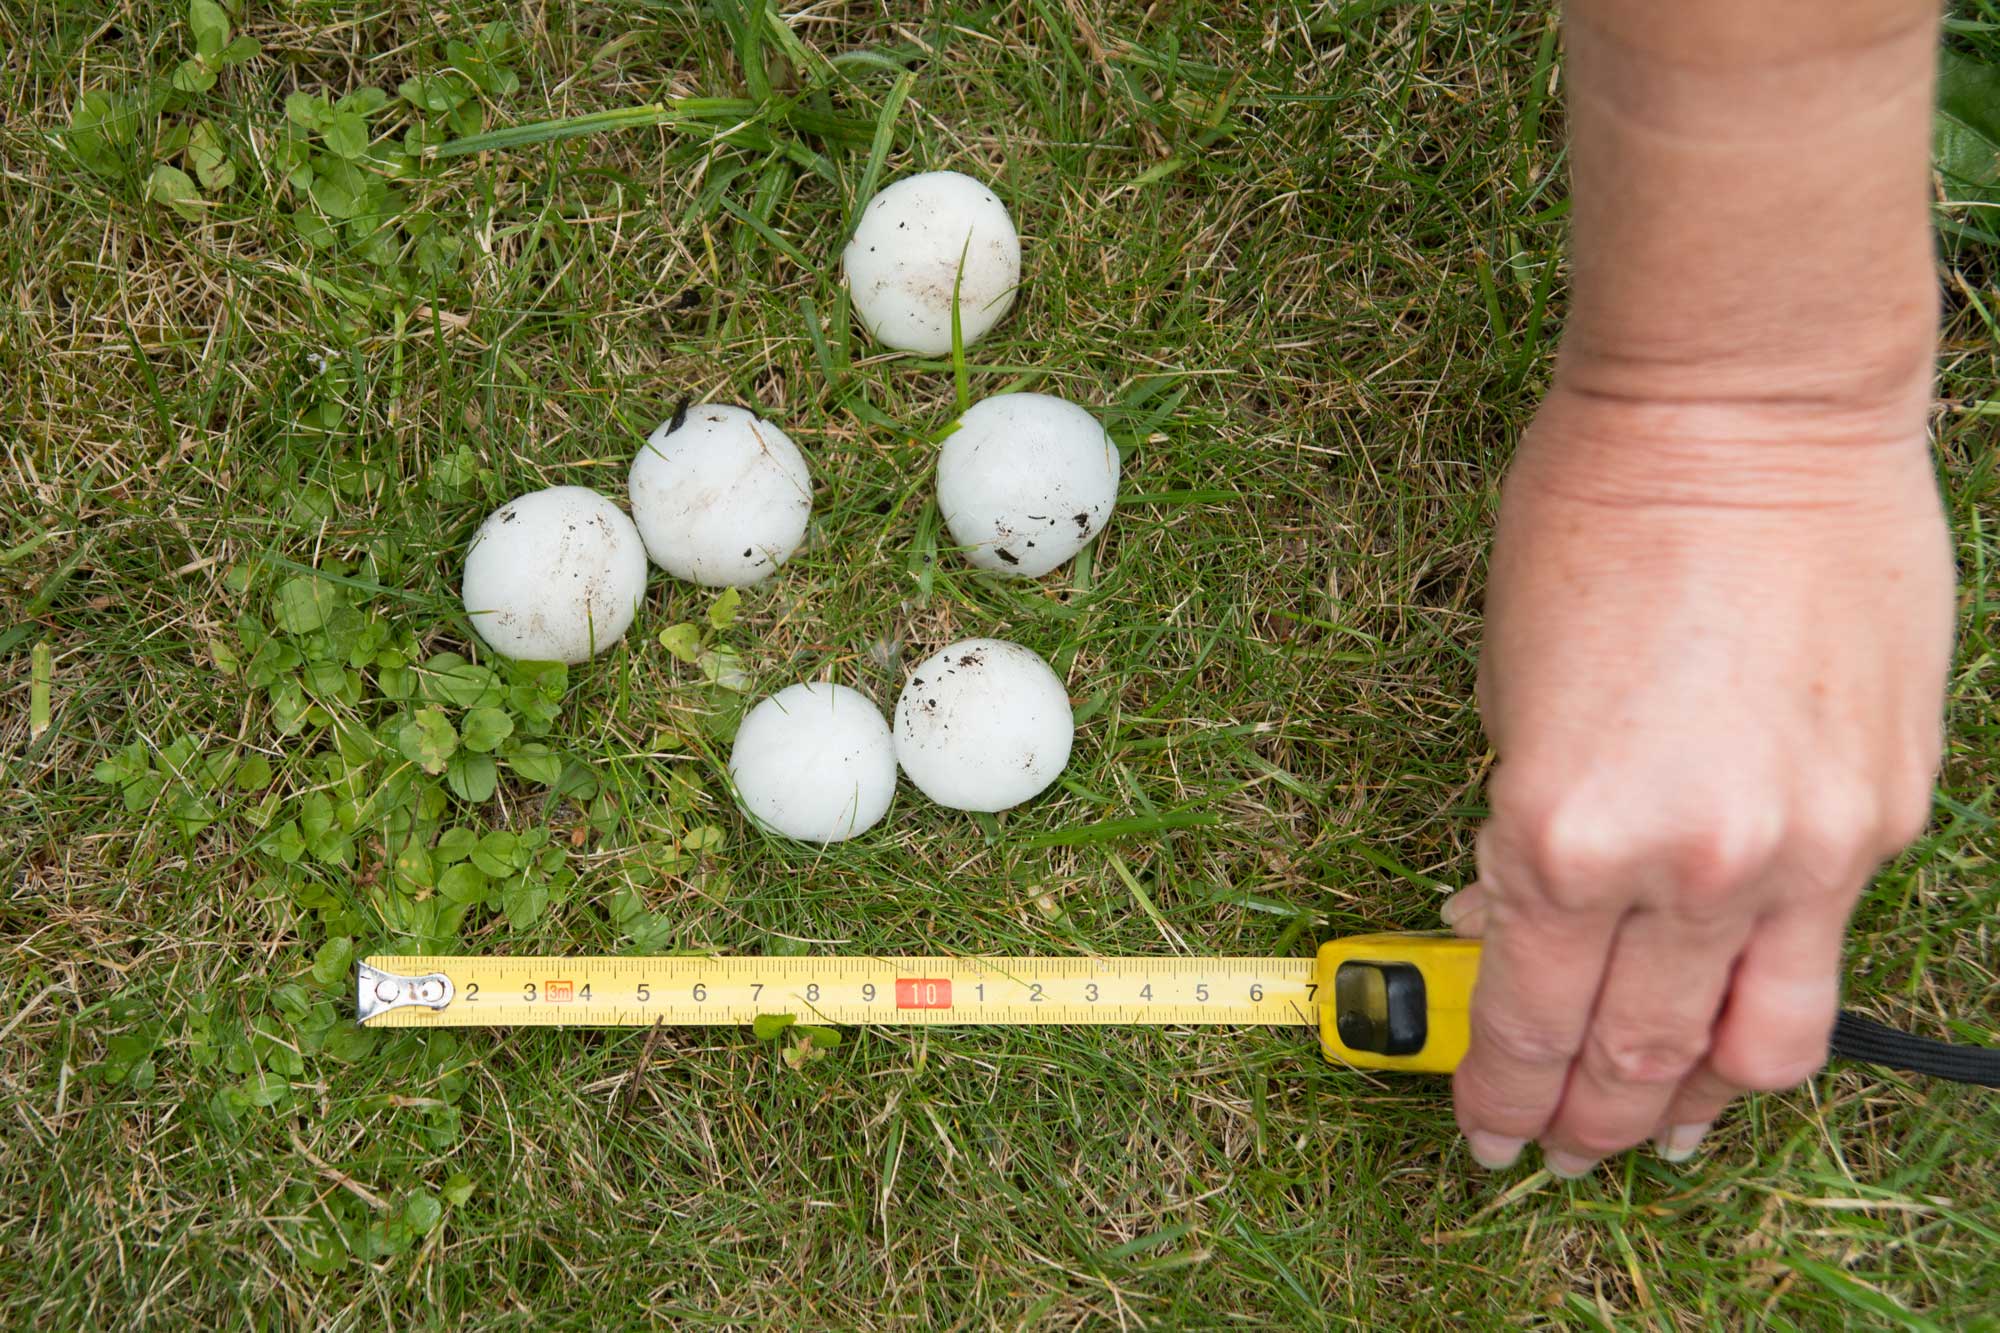
1 ¾” to 2” Hail
Quite a bit of complications can occur with hail close to a golf ball or tennis ball size. Siding can be ripped off the home, and shingles can turn into flying frisbees if the wind accompanies 2” size hail. If hail does increase to a larger size than 2”, substantial damage to your home and property will occur.
What are Some Things to Look for After a Hailstorm?
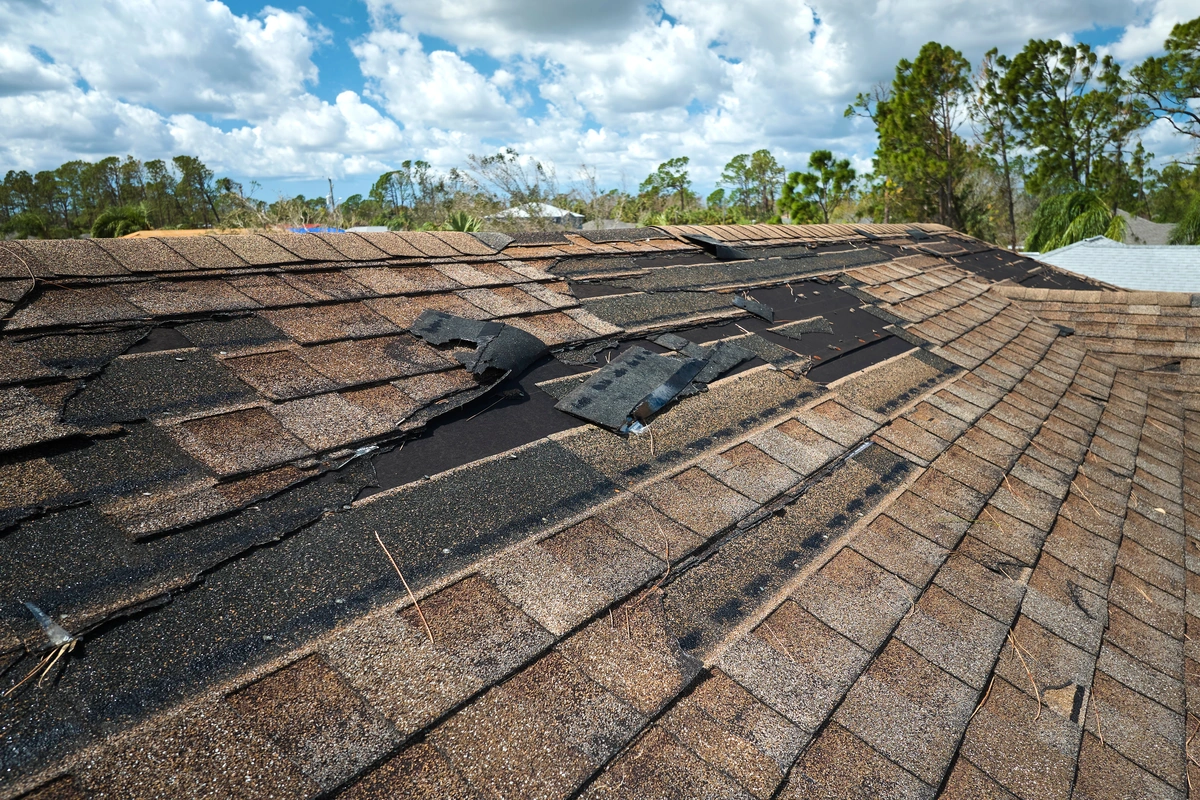
Here is a list of damages that can occur to your roof after a storm.
Granule loss of shingles
Black-colored dents in the roof
Bruised shingles
Impact marks or dents
Shingle tears
Split shingles
Peeling paint on the exterior of your home
Broken or cracked windows
What if Damage Goes Untreated?
If a homeowner doesn’t have the roof inspected after a hailstorm, further damage can occur. Water can leak through the roofing system, causing additional damages and future repair costs. Exposed areas must be repaired promptly to prevent complications.
Where Can I Turn to For an Inspection?
Place your trust in Alamo Construction roofing company in Portage for a thorough inspection after a storm. We are here to help the community get back on their feet and secure their homes after a major storm. It is possible there is damage underneath the shingles after such a storm, and to the untrained eye, the roof may seem to be intact. Always ask the roofing professionals at Alamo Construction to evaluate the roofing system to ensure quality and integrity in the system going forward. We can help with insurance claims processing to guide you through if a roof repair or replacement is needed.
If you think your home has been affected by hail and storm damage, don’t hesitate to contact us for assistance.
Last Sunday, residents in Joliet experienced severe weather at the beginning of what is shaping up to be a doozy of a storm season. Here’s the overview of what occurred:
What: 1-inch diameter hail
When: March 26, 2023
Where: Joliet, Il
What It Means for Your Home
Local news station Fox 32 Chicago reported on their website that areas of Joliet saw hail between roughly .5″ and 1″ inch in diameter while residents throughout the area reported even larger hail in the range of 1.75 to 2 inches in diameter.
That’s some huge hail – but what exactly does that mean for your home?
Generally, hail that is greater than 1″ in diameter will cause damage and warrants a professional inspection.
Hail this size can create dents in shingles as well as bruising in the underlayment.
You may see dents in your gutters and fascia.
Siding can become dented or even cracked.
Hail can tear holes in window and door screens.
Shingles will experience granule loss – this will be obvious from an excessive amount of granules in your gutter downspouts.
Larger hail, in the range of 1.5″ to 2″ in diameter is even more destructive.
In addition to the above problems, hail of this size can begin to penetrate softer parts of the roof like ridge caps and plastic roof vents.
Siding is more likely to crack and break – you may even see your siding tear off entirely from the combined pressure of hail strikes and high winds.
Windows and doors may show cracks in their glass from hail impacts.
Most metal fixtures will begin to show damage.
Take note, larger hail is generally caused by stronger winds – wind can be extremely damaging in its own right.
High winds will cause shingles to lift, curl, peel, or blow off the roof entirely.
Fallen limbs and other debris can cause extreme damage to the roof, siding, gutters, and other exterior fixtures.
Will County Storm Damage Resources
Will County Emergency Management Agency
The Will County Emergency Management Agency helpfully provides adequate emergency response capabilities within the local community. These responses are designed to help Will County residents throughout Joliet in the event of the county reports any storm damage to their properties, which will assist the National Weather Service in evaluating the extent of the damage to the area as well as the severity of the storm.
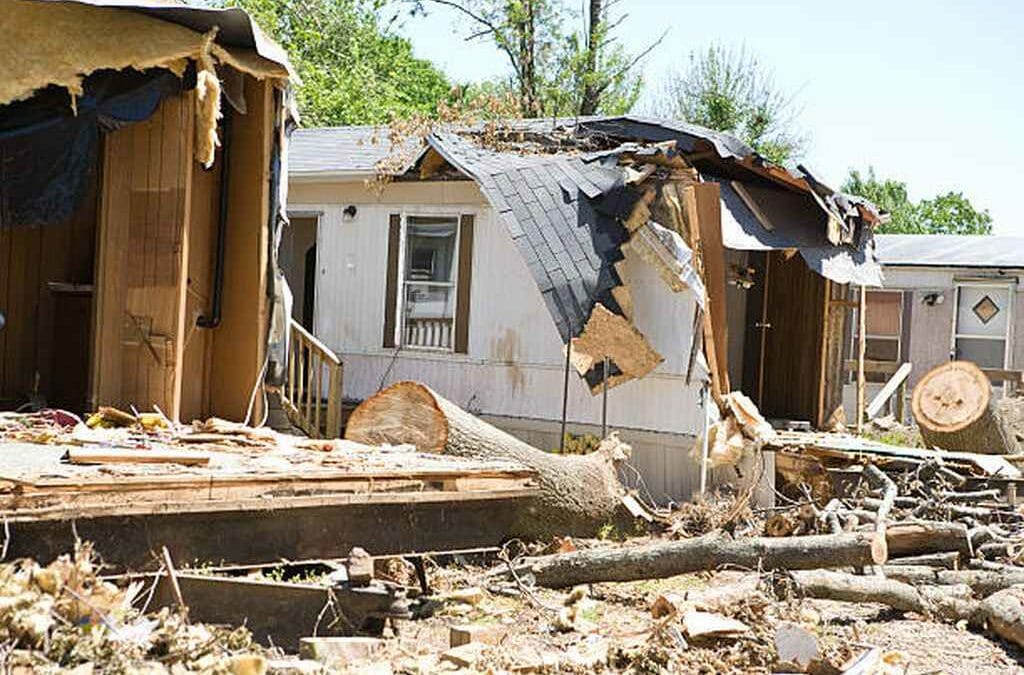
On Monday, June 13th, a supercell storm passed through Indiana and Illinois, leaving a trail of damage and destruction in its wake. Residents were warned to take cover and to limit all travel as much as possible.
Most of the damages caused were due to the intense wind gusts sweeping through the area. The National Weather Service recorded wind speeds of 100mph at the Fort Wayne International Airport. It is said to be the fastest recorded wind speed in the area. These wind speeds caused significant damage to buildings and hangars at the airport. One hangar had its walls, siding, and insulation completely ripped to shreds.
The winds slammed into neighborhoods across Indiana and Illinois, causing widespread power outages, toppling hundreds of trees, and battering homes. The Chicago Department of Streets and Sanitation received over 300 tree emergency calls during the storm. Uprooted trees were blocking roadways, destroyed fences, broke powerlines and collapsed on homes.
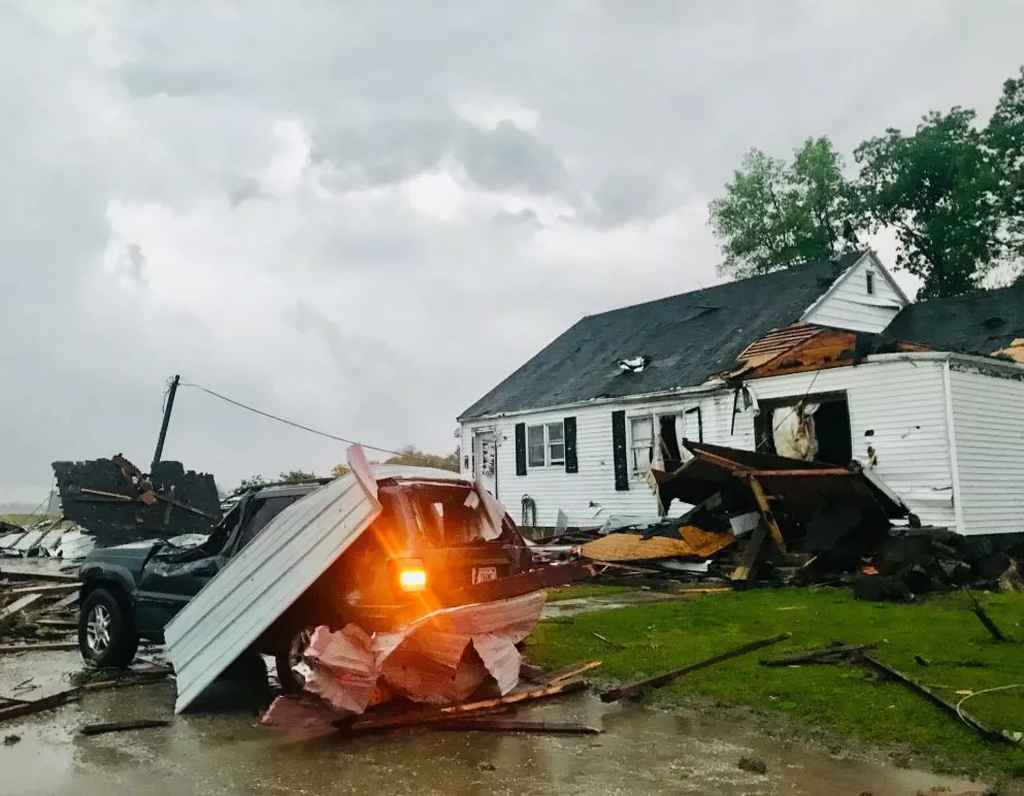
The National Weather Service confirmed that an EF-0 tornado touched down in Schaumburg and made its way into Roselle before dying down. The storm traveled at around 100 mph, slamming into surrounding buildings, homes, and neighborhoods.
Image via wrtv.com
In Bellwood, a multi-unit building had its rooftop completely destroyed by the debris. Residents were heard screaming as the roof started to cave in. Several residents had to take cover or flee the building to avoid injury. Another had to be taken to hospital due to flying debris injuring them. Residents in another part of town had a tree punch right down the center of their home. Another had their siding wiped clean from their home.
In Milwaukee, a ten-year-old boy lost his life due to the intense storm and heavy rainfall in the area. Two adults who tried to rescue the boy have been reported missing. The massive thunderstorm clusters that formed over the Great Lakes were believed to have been a derecho.
This tremendous storm left nearly 500,000 residents across Illinois, Indiana, Michigan, Ohio, and West Virginia without power.